These diagonals run at about 30 degrees, or more, vertically. The cane is woven into the triangle formed by steps 1, 2, & 3. Weave OVER step 1 (horizontal), step 2 (vertical), & step 3 (60 degree diagonal). Weave under everything else. It may be necessary to enlarge the triangle to weave into, by using an ice pick or wood peg. I also soaked the seat with a damp paper towel before starting each cane strand. This step takes patience.
After a while you get into a rhythm & can visualize the pattern a little easier.... going up into the triangle, over steps 1,2,3 & then down the triangle, & across to the next triangle. Think of this like a sewing technique. I found it easier to do 1 or 2 triangles at a time, before pulling the rest of the cane strand through. When I tried to do more the cane strand broke more often.
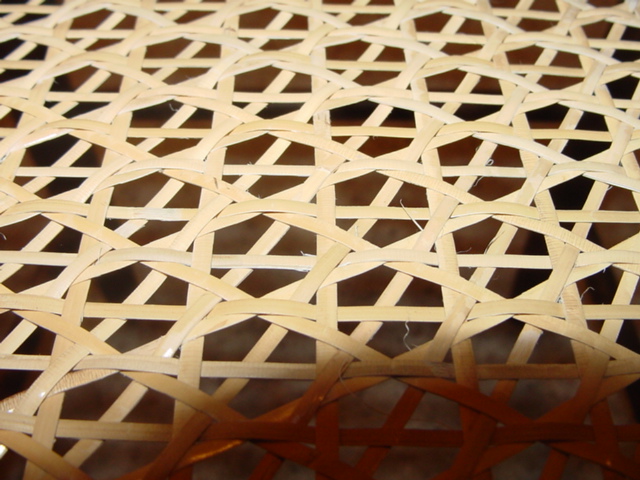
This close up picture gives a good look at the weaving & notice how the effect is starting to be 3-dimensional.
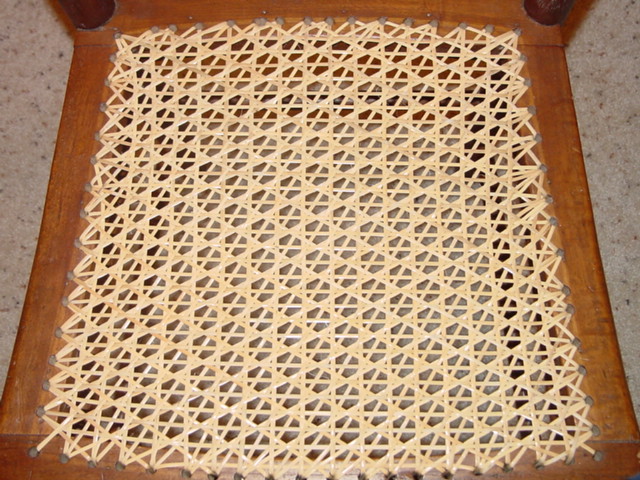
I was so happy to finish step 6, that I had to take a picture of the whole seat.
Step 7. The Second 30 Degree Diagonal.
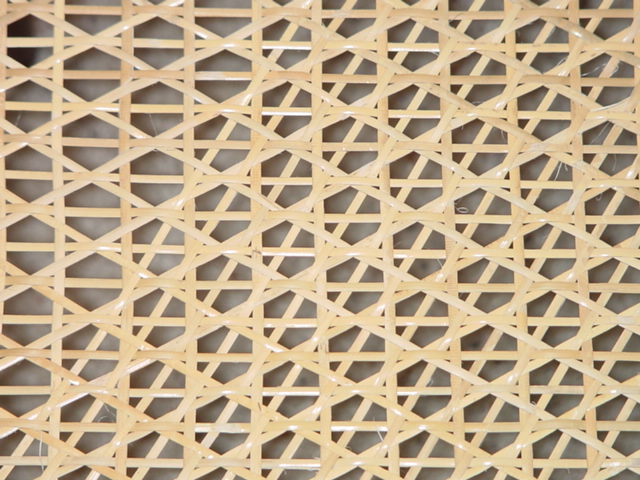
Now weave through the triangle created by step 1 (Horizontal), step 2
(vertical), step 4 (60 degree diagonal) & step 5 (30 degree diagonal). Weave
OVER step 1 (horizontal), step 2 (vertical), step 4 (60 degree diagonal) & step
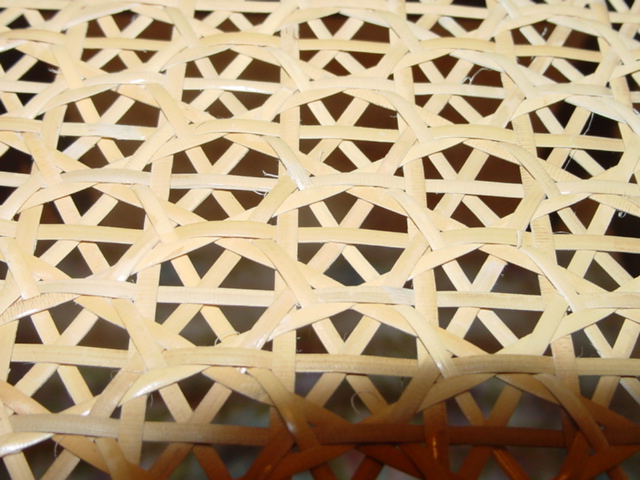
5 (30 degree diagonal). Weave under everything else. You will see an X forming
in the middle of each medallion. It may be necessary to enlarge the triangle to
weave into, by using an ice pick or wood peg. I also soaked the seat with a damp
paper towel before starting each cane strand. This step takes a lot of
patience. I found that I could only weave through 1 triangle at a time, or
the cane strands would break more often. So this really is like a sewing step.
I did celebrate with my favorite refreshment after completing this step... even though I still had the binder step to finish.