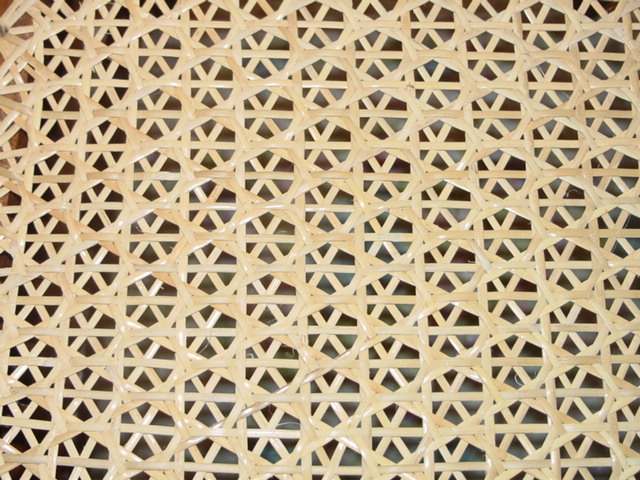
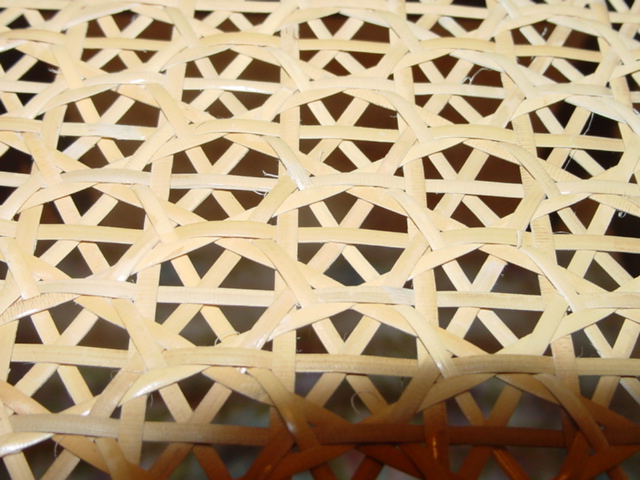
This chair caning pattern is very beautiful, but also very difficult. In my search for more advanced chair caning patterns I came across the Spider Web patterns. I read of two Spider Web patterns, differentiated by the chair hole drilling pattern, ie. how close are the holes. My chair fit the Spider Web A pattern.
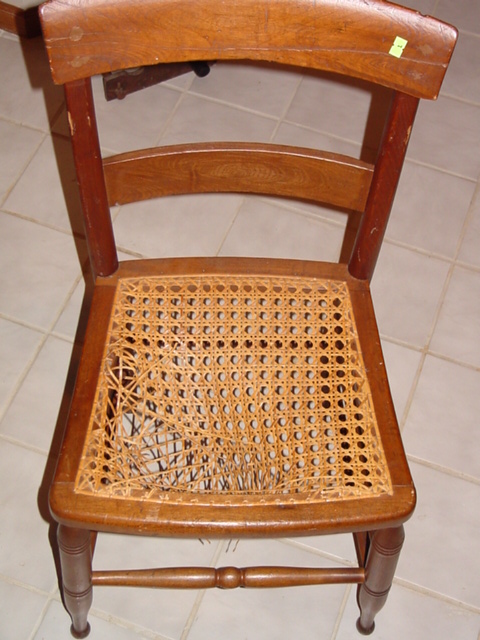
My daughter purchased this chair at auction for $4 & gave it to me "to keep
my hands busy". I guess she thinks I'll get in trouble if I'm not caning. :-)
The chair needed a lot of work to the cane seat, but was structurally sound &
the finish was ok. The top back rail had been previously repaired, & is still
obvious. So I thought that this would be a good "Experimental" chair. Something
to try out a new pattern & new techniques on. If things don't work out, it won't
cost much to throw in the burning pile. The old cane in the chair was Medium
size.
The Spider Web A pattern seems to provide an opportunity to utilize left over cane. This pattern uses two sized cane, Medium & Fine-Fine. I had left over Medium cane, but not Fine-Fine and the local hobby shop did not have Fine-Fine in stock. Since I considered this my experimental chair, I chose to use Fine sized cane. This may have been some of my difficulty I would later find in steps 6 & 7.
Step 1. The first Horizontal. After
removing the old cane seat & cleaning the chair with warm water & a little
TSP, I was ready to begin. Use the
Smaller Cane to run Horizontally in every hole, starting in the front & working to
the back. Do not worry about keeping this too tight. Tie up the ends after step
2.
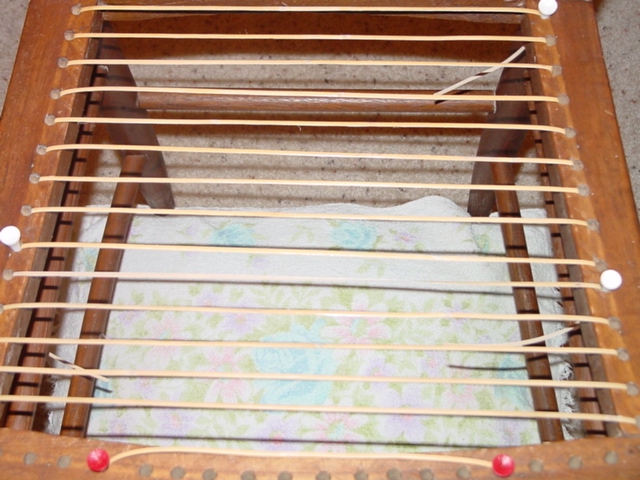
Step 2. The first Vertical. This step uses the larger cane, I used Medium. As with "7 Step Caning", start with finding the center holes & run the cane strands vertically towards the side. Then repeat the vertical runs going towards the other side. That's the correct way to do it. Again, I wanted to experiment with this chair & I always wondered if I really needed to start in the center & work out. This always seemed to me to waste the end of a cane strand. So on this chair I started the verticals off-center to where I figured I would use one whole cane strand. In the long run, there is really little difference & starting in the center is probably better. I still had to use more than one cane strand to complete this step & there was waste.
Notice also in this picture, that since the seat is wider in front than in back, that it required some short rows on the sides & also on the front rail. This indicates the need for a "fish head" if we were doing the "7 Step Caning". With the Spider Web A pattern it means that there will be extra cane run through these holes & some confusion (for me) in the web.
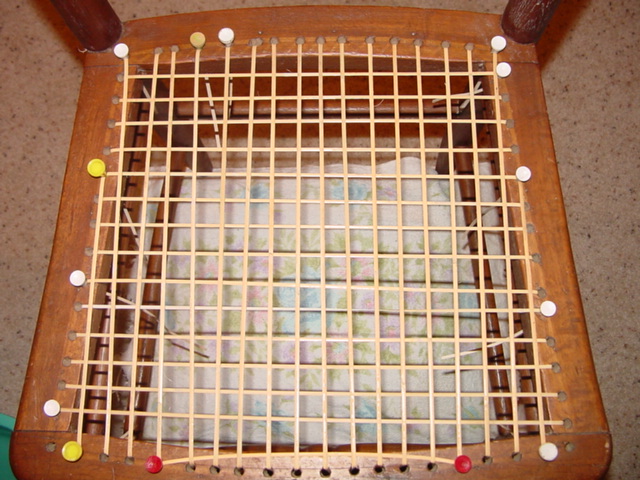
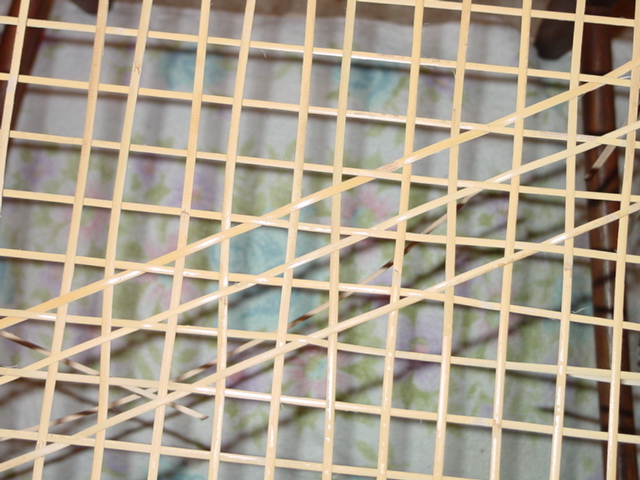
Steps 3 & 4. The First Diagonals. 60 degree. Now the challenge starts.
Step 5. The Next Horizontals. Use the Smaller cane on this step & the next 2 steps. This step runs OVER the X created by steps 3 & 4, UNDER the verticals of step 2. Use whatever hole is convenient on the rails, but always do the same on both sides. I chose to always use the hole towards the back. This horizontal strand runs between the previous horizontal row.
Step 6 & 7. The Second Diagonals. 30 degree. Now the challenge hit fully
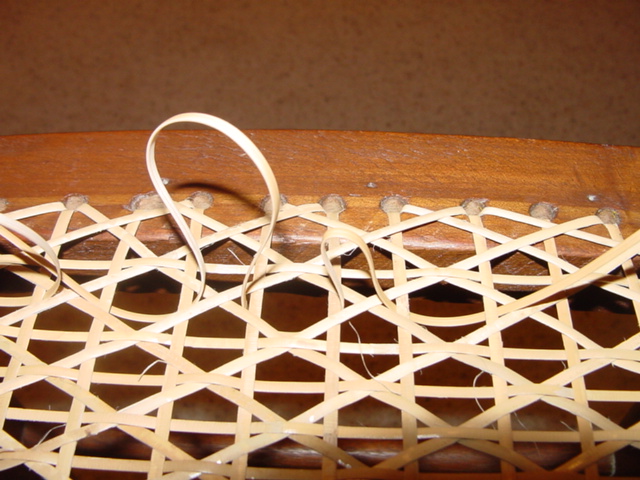
Step 8. The Binder. Again I decided to experiment with this chair, so I tried a new way (new for me) for adding the binder. This is called "Couching Corners".
Conclusion: As stated many times here previously; this chair was an experiment. I tried new techniques & a new pattern. I found Spider Web A pattern to be beautiful, but very difficult. I probably made matters worse for myself by not using the correct cane (should have used Fine-Fine instead of Fine). Also, I felt lost at times working near the side rails. This appeared to happen where the verticals had moved too close together during steps 3 & 4, & also on the side rail where a fish head would be. Perhaps caners with more experience with Spider Web pattern can add their advice.
Also, I do like the Corner Couching. I will use this more in the future on square cornered chairs. I think it gives the chair a neater finished corner.
Another Successful Caning Project. I hope you enjoyed reading this
caning adventure & learned about the Spider Web A pattern. Give it a try,
IF you are daring enough. :-)

Wayne Sharp completed all work on this webpage & linked web pages & produced all pictures. Copyright 2004. All rights reserved & may not be used for profit without the expressed written permission of Wayne Sharp.