Restoring Rockers. Caning: Sewing Rocker.
This is project 4 of the Restoring Rockers 2004-2005 series. This sewing rocker was purchased at an auction by my daughter for $14, the summer of 2004. My daughter loves going to auctions & finding "projects" to keep me busy. This rocker closely resembles a bedroom set that my other daughter owns, so I am restoring & caning it for her. She has asked me to cane the Spider Web pattern into this rocker, seat & back. We will see if I can accomplish such a substantial task.
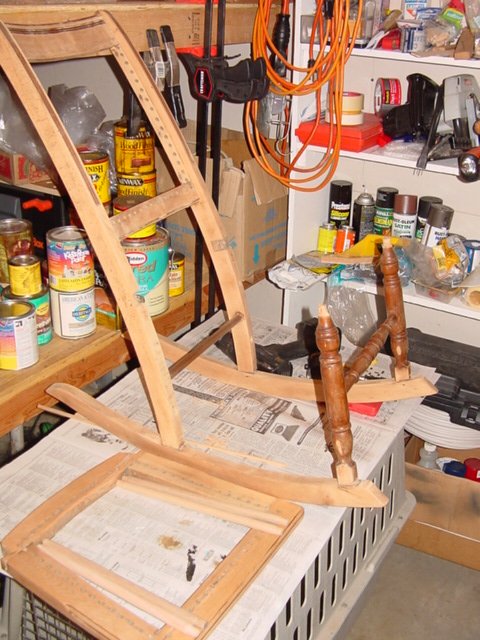
When I got the rocker home, I found that every joint was loose or broken. The seat was held together with metal angle brackets. Four of six stretchers were broken. The rocker totally fell apart as I was stripping it. I had two choices; burn it or rebuild it. On several occasions I threatened to throw the rocker into the burning pile. I am now happy to report that it (& I) survived this ordeal.
I started to strip the rocker and it literally fell apart on me.
Notice the stretchers that I created by whittling dowels to fit. I
still have to strip the front legs.
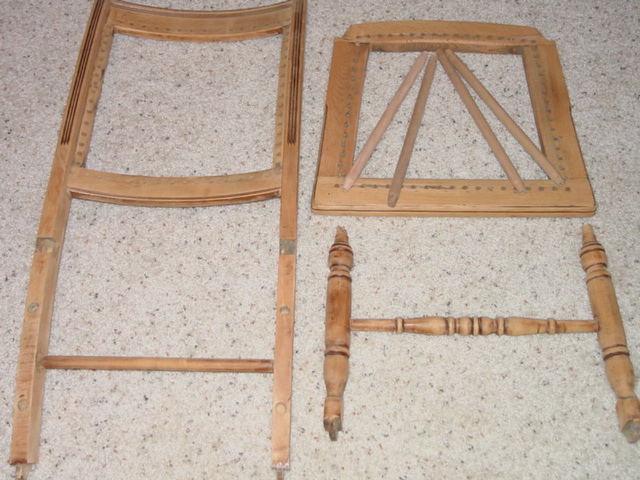
Here I have all the pieces laid out ready to dry fit. I had to re-drill & add
dowels to re-build the seat & also to re-attach the seat to the sides.
This is the glue up. I could have used more clamps. It glued up slightly
crocked, but this will just add character (because I'm not going to redo it at
this point).

The rocker after stain & finish.

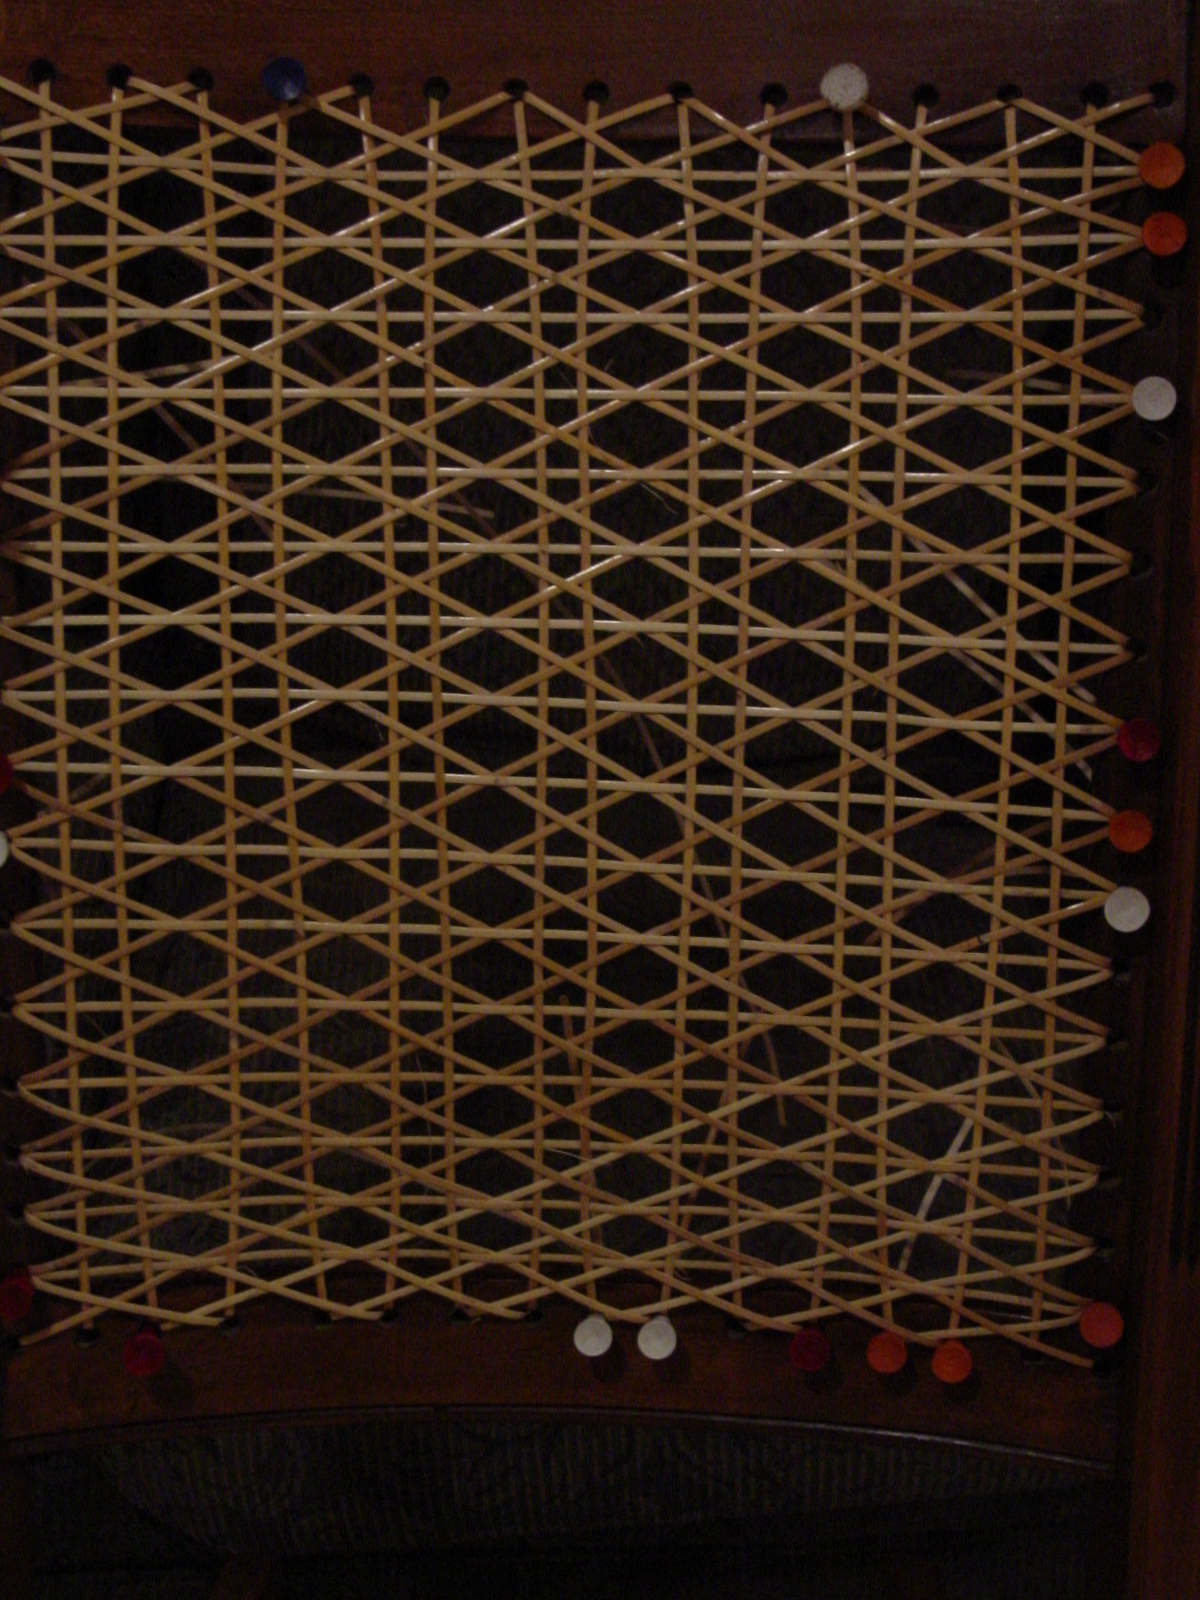
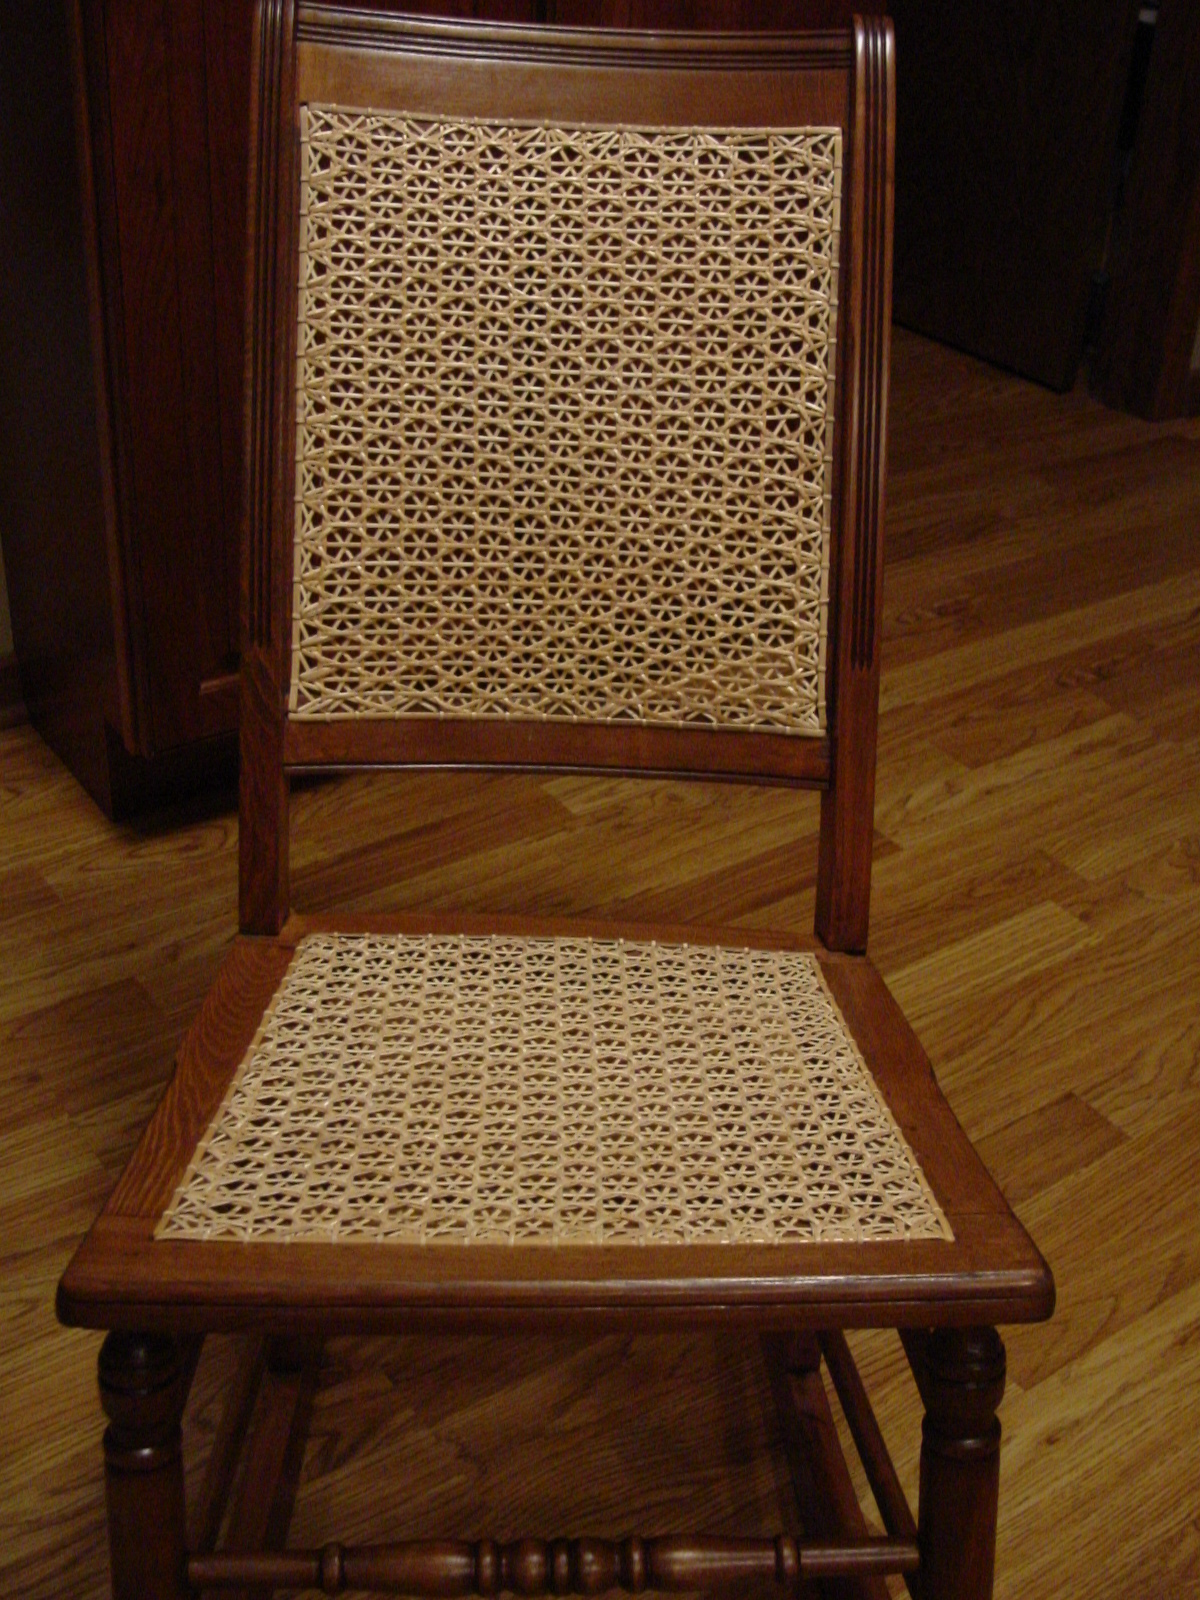
Spider Web pattern completed in the seat. Notice the depth of the
pattern, created by the layering of the cane.

Starting the Back. Spider Web Step 3, 30 Degree run. Run this cane from lower left towards upper right, OVER 2 strands of verticals & UNDER 1 strand of horizontal.
I found it much easier to maintain the vertical row separations when I left
the step 1 horizontal & step 2 vertical VERY loose. Otherwise the
verticals tend to slide in together. I tore out the seat once & started over,
because the cane kept sliding together. On the back I had much better
success keeping everything loose & separated. So, FORCE yourself to keep
everything VERY loose to this point. Rest assured the cane will tighten up with
the rest of the weaving in steps 6 & 7. Tie off the ends after step 5.

Step 4, Second 30 Degree run. Run this cane from lower right towards upper
left, OVER 2 strands of verticals & UNDER1 strand of horizontal. Again,
here's where the verticals want to pull together. Take time to keep them
separated vertically.
Step 5, run a second horizontal between each of the step 1 horizontals. Weave the cane OVER the X made by the 2-30degree runs & UNDER the step 2 verticals. From the holes in the side rails you will start this run by going down to meet the center of the X. Tie off the ends after this step is completed.
Step 6, 60 Degree Run. Run this cane from lower left to upper right, OVER the
intersection of Step 2 & 3 (first horizontal & first 30 degree). Go
UNDER
everything else. This close-up picture is a good illustration. Notice how
the crossings in the center are starting to form the web & the intersections are
starting to build up the edges I found this the hardest step for me to get
started. I needed total concentration & starting off the rails always was
difficult. I finally realized that the partial spider webs on the side rails is
what confused me. So I started the runs a couple intersections into the pattern,
worked back to the rail & then worked the cane, as normal, towards the other rail. This
cleared up the confusion for me & again kept me from chucking the chair into the
fire pile.


Step 7, Second 60 Degree Run. Run this cane from lower right to upper left,
OVER the intersection of step 2 vertical & step 4 30 degree). Go UNDER
everything else. Again, to begin, I started a cane about 3" into the
pattern, at an intersection of step 2 & 4, worked back to the rail; before
taking the rest of the cane & running as normal the other way.

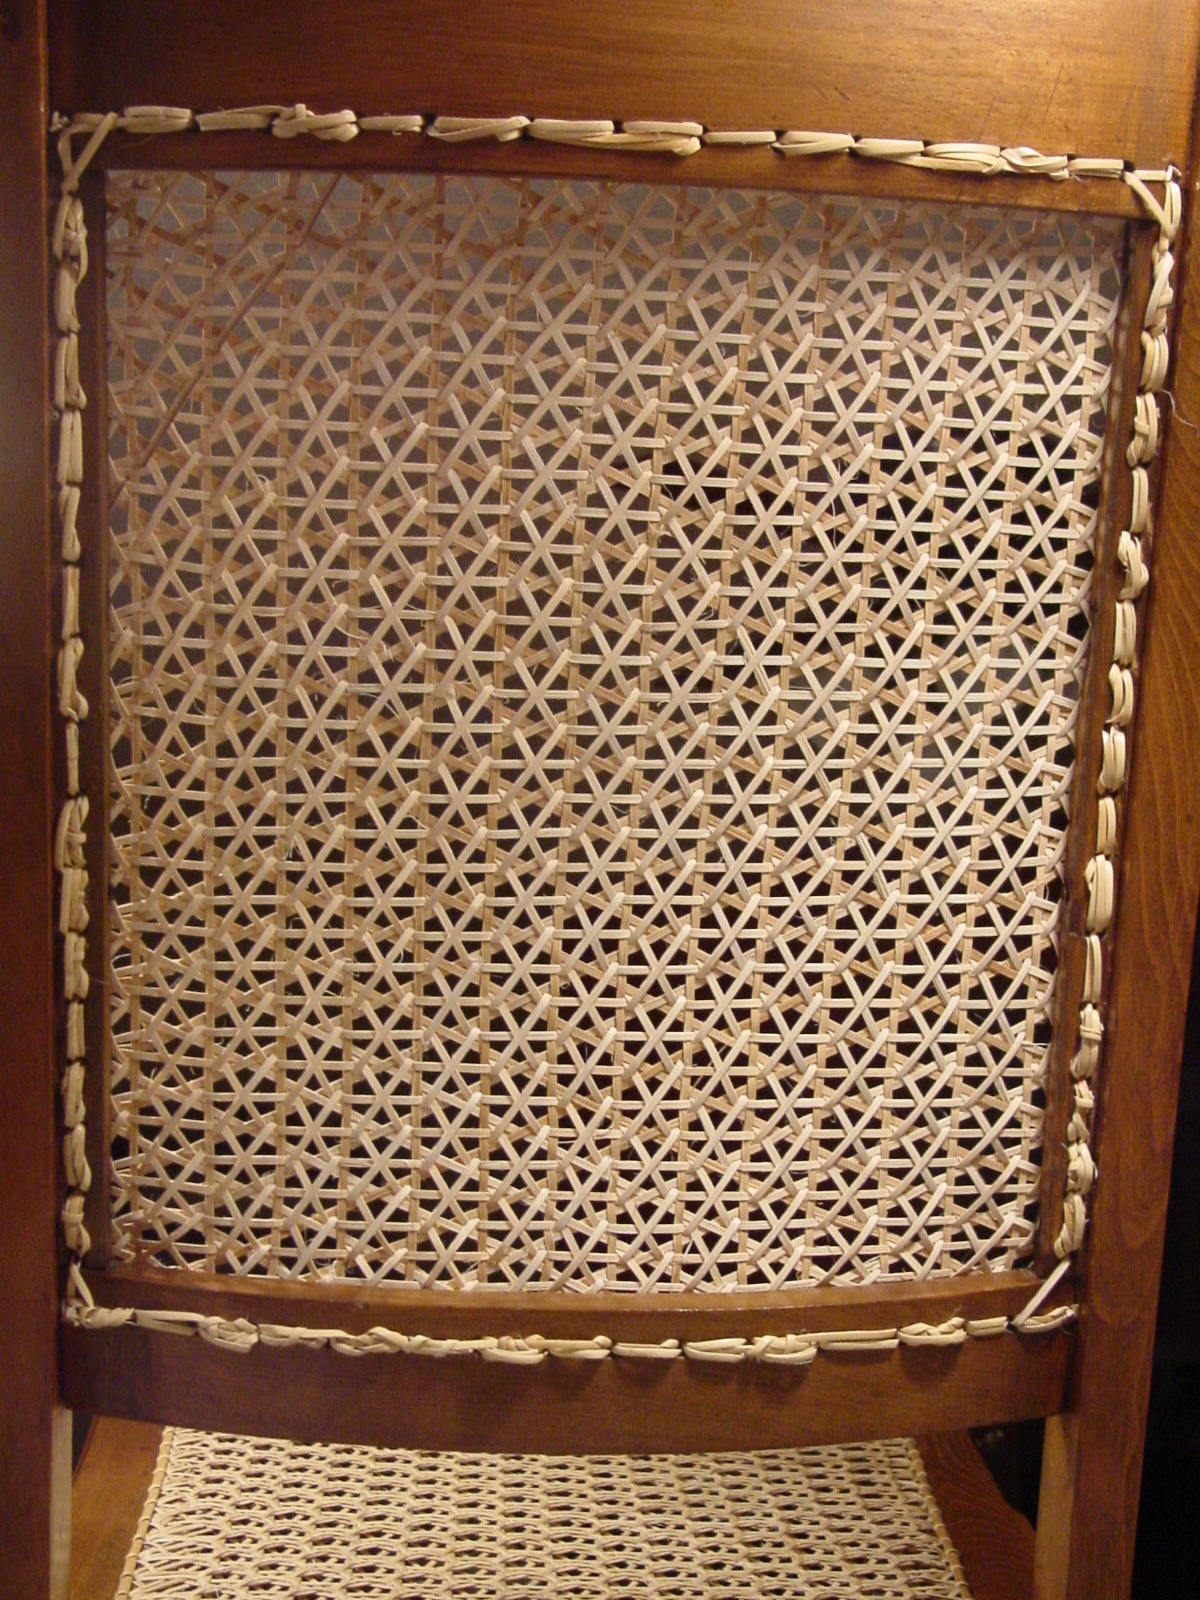
This is the back of the back. I tried very hard to keep the back neat &
to minimize knots. I tried a new technique that Helen suggested (Thanks
Helen). Let's call this "Half looping", I don't know if there is a correct name.
Instead of pegging the ends (as suggested by Martin), I ran the ends one time
under a nearby loop & then back into the next hole with the topside of the cane
going down the hole. I then cut off the extra from the front side, by placing my
utility blade on the cane & moving the cane back/forth to cut. I was VERY
careful not to cut any other cane. I wouldn't call this completely
successful. I just didn't trust some of these loops if they were loose, so ended up knotting them. So
there are about 6-8 knots visible. I also lost track of back side loops on
the finish border loops. I needed an extra set of eyes & hands to do a better
job. I will try this again. My fingers were sore after I finished
the border.
Here is the finished sewing rocker. I am very pleased with the end result &
very pleased to be completed. This rocker was a challenge right from the
beginning. I hope that my daughter will enjoy this heirloom & will pass it down
to the grand daughters.
New things tried on this Sewing rocker included: Spider Web A pattern,
couching the border corners, & tried to minimize the knots on the back (similar to
pegging, by half looping).
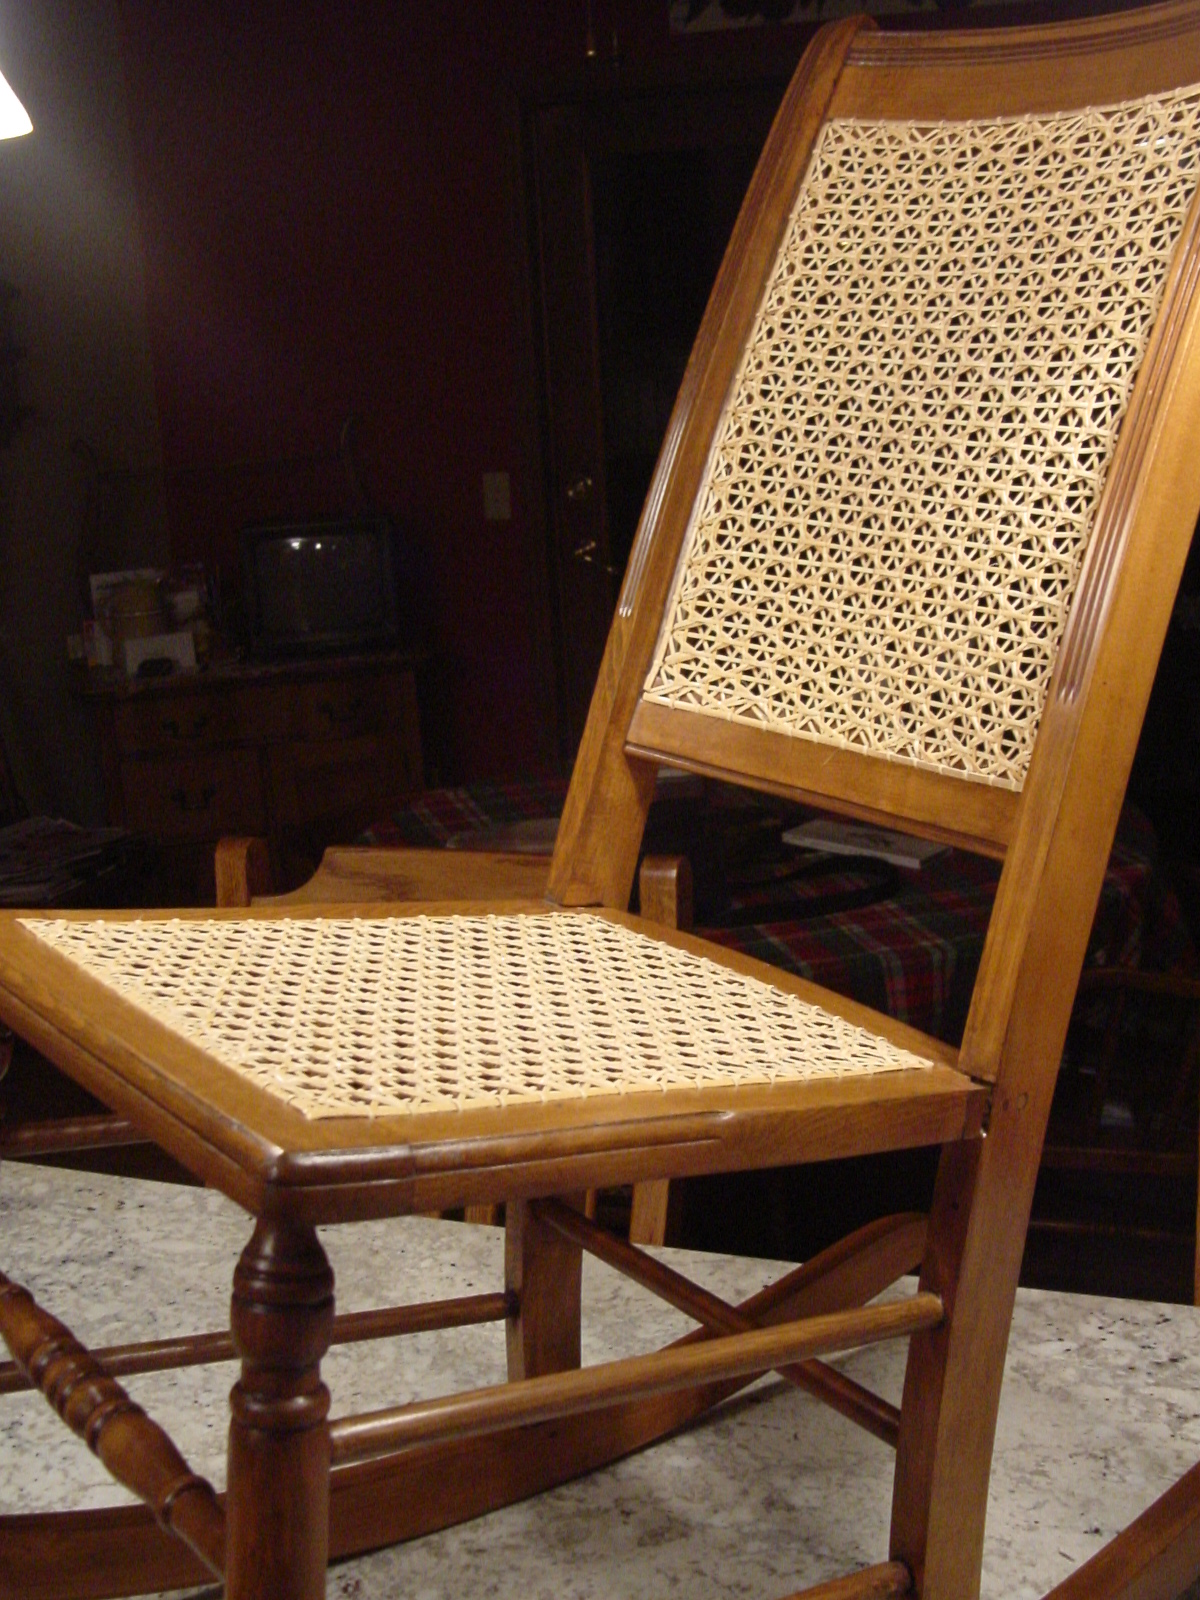
The finished rocker, YEAH! December 19, 2004.