Restoring Rockers. Caning: Child's Rocker.
This is project 1 of the Restoring Rockers 2004-2005 series. This child's rocker was purchased at a southeastern Minnesota city wide antique & flea market, the summer of 2004. Because my wife & I have three grandchildren (currently) we had been looking for hard to find child's rockers as projects to repair, refinish & then cane. This is the story about the restoration of this child's rocker.
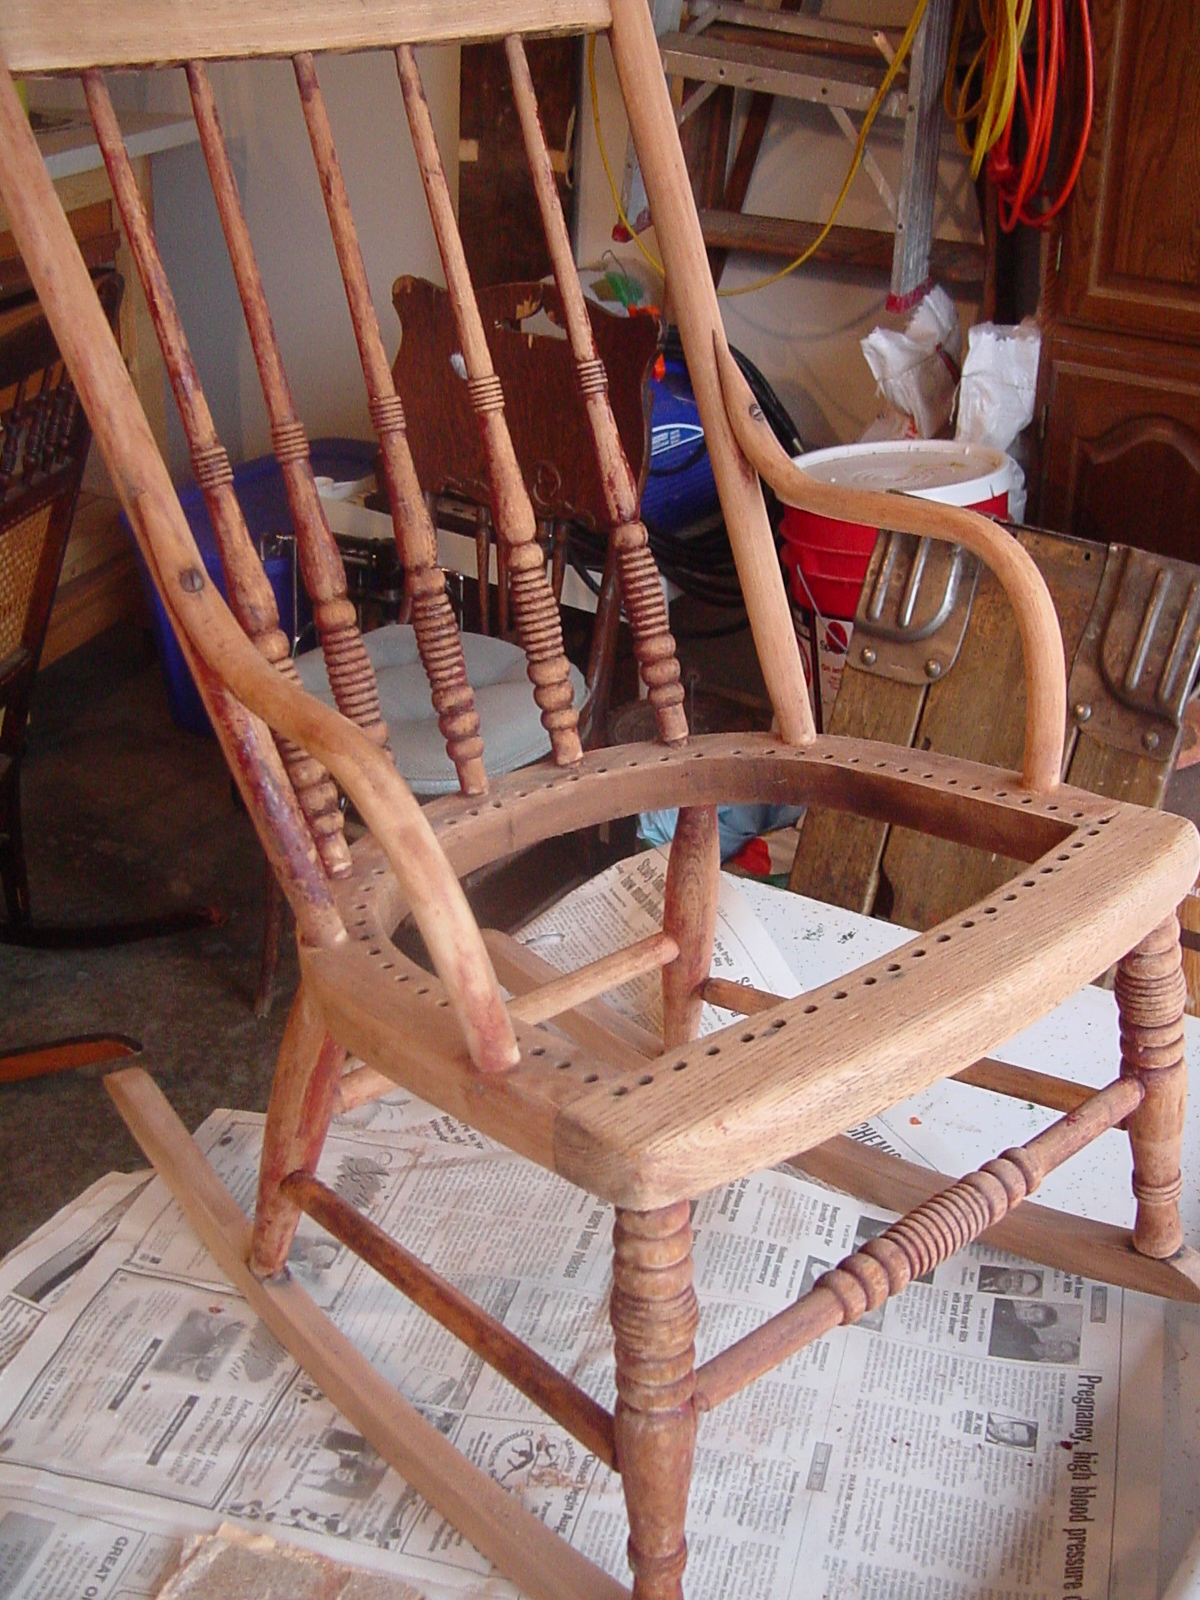
The rocker was painted deep read & green, for a rough vintage look. The seat
had a green painted plywood cover. We discovered the caning holes by turning the
rocker over & looking under the plywood cover. We paid $70 for it, which was way
more than we would normally pay. However the chair appeared in excellent
condition, ie, no joints broken or loose; no missing parts. In this picture you
can see some hints of red paint still visible. (Click on the pictures to
enlarge).
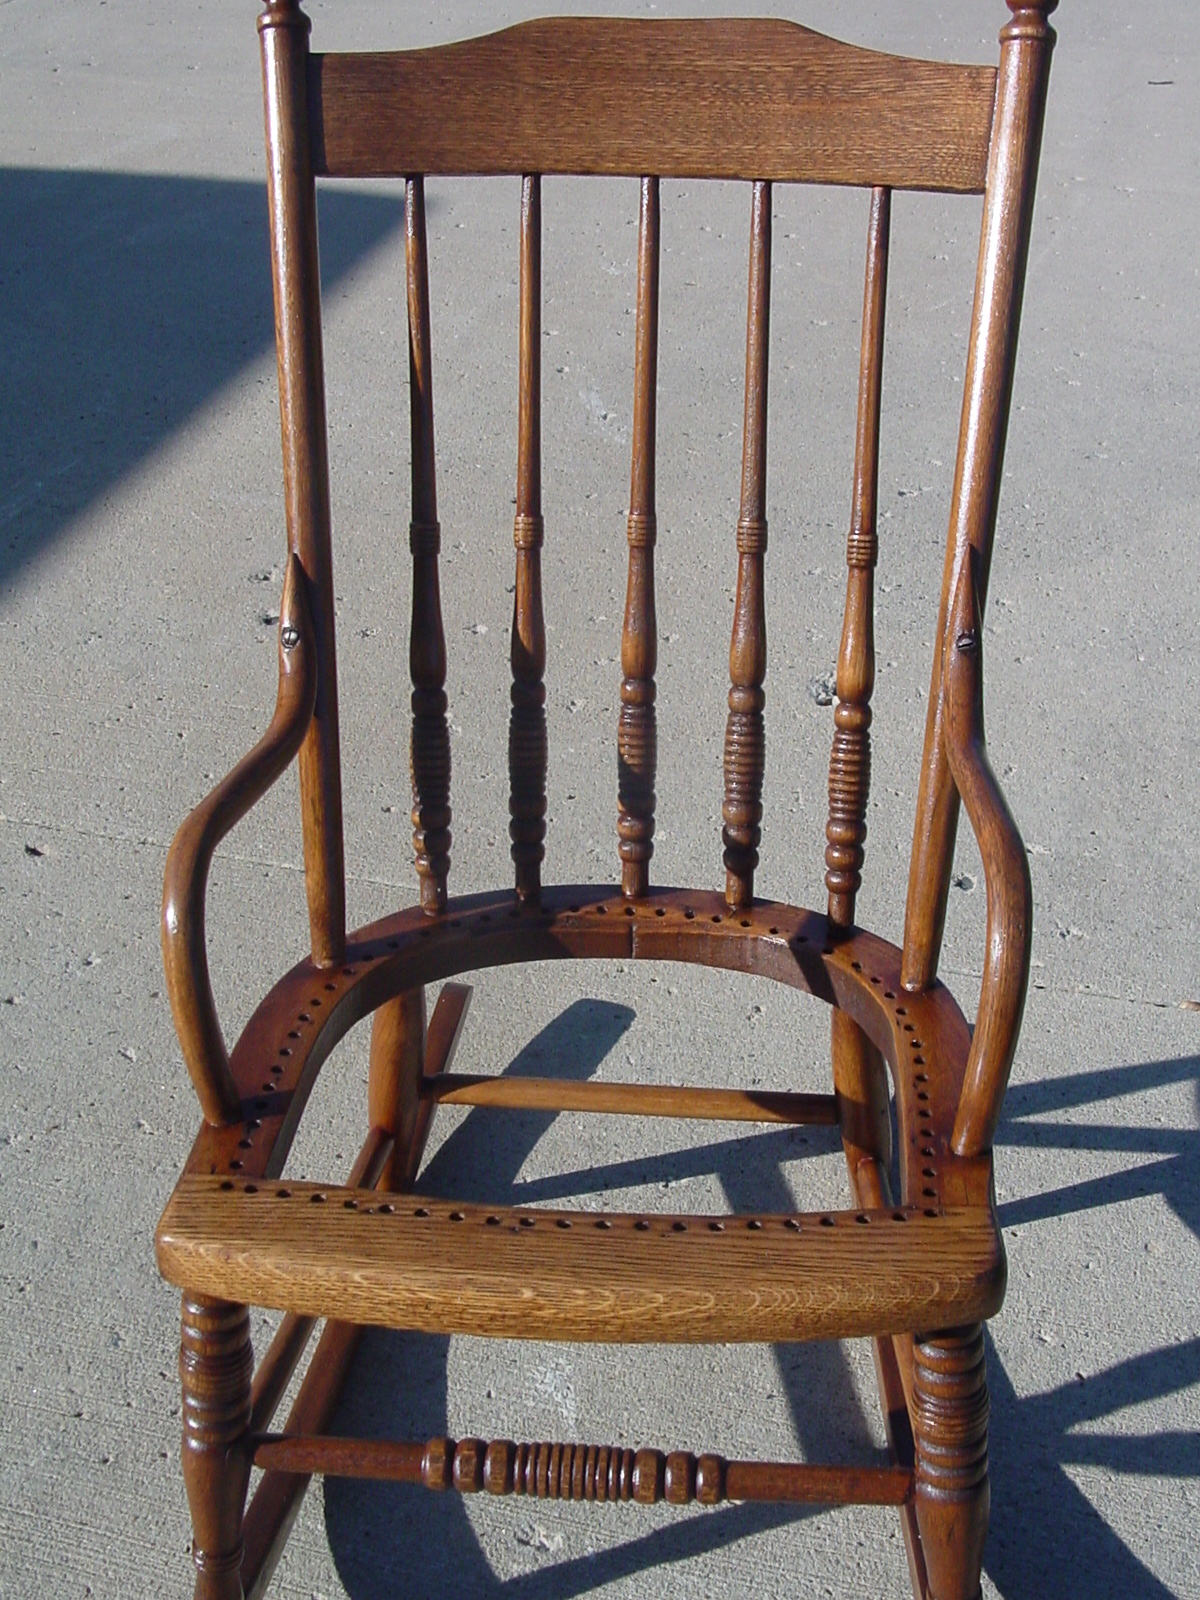
As you can see in this picture, the child's rocker really cleaned up nicely.
I put on 3 or 4 layers of stripper & let it soak in for a long time each time.
One layer of stripper I left over nite so that it could eat through the heavy
paint. I had to do a fair amount of sanding to get the final remnants of
paint off the spindles. I was very pleased that I had to do no repair. An
american heirloom antique color stain was used, which has some warm nutmeg & a
little walnut darkness. I put on three coats of hand rubbed polyurethane.
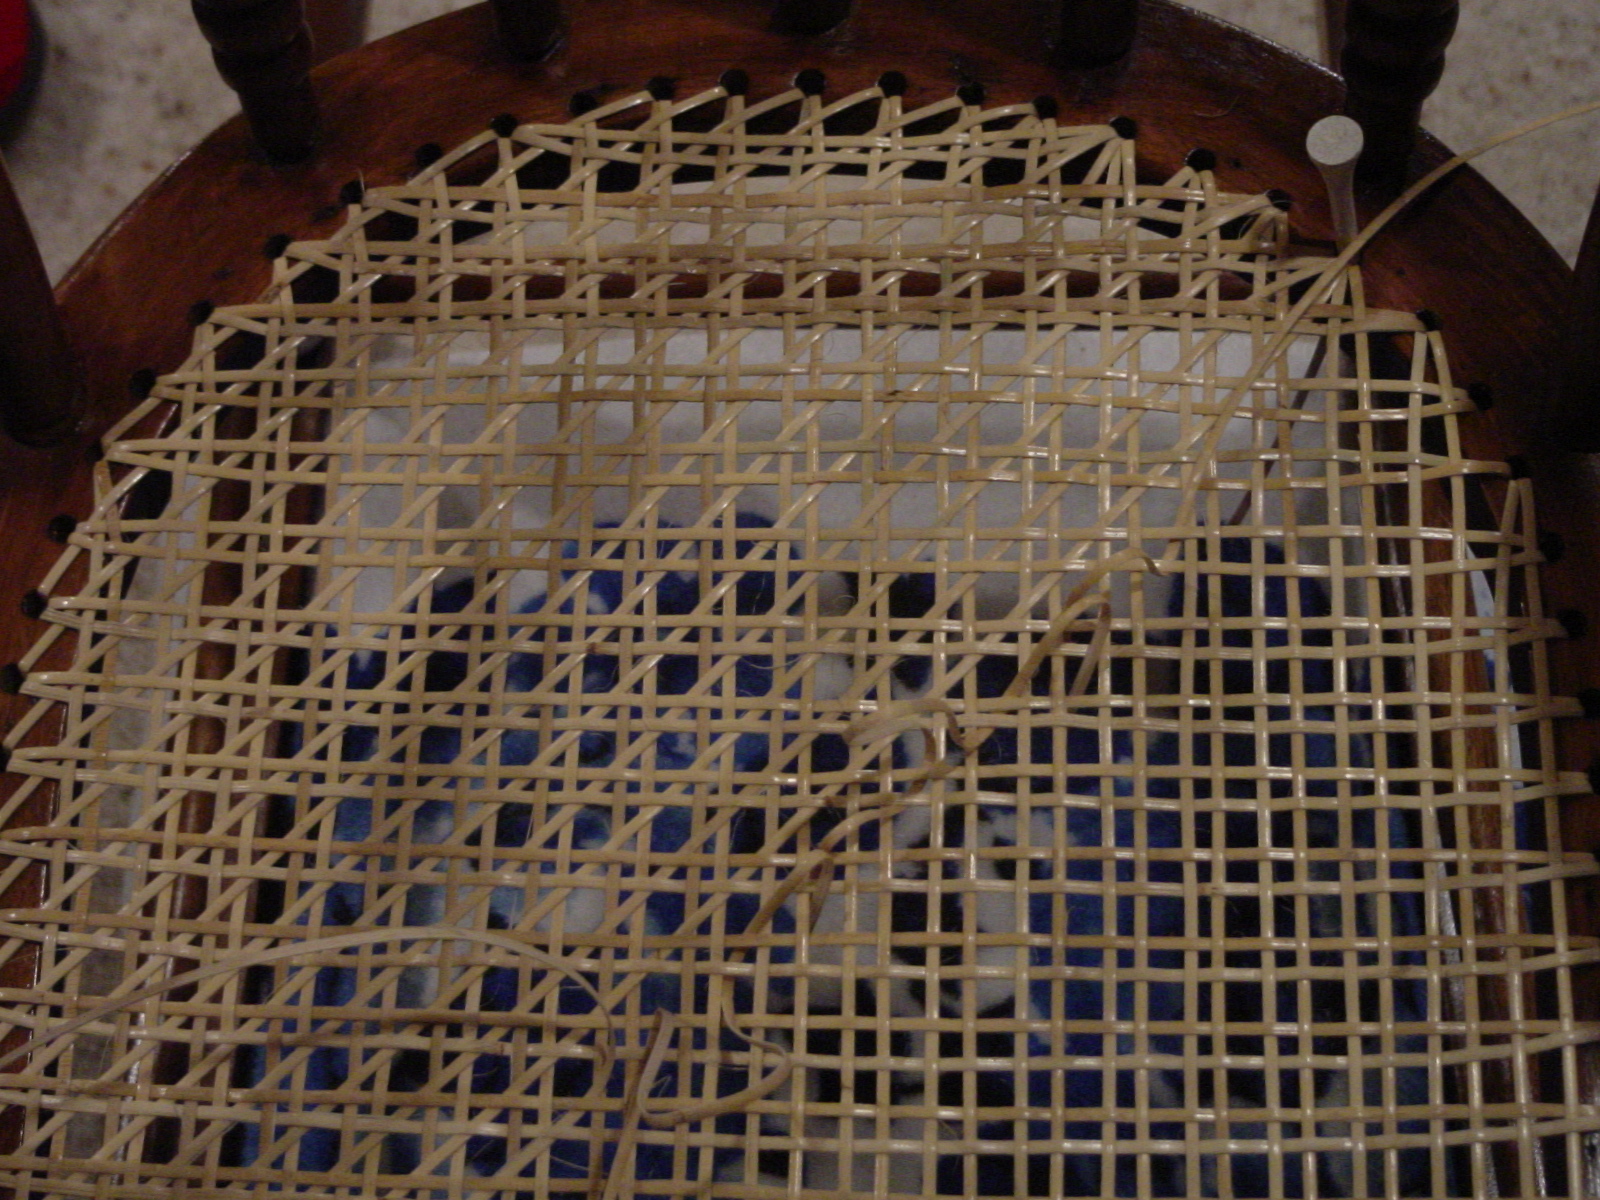
This is step 5, the first diagonal weave, of the regular 7 step caning
process. I am paying special attention to forming "X" & "fish-tales" in
this step. I had to force myself to make the "X" at first. Once I got them
started, they seemed to come naturally after that. Just in the corners & where
"fish-eyes"/"fish-tales" happened did I skip "X". The "X" did tighten up the pattern
on the rows nearest the rails & also added some more beauty. (A special
THANK YOU to Helen goes here. She shared her experience that taught me how to do
this).
The rounded back of this chair makes for several "fish-tales". As always, pay
attention to what you are doing on one rail & do the same on the other, for
symmetry to the eye.
Step 6 is the second diagonal weave. Here I am paying even more attention to
"X" on the rails. Notice them start to develop on the right side rail.
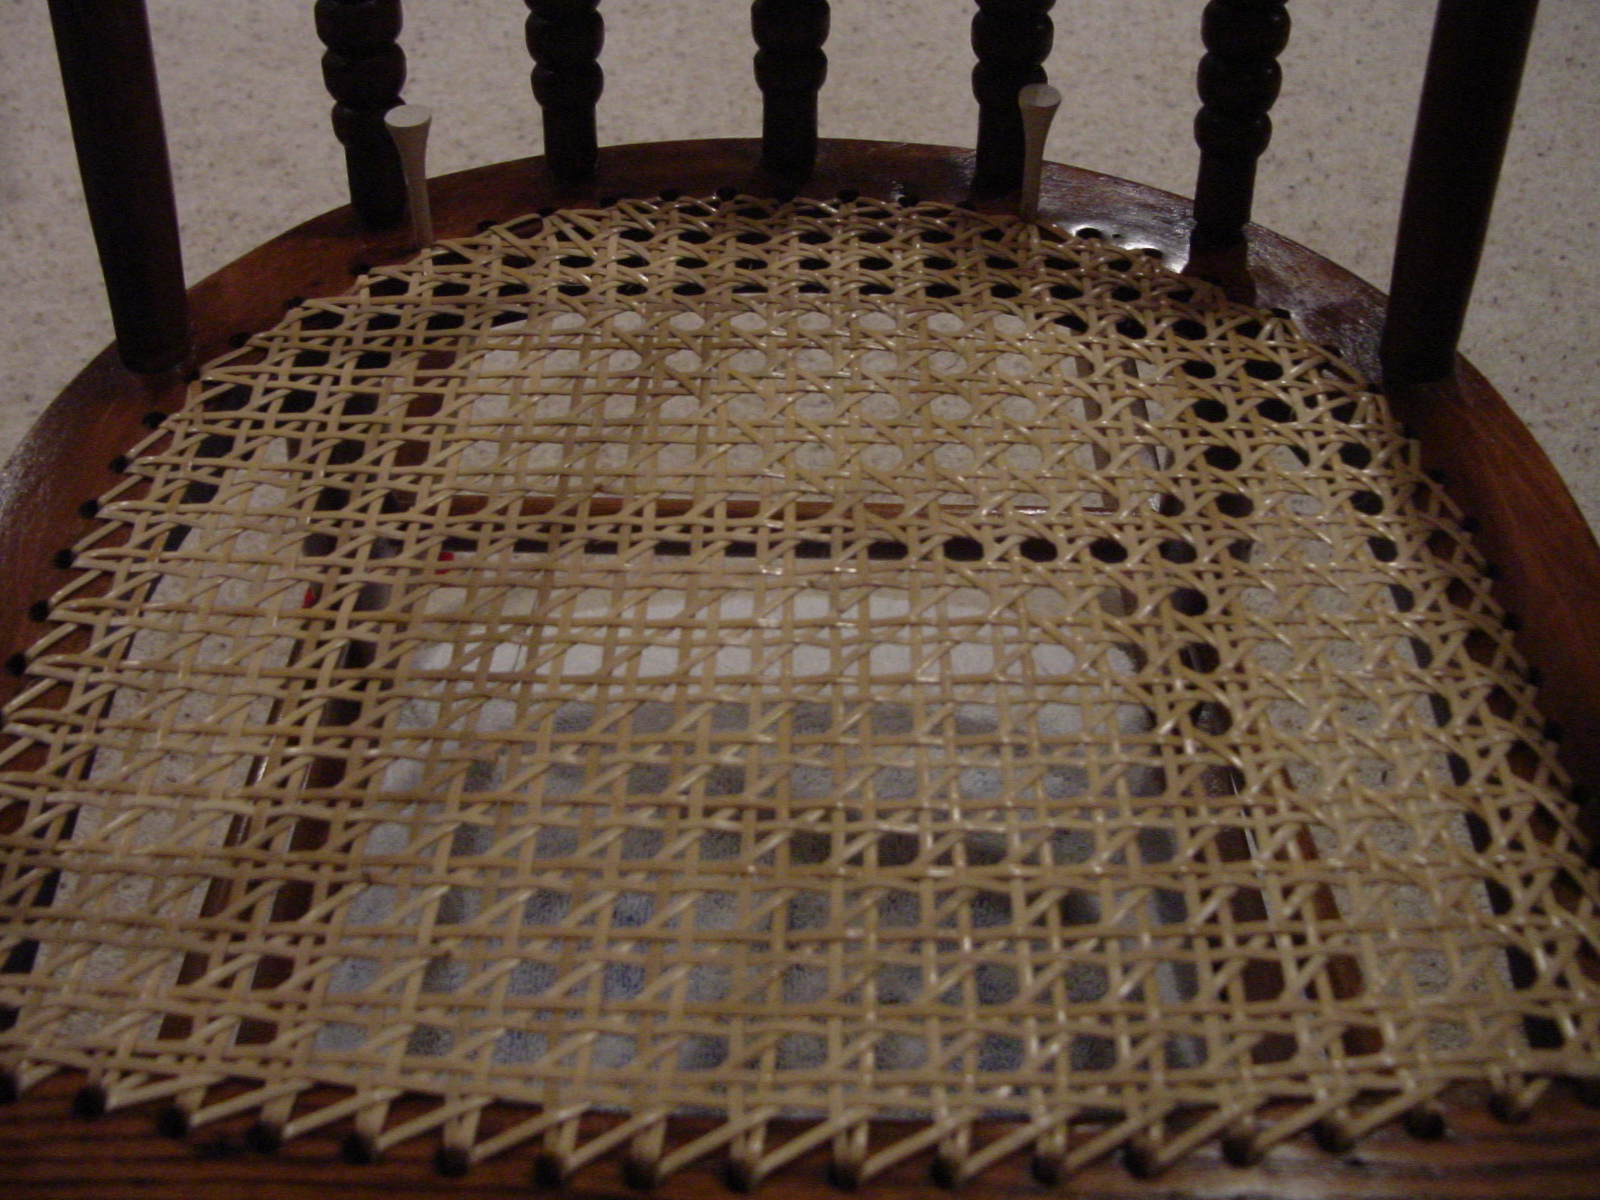
The Caning is completed. Notice the "X" on all rails, the
"fish-eyes" or "fish-tales"
on the curved back & front corners. Also, note that I "couched" the corners for
the step 7 binder. The Couching technique hides the peg & gives the corner
a more finished look. In the first corner the binder ends are inserted into the
hole, with the peg & then the front rail binder is folder over the peg to hide
it. As the step 7 looping approaches the last corner hole (I left the last
4 loop holes loose so I could work with the corner), I inserted the peg & the
rest of the binder over the peg & down the hole. I then used my needle nose
pliers to carefully force the binder & peg securely down the hole at the same
time. Finally I finished tightening up the last 4 holes of the step 7
loops. The final "couching" peg was a bit tricky, but I think it really
makes for a nice finished corner.

The finished Child's Rocker, Project 1 of the 4 Rocker series. New techniques
that I tried on this project included: "X" weave on the rails, "Couched" corner
binders & letting stripper sit over nite to eat all the way through many layers
of antiqued paint. I hope you agree that the end results were well worth
the effort. One of my grandchildren will get the joy of this project that
Grandpa did for them.

