.
Restoring Rockers. Caning: Child's Rocker.
Barrel Rocker; Doll Rocker
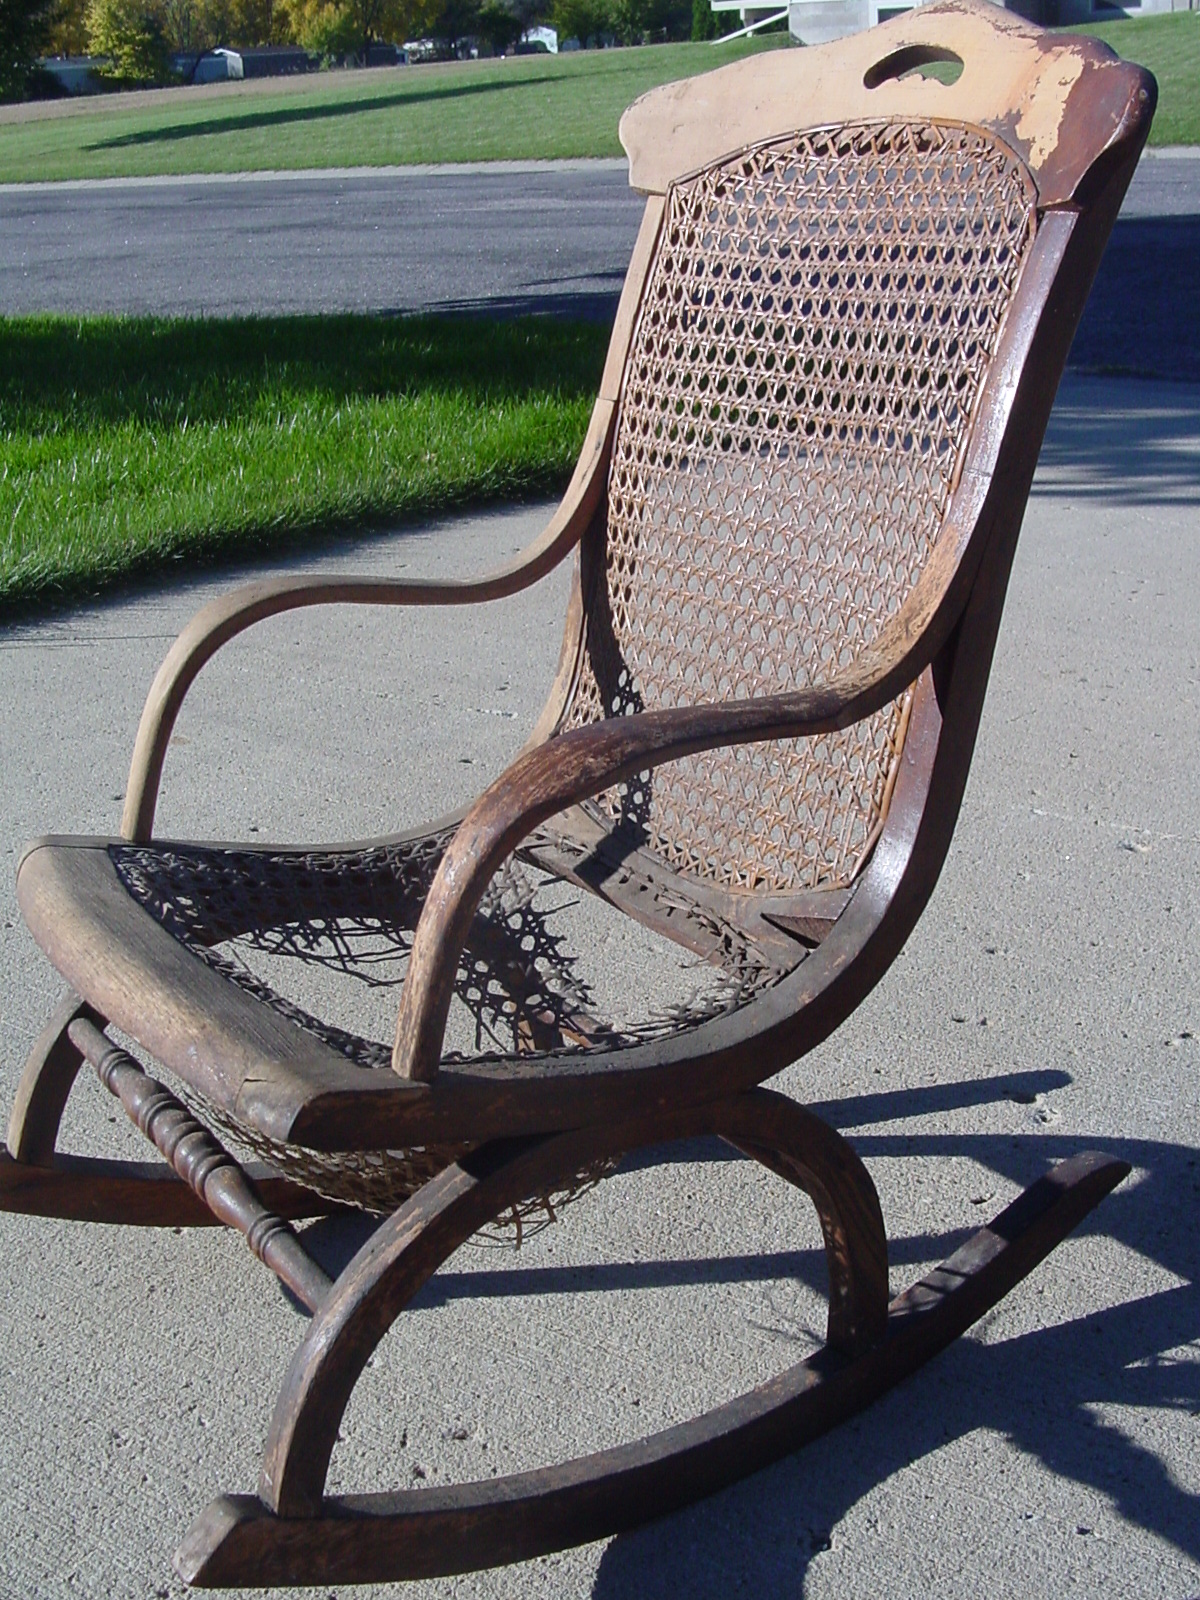
This is project 2 of the Restoring Rockers 2004-2005 series. This child's rocker was purchased by my daughter at auction for $35, the summer of 2004. My daughter really enjoys auctions & she often finds "projects" to keep me busy. I thank her for that. Because my wife & I have three grandchildren (currently) we are always looking for hard-to-find child's rockers as projects to repair, refinish & then cane. This is the story about the restoration of this child's rocker, which I will call a Barrel Rocker or a Doll Rocker. I will call it a barrel rocker because of the unique curves in the seat, the back & the legs. I also think of it as a Doll Rocker, because it looks somewhat whimsical as if for a large doll collection. If you know of the proper name for this form of rocker; please, please, please let me know; so that I can share it with our caning community & also get my information correct.
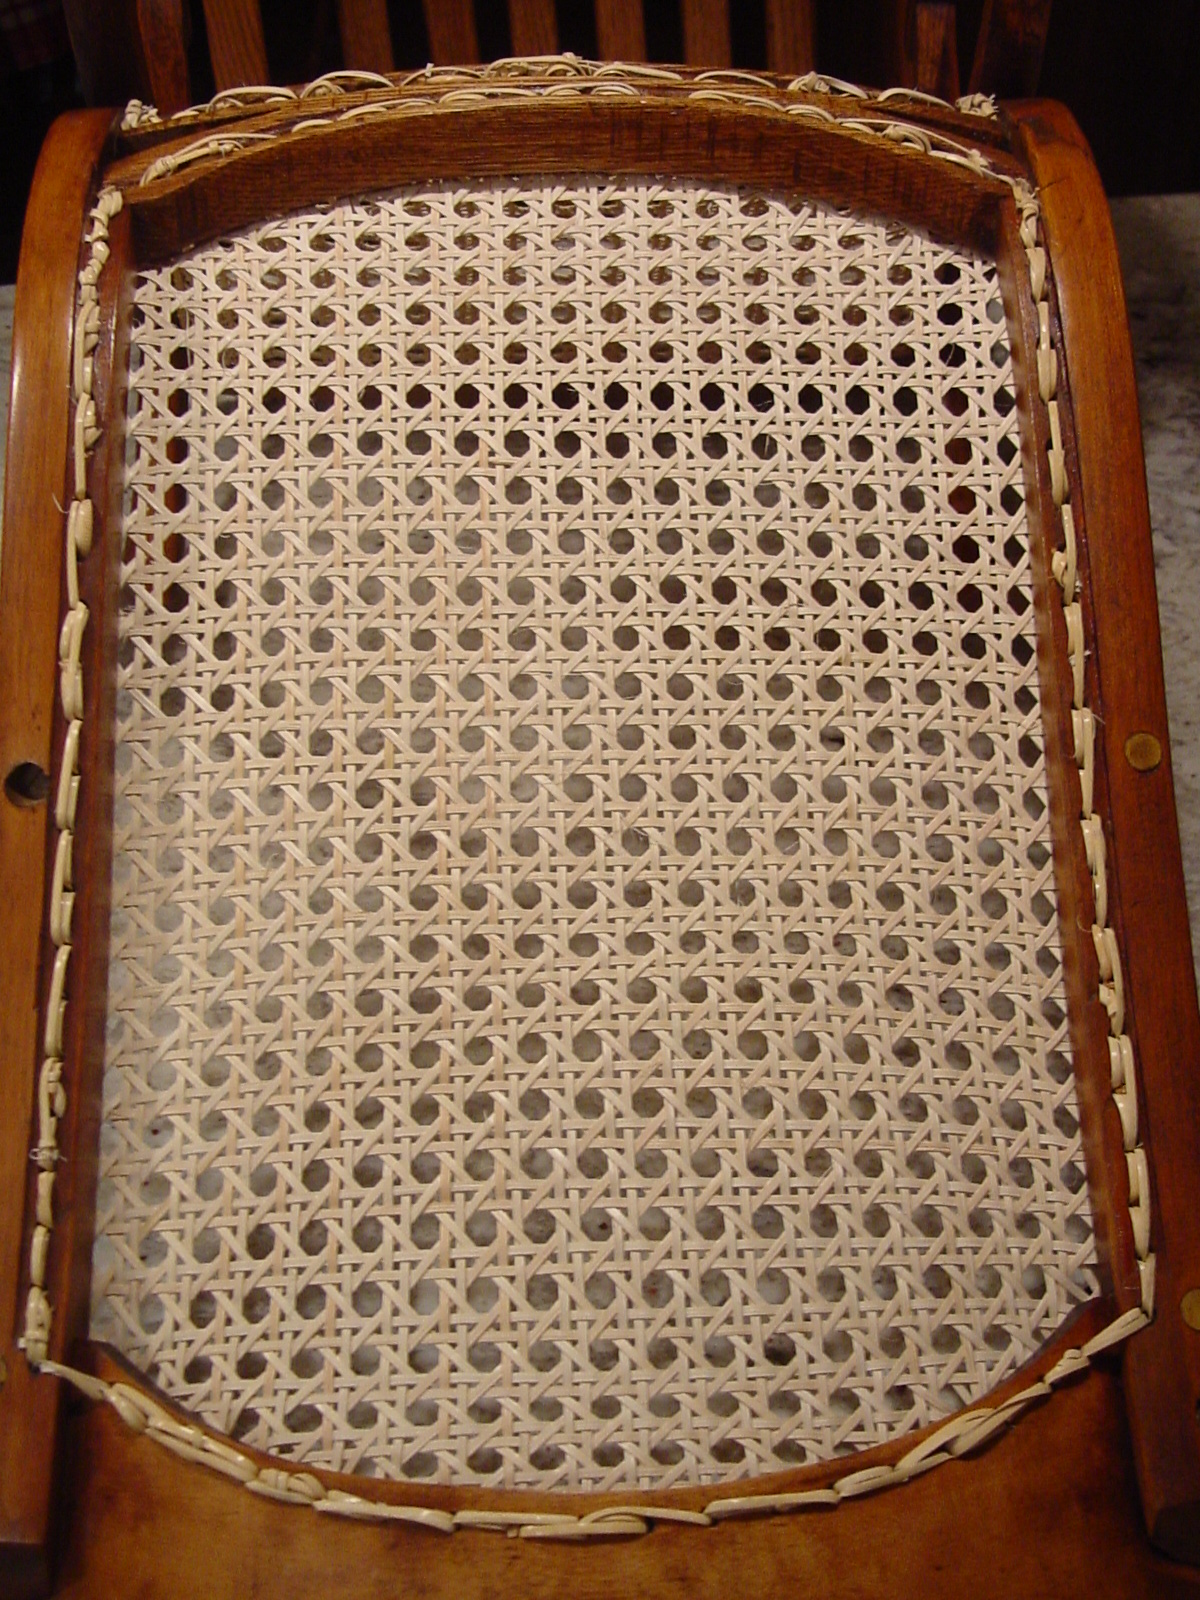
As you can see from the picture below, the rocker needed a lot of TLC (that's
Tender Lovin' Caning). There was not much finish left, so it was fairly
easy to strip. However, the old cane was very stubborn & did not want to leave. I
actually had to drill the final remnants of cane out of the
holes.
.
The common back rail, used by both seat & back, was split all the way across.
I carefully glued & screwed this back together. The screws are very small & on
the bottom side, so not very visible, while also being careful not to screw into
a caning holes. I was careful to pre-drill, so that I did
not further crack this old piece of oak rail. Some holes had to be
re-drilled to clean out excess glue. The rocker was stained & given 3 hand
rubbed coats of polyurethane/varnish. The wood turned out very nicely.
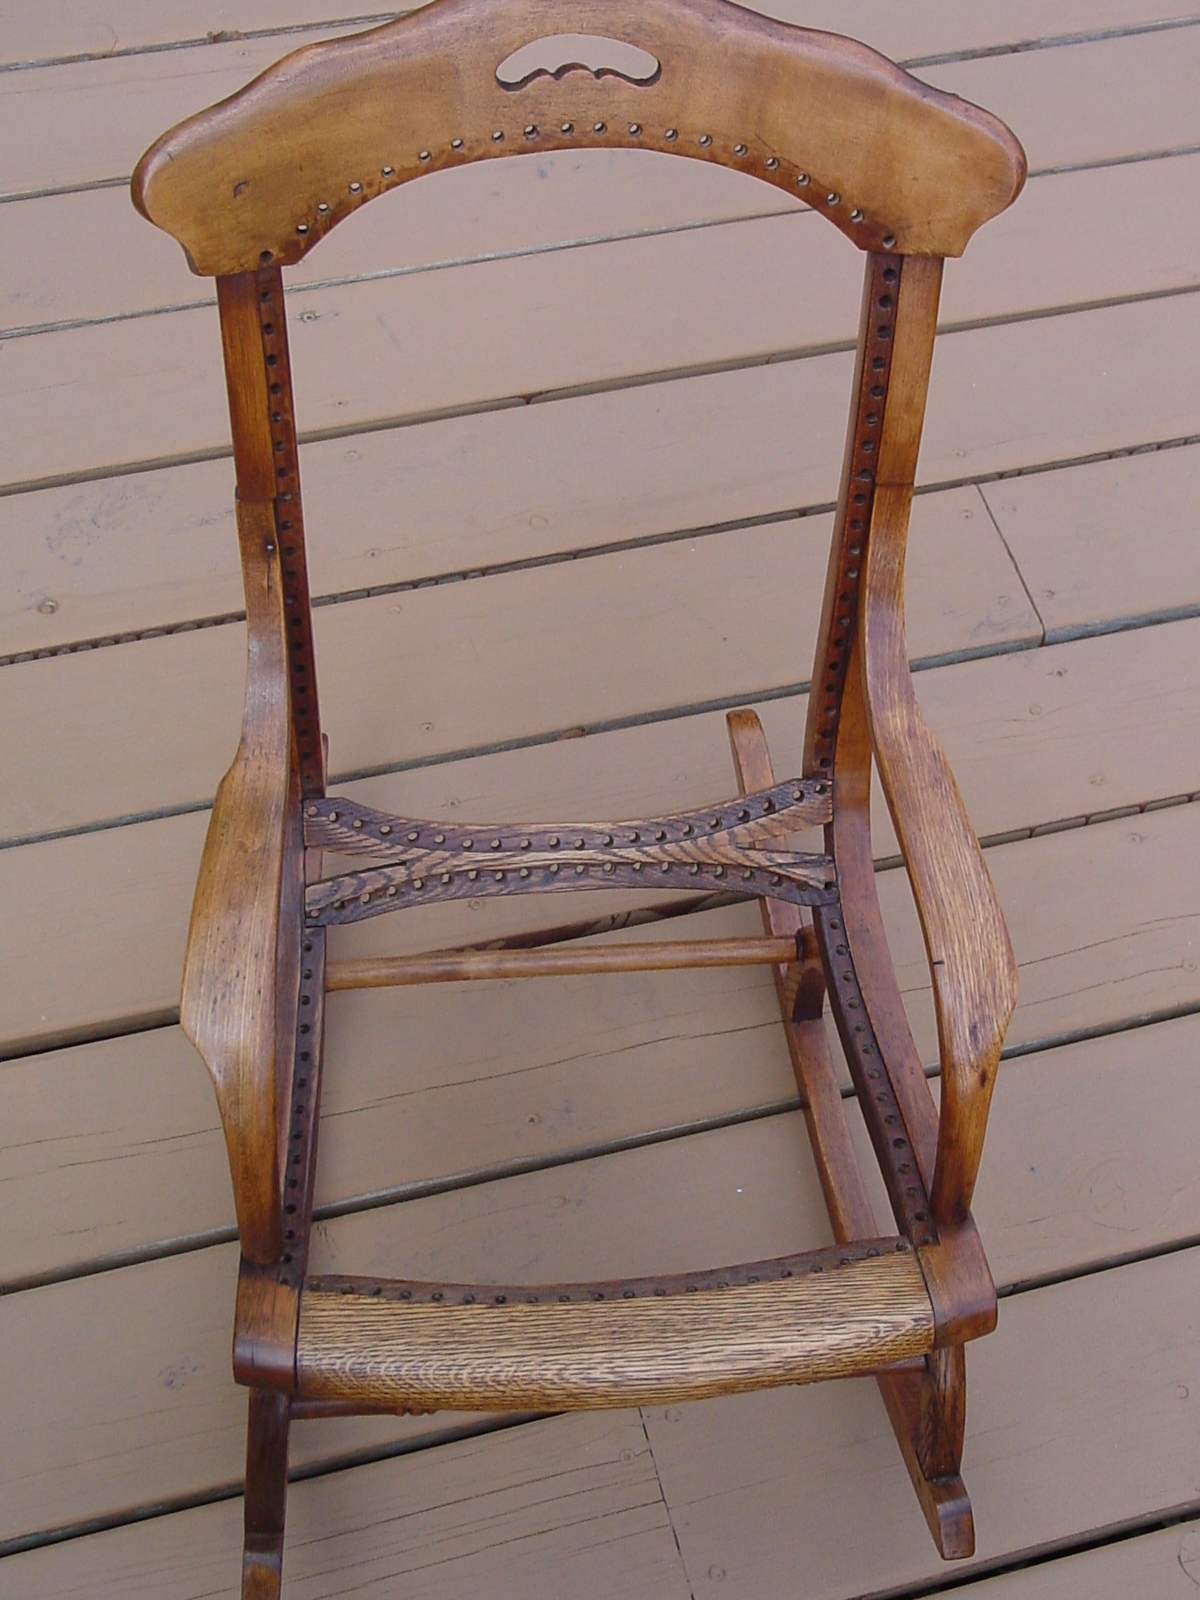
Notice the curvature to the back of the seat. This will pose some
caning problems similar to curved back rockers.
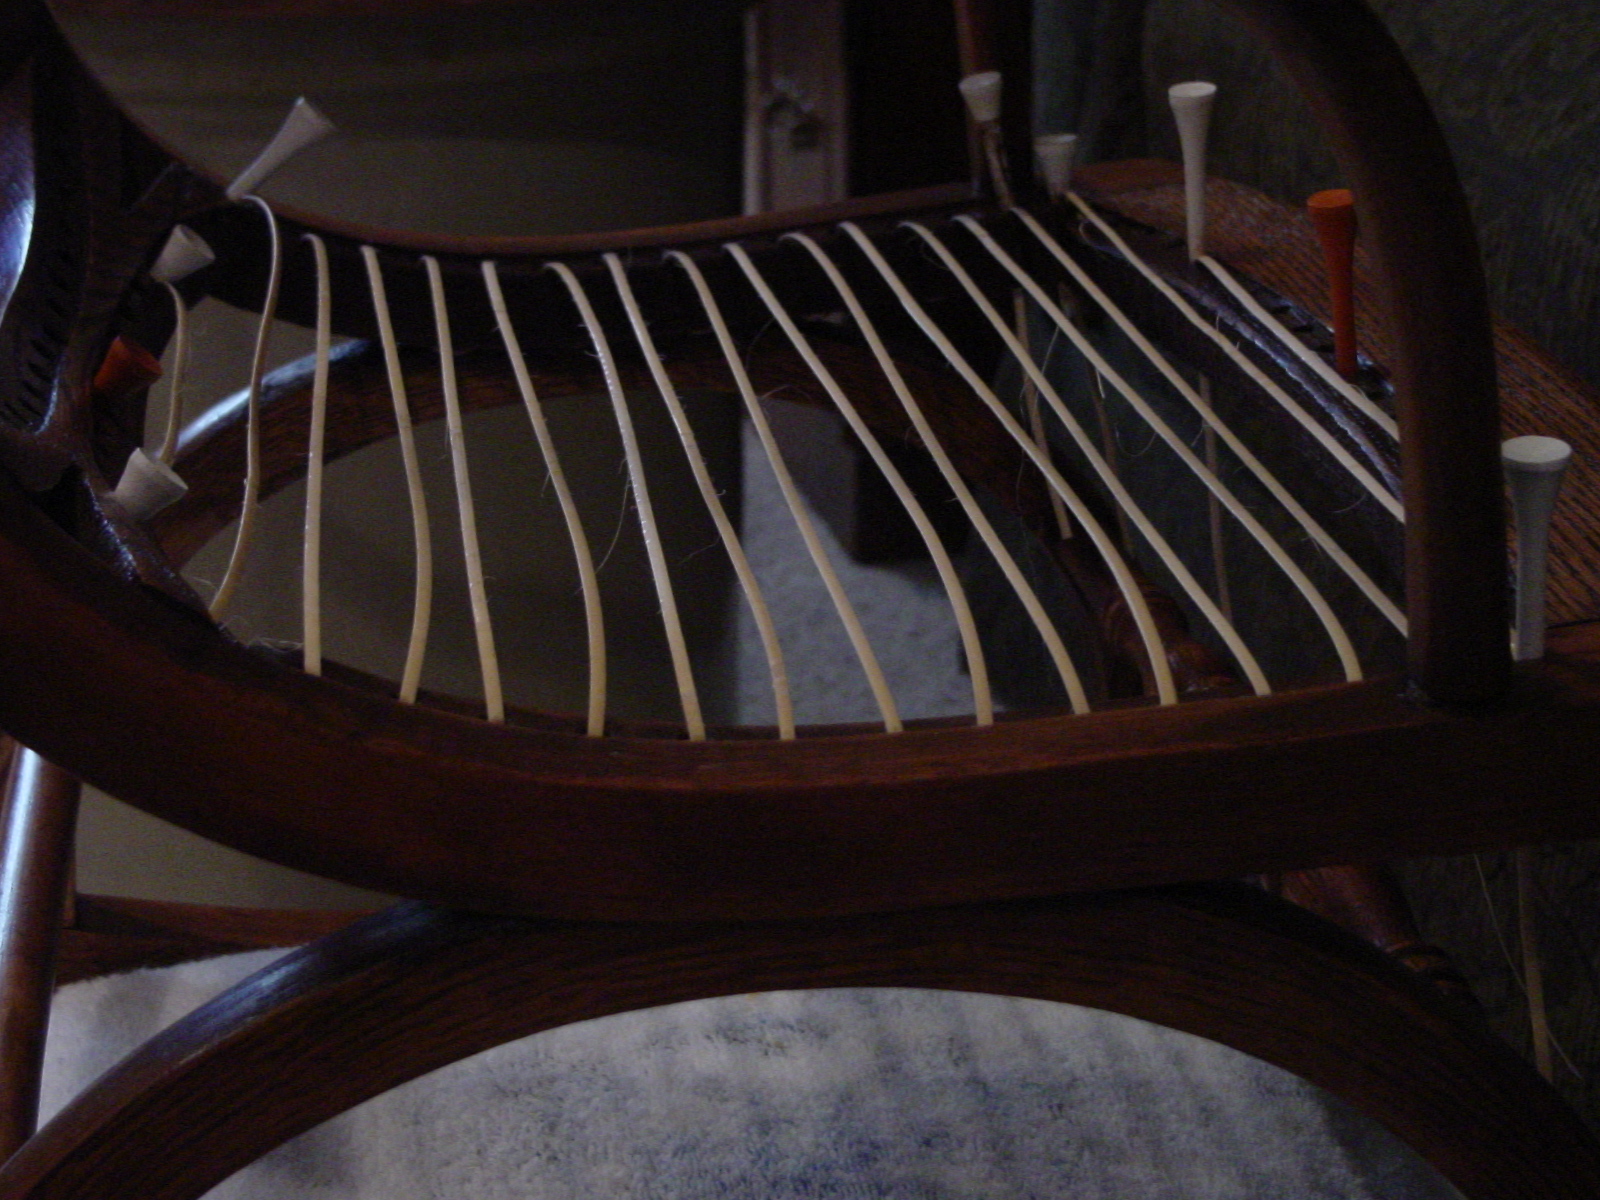
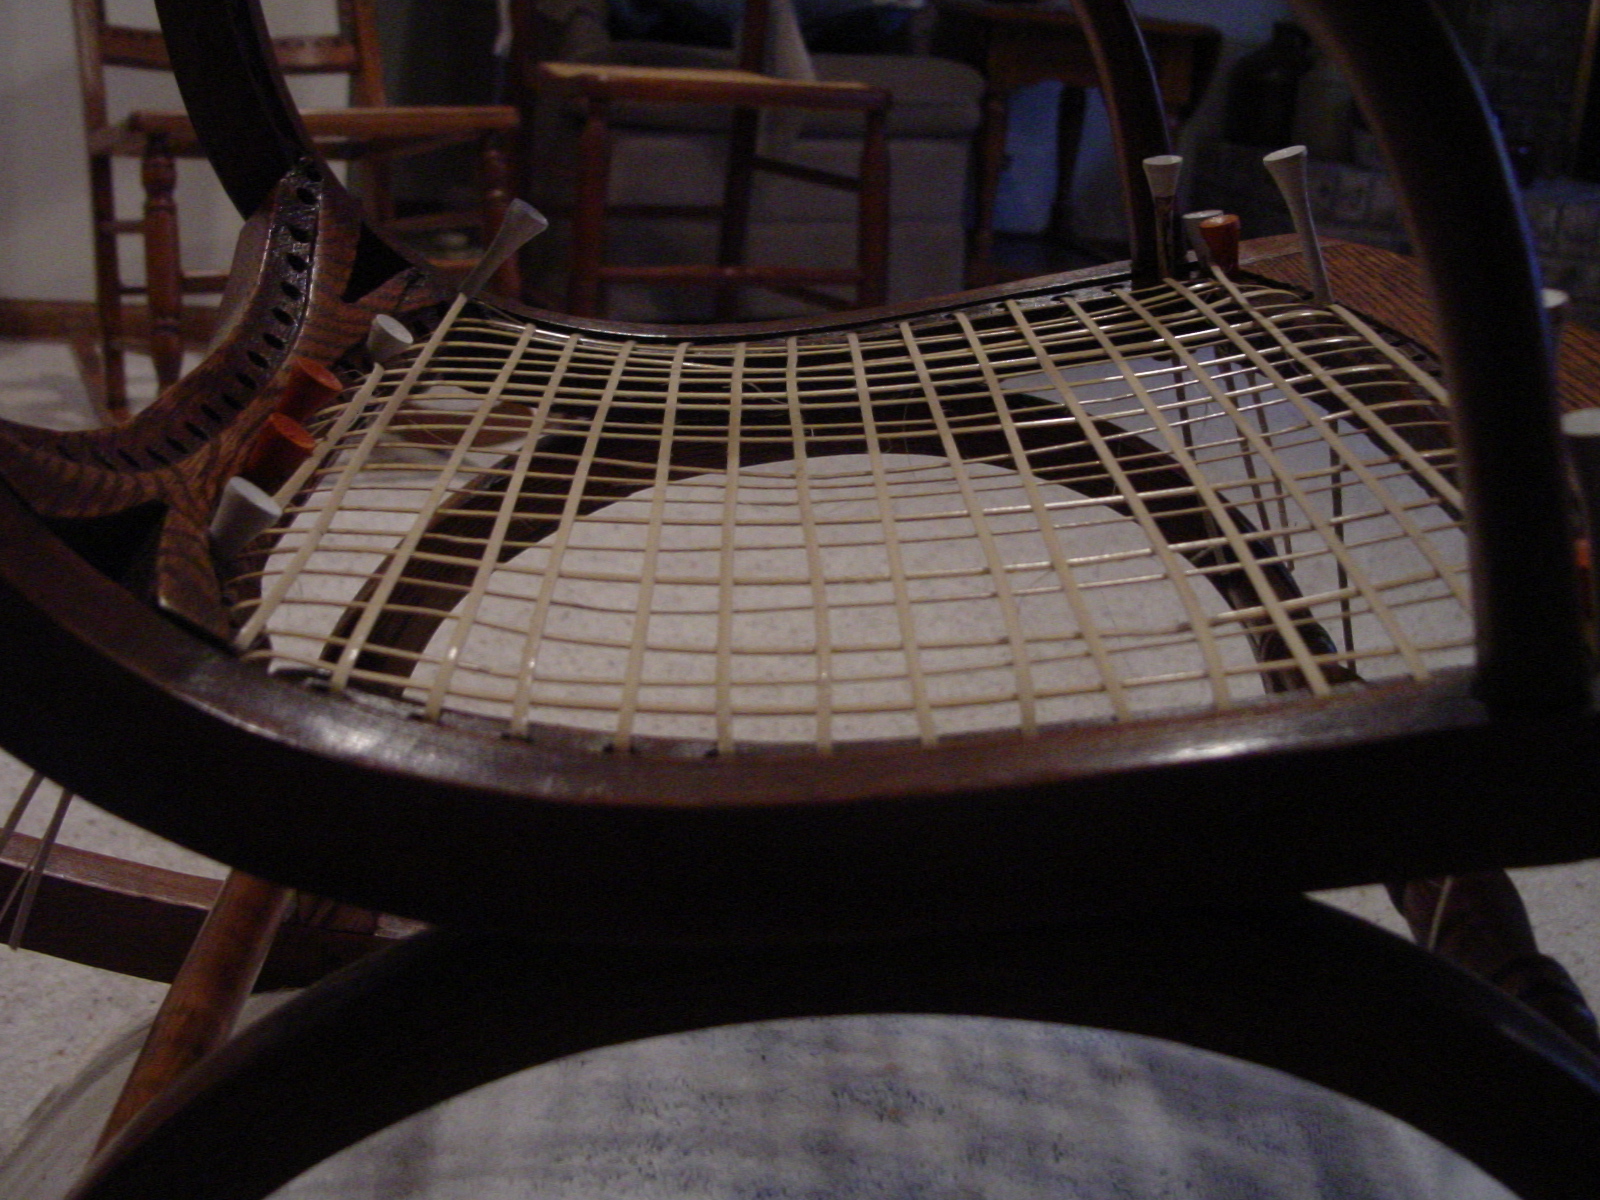
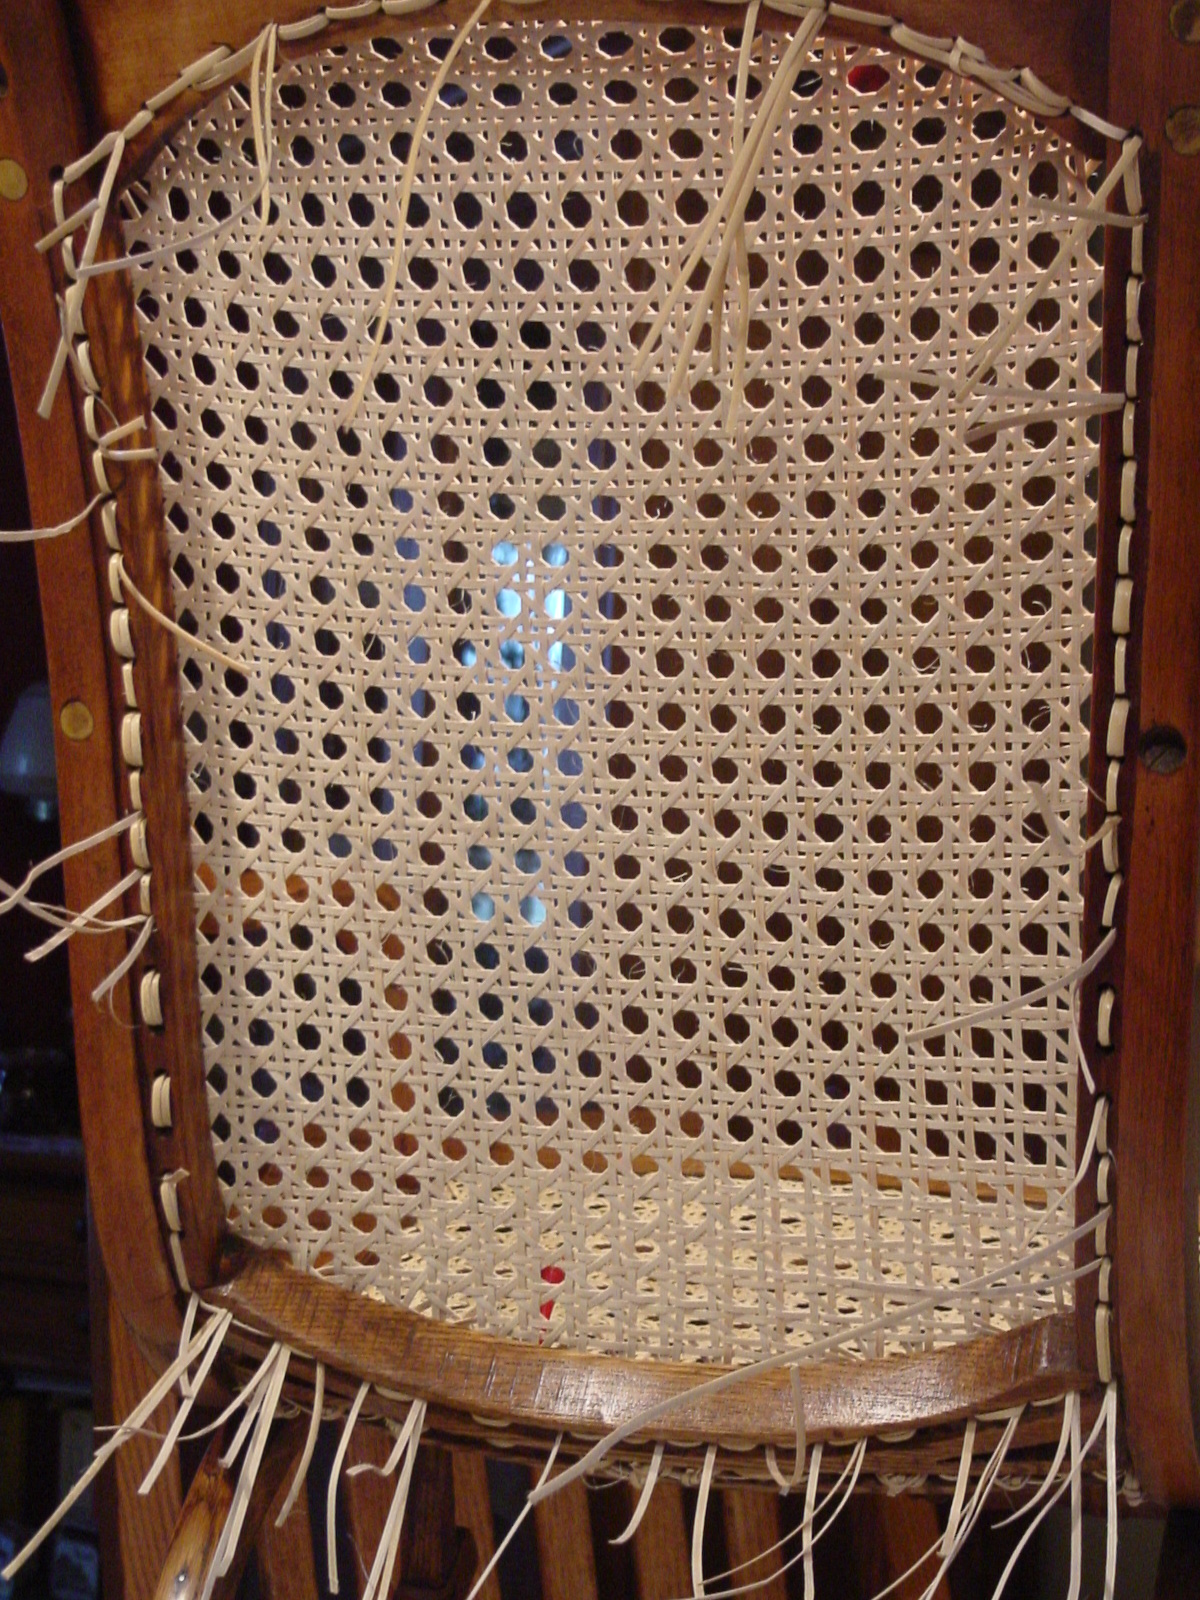
Because of the curvature of the seat & back, I decided to complete the
horizontal run first (step 2 of 7-step method). Then I ran the first vertical
(step 1 of 7-step method) UNDER the first horizontal. This technique
helped the cane to fit the curvature of the seat. I tried to keep everything
very loose at this point. The next steps naturally tighten up the cane.
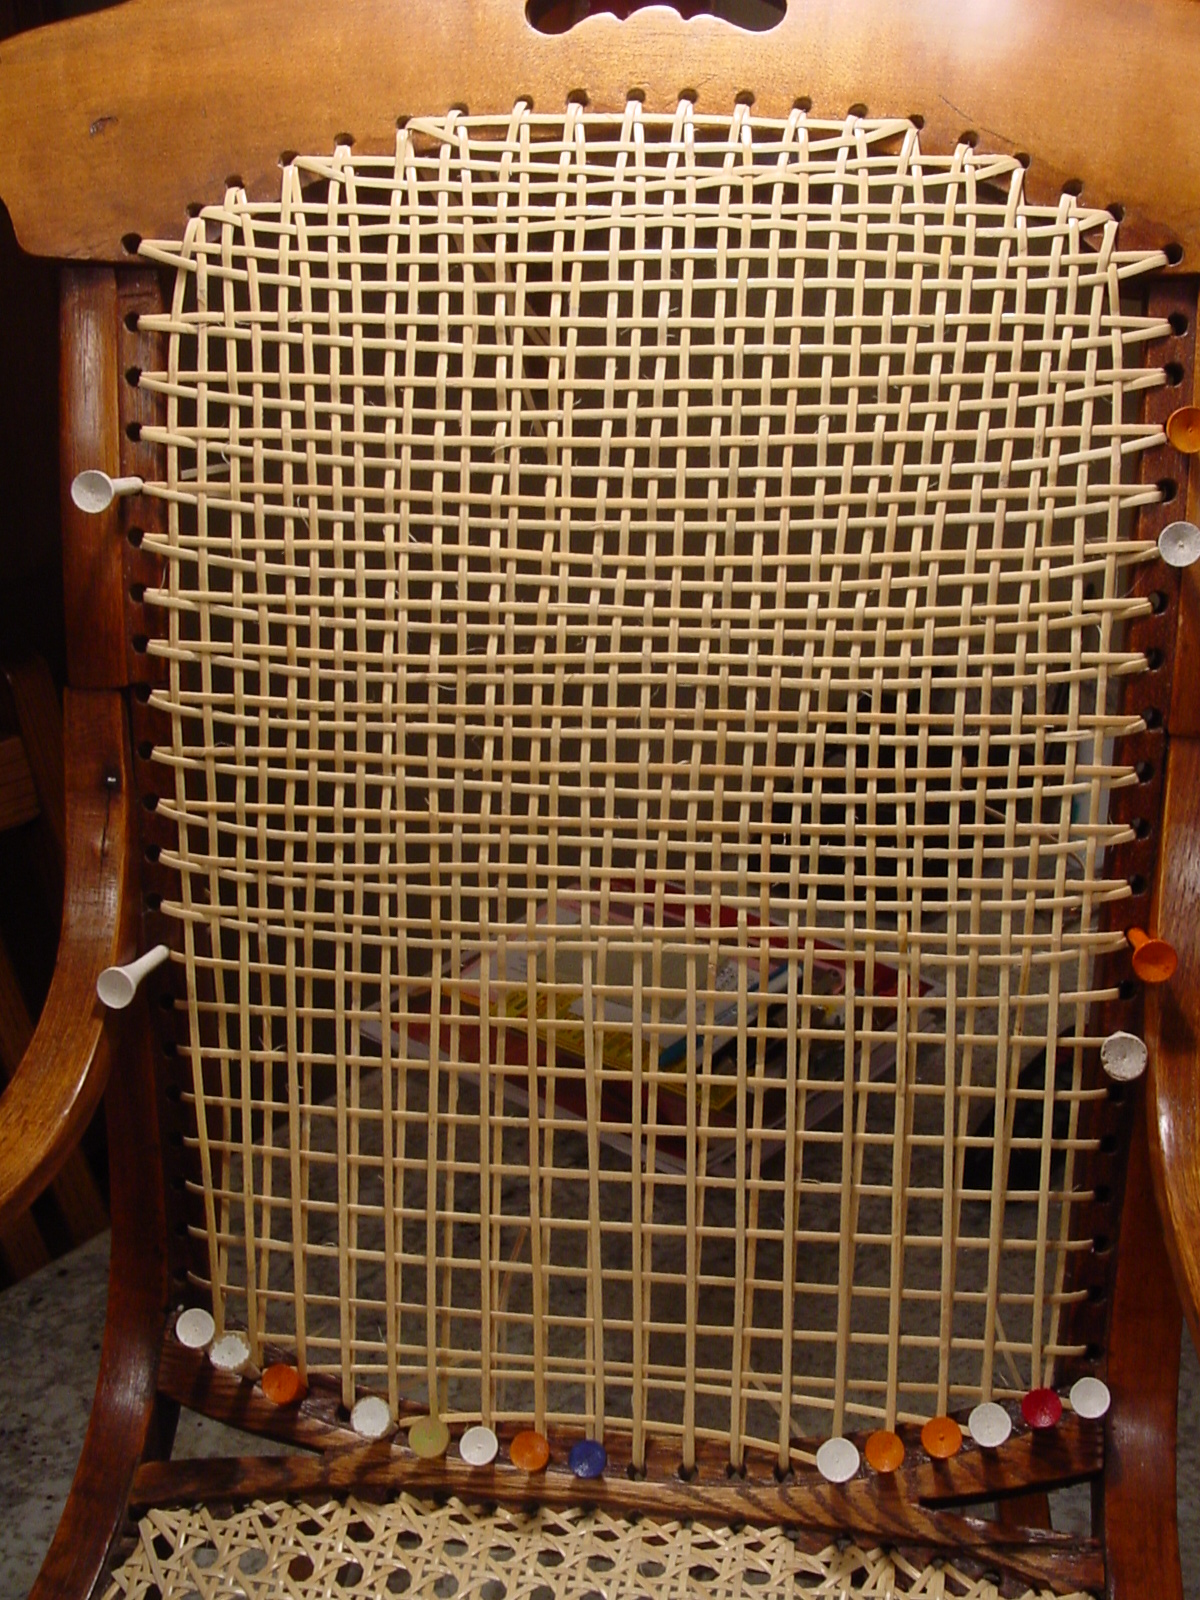
Below, Step 6 is completed on the seat. It was quite a challenge, in that the
holes where so small & the seat curves from front to back & also side to side.
I did work hard to get the "X"s on the rails. This was some very tight caning.
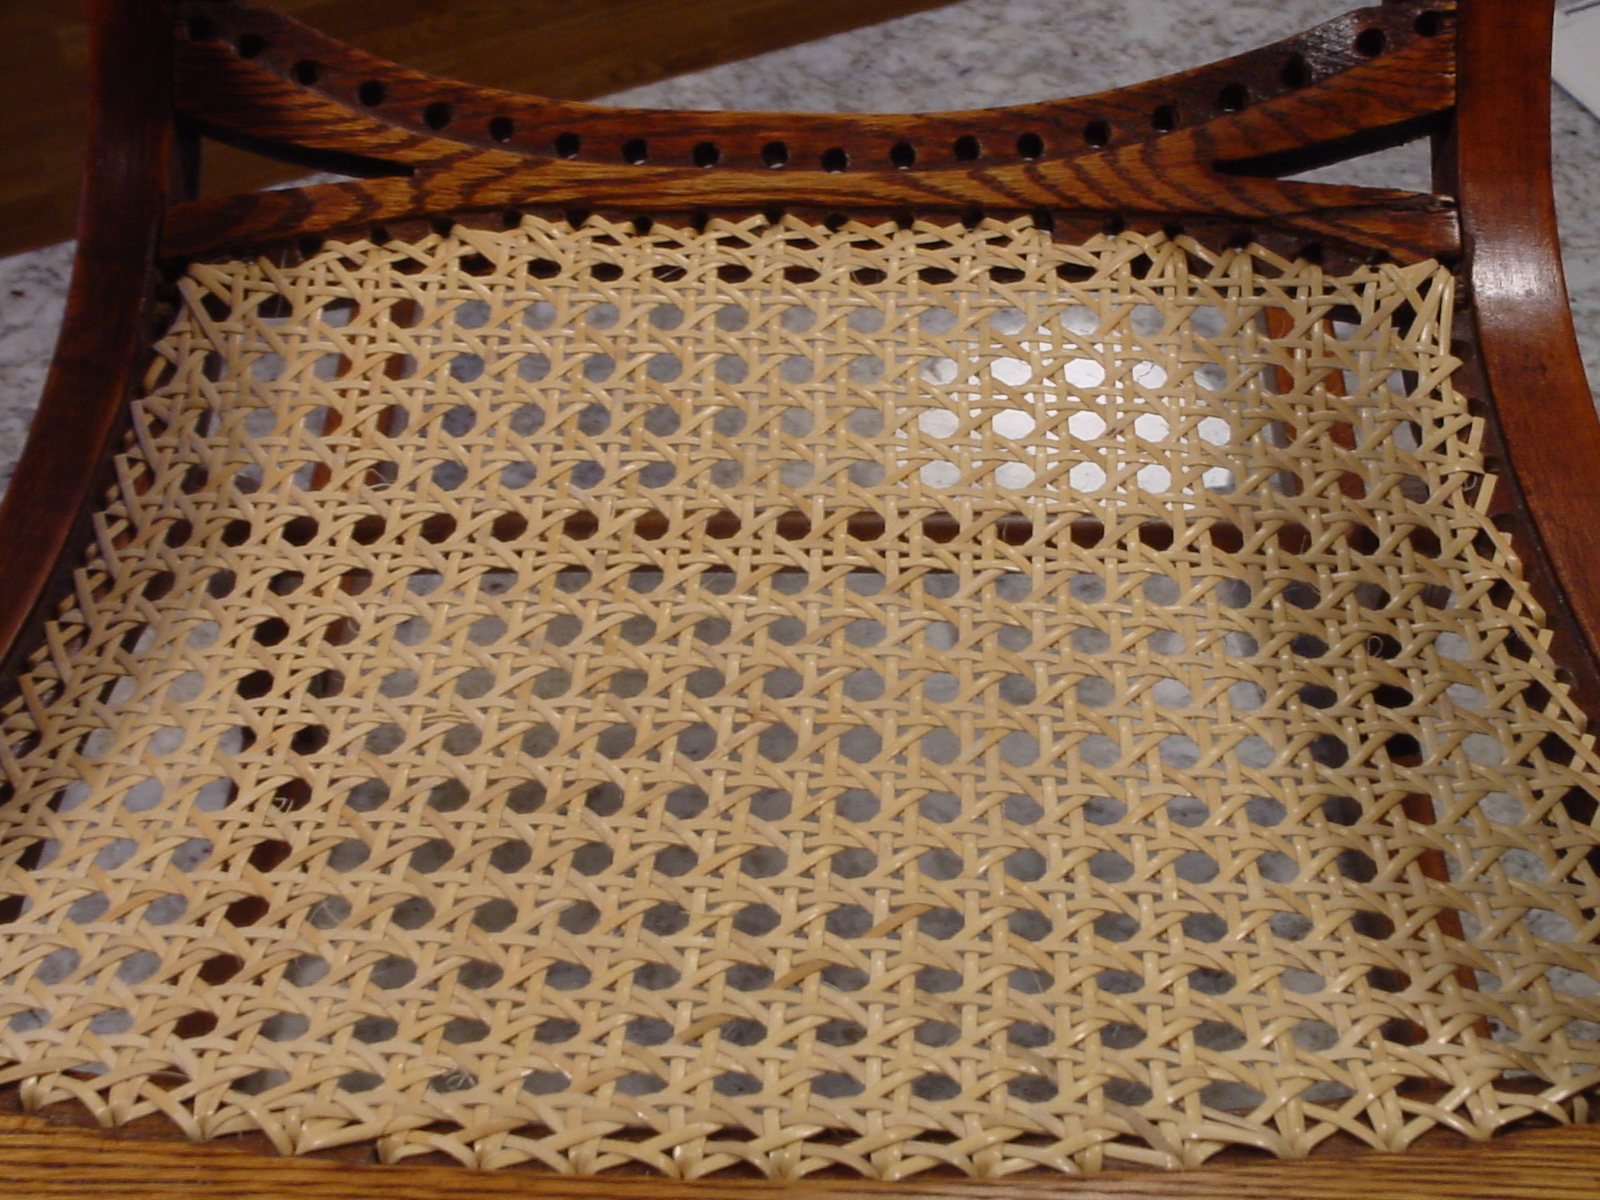
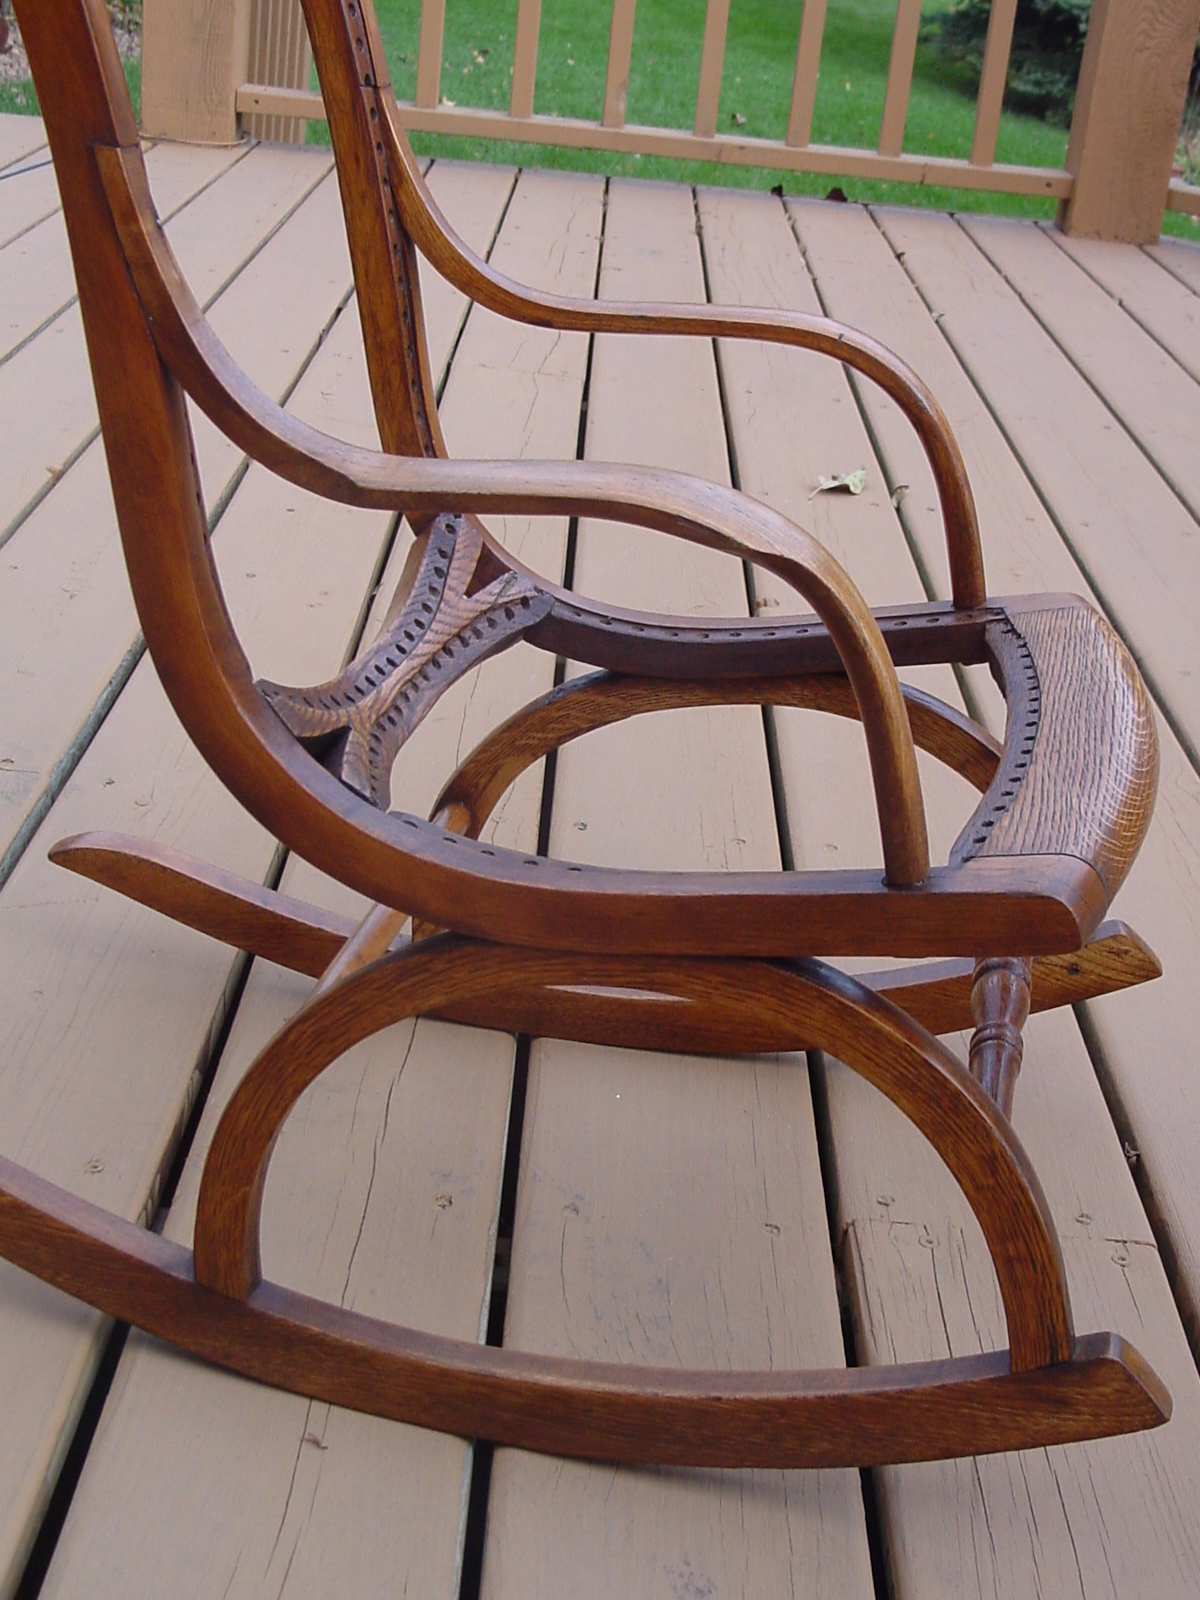
The curvature of the seat is more visible from the side. The back rail of the
seat may be a future problem area, because the cane has to sweep upward very
rapidly there; putting more pressure on those canes. I am hoping the "X" give
extra support here. (Looking back at the first picture on this web page, notice
that the cane is broken near the back rail, as well as the oak on the back rail
being broken). I waited to
complete the seat binder in step 7, until I also do the back binder.
I started on the Doll Rocker Back during a Sunday football game that wasn't going to well for the home team. So I was able to get quite a lot of cane run. Here I have completed steps 1-3 & am over half way done with step 4, the first weaving step. I placed a yard stick behind the back & ran the step 1 verticals behind the yard stick, to allow plenty of slack for the curvature of the rocker back.
I tried using a caning rod (a new tool purchased to help pull cane through).
But because of the curvature of the back, I had difficulty; breaking 2 vertical
cane. I finally put the tool away & was going faster with my own two hands.
Step 4 always seems the hardest for me & takes the longest.
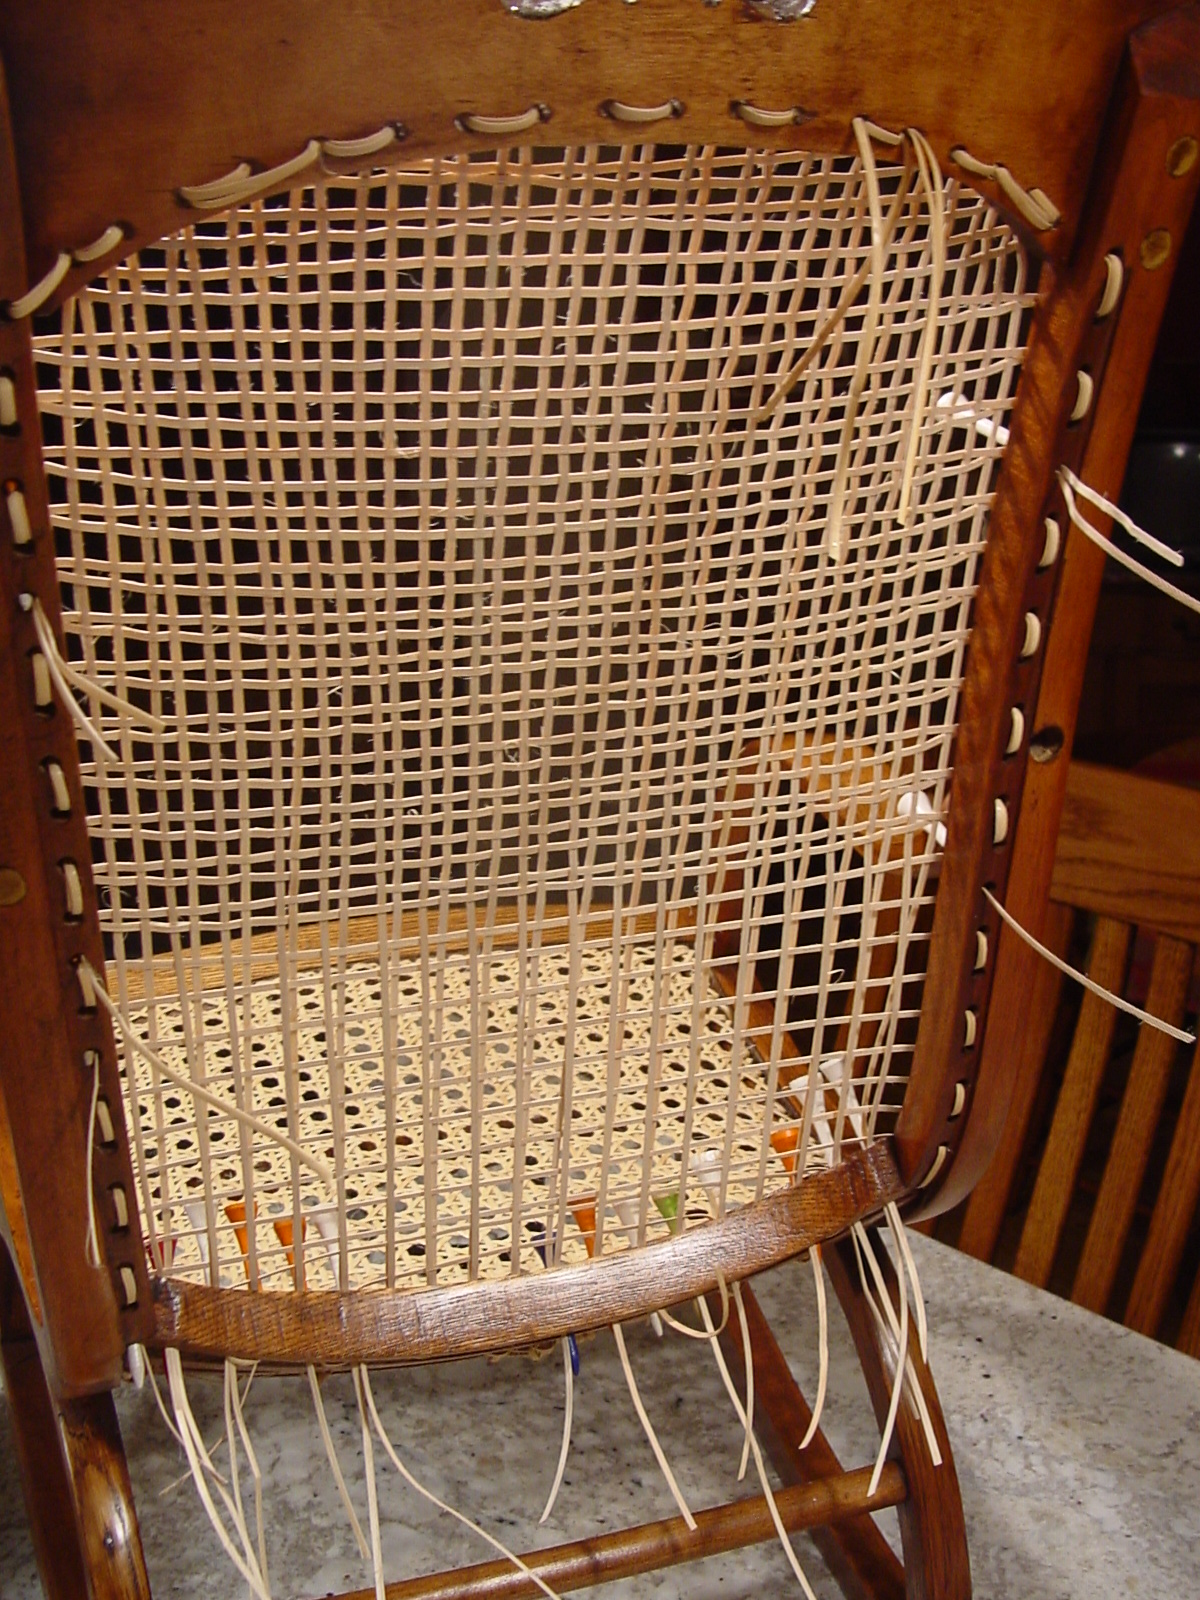
Here is the backside of the rocker back, showing the cane ends. I hope to try
pegging the rocker back for a better look. I have paid special attention to
where I start & end each cane. I started the first & second verticals, step 1&3,
at the lower rail. If a cane was going to end at the top rail, I pulled the cane
back to finish on the lower rail. At this point there are very few cane
ends that are not on the lower rail, & they would be somewhat hidden. I am
starting to wonder if there will many visible knots on the side & top rails,
even if I don't peg. I wonder, if I am careful with my knots, if they will
even be that noticeable. (As you can tell, I'm starting to hedge on the
pegging, stay tuned to see if I gather the courage to try to peg my cane ends).
Step 6 of the back is almost completed here. In the close-up picture you can see the second diagonal run from upper left to lower right (yellow peg to red peg). I laid the the rocker upside in my lap to work on it, so that I would not have to bend over the seat to reach the rocker back. This caused some of my work to be "upside down". The cane quickly told me when I was running the diagonals in the wrong direction, by kinking up & wanting to cut.
The role of the diagonals is to support the squares built in steps 1-4.
The diagonals should slide smoothly & neatly into the intersections of the
vertical & horizontal steps. If they do not; stop & recheck your work!
Notice that I have more cane to run on the second diagonal in this picture, from
red peg to yellow peg.
Notice the curvature of this child's rocker. The seat is very curved,
reaching upward to meet the common back rail, which also starts the bottom of the back.
The rocker back also curves side-side & top-bottom. The cane ends have been left
loose to allow for pegging of the border in step 7. I paid
special attention to trying to keep cane ends on the bottom rail & limit the
number of cane ends on the top & side rails.

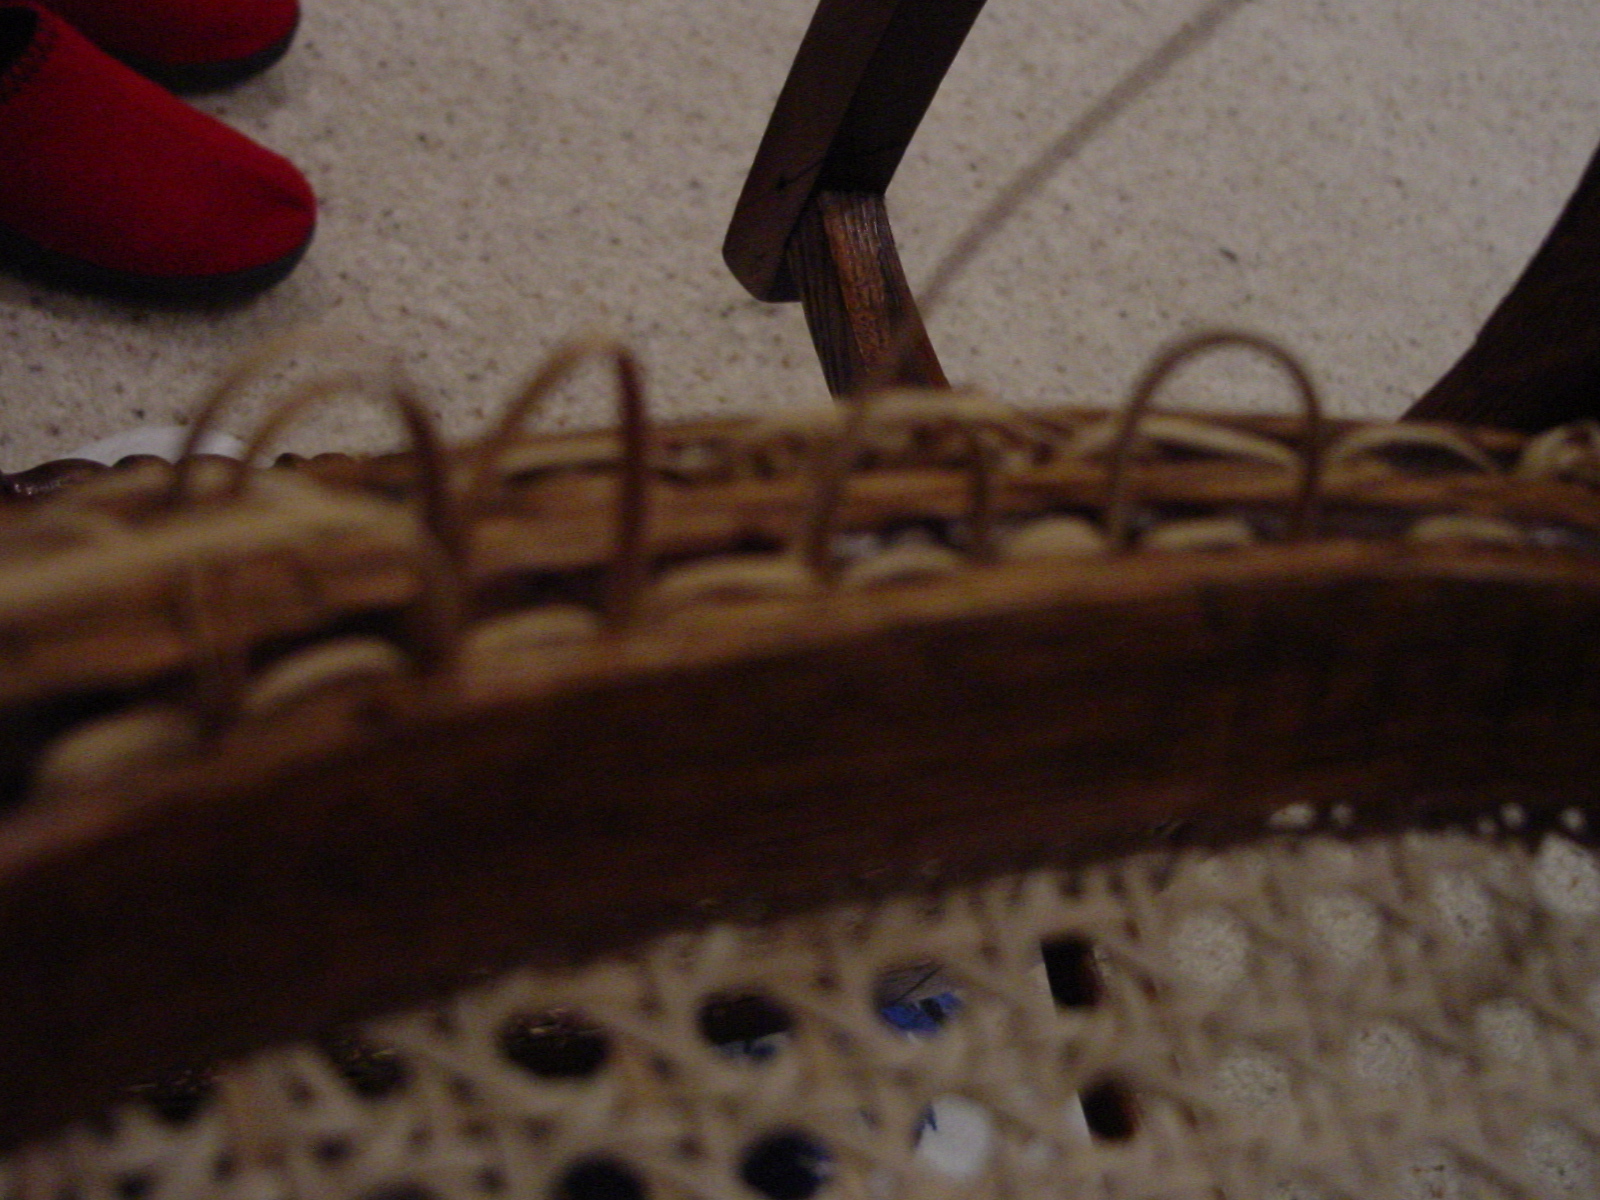
Here I am trying to show how the pegging process. Unfortunately, the picture
is a little fuzzy, sorry! I started planning for where the pegs would go,
by going every other hole around the rails. This worked easily on the side
rails where few cane ends existed. On the bottom rail it was impossible to peg
every other hole, so the need to skip 2 holes was determined. On all rails I
tried to be symmetric, so whatever was done on one side, do the same on the
other. This was especially important on the top & bottom rails. The right
picture shows the common rail, with knots on the underside of the seat (which
should not be viewable) & the pegged back (which will be viewable). Note how the
pegged is a cleaner look already.
The pegging process is completed. The pegging process consists of returning
the cane ends into a nearby hole & forcing a wooden peg into that hole to hold
the cane ends. The excess cane end is very carefully trimmed off as close as
possible. I used a utility knife, held the edge to the cane end & wiggled the
cane end back & forth to cut the ends. In the corners, I did give in & tie-off
the end, because there wasn't an available nearby hole that was going to be left
open & not pegged
.
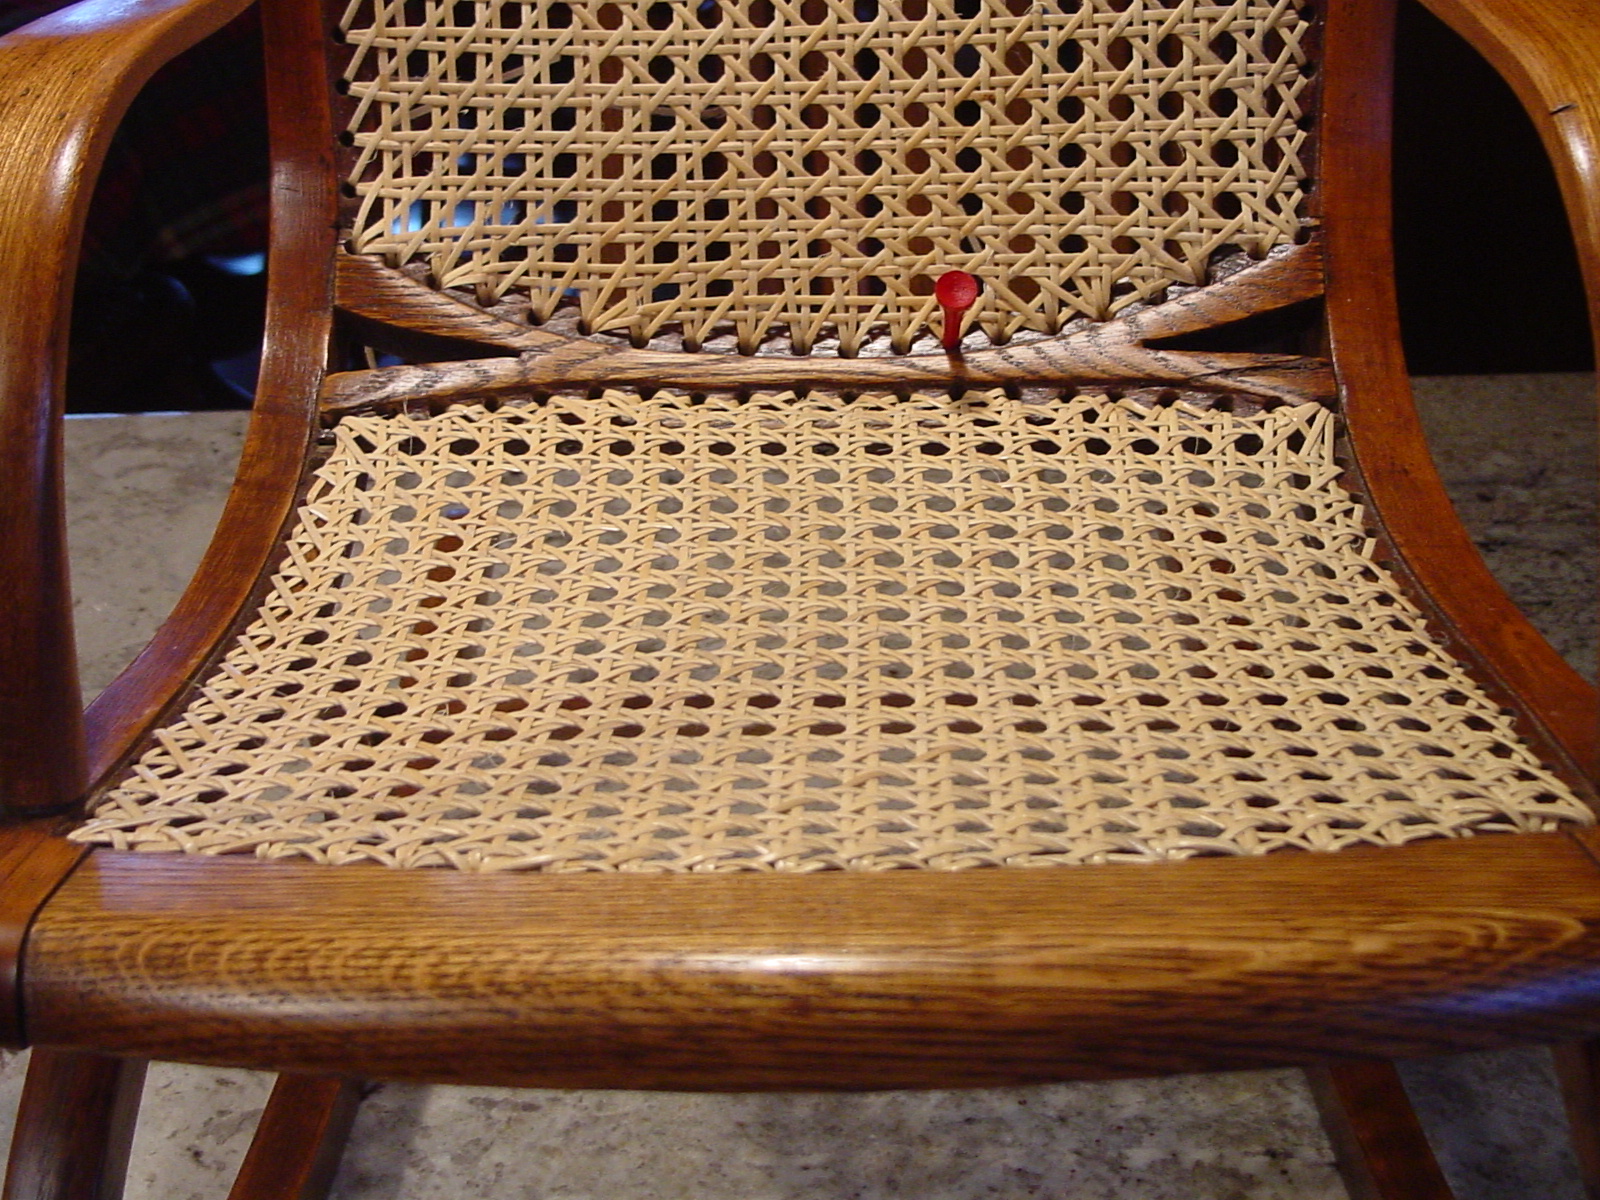
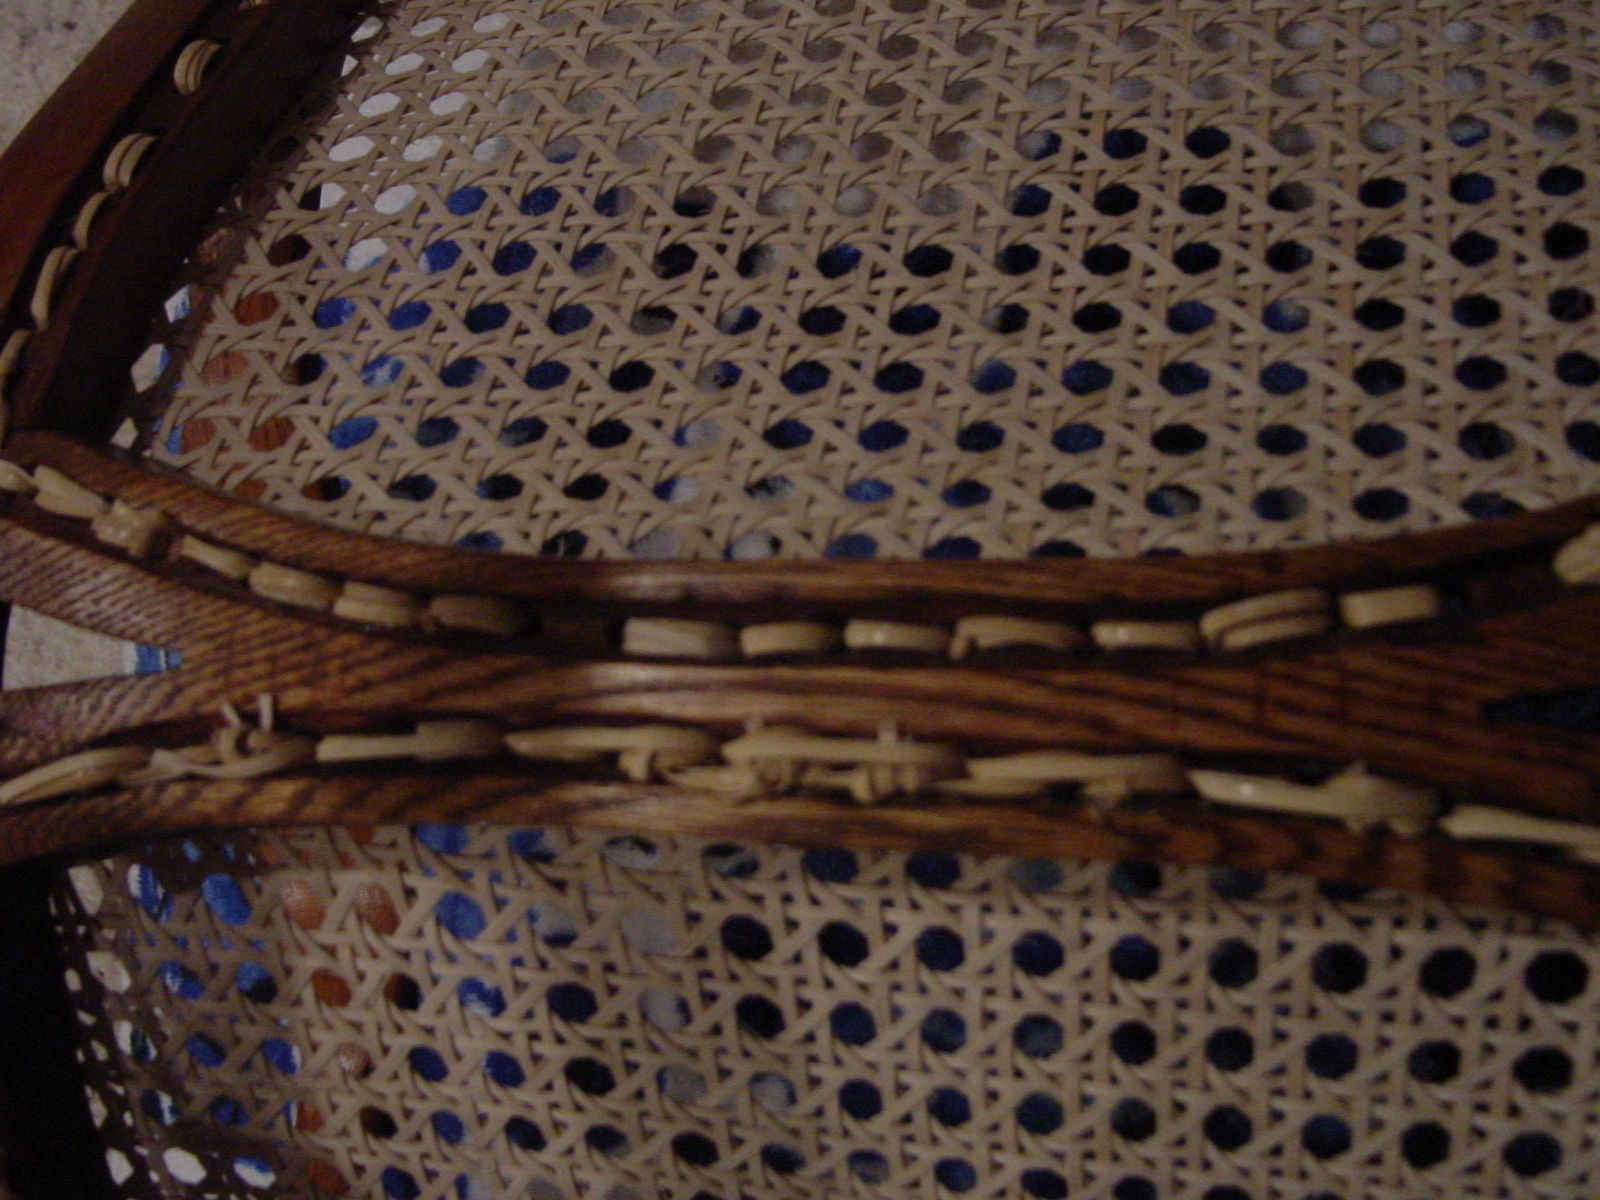
The picture below shows the back rails after the step 7 border is completed.
I worked very hard to keep the back looking as good as possible, by keeping the
cane loops very tight & the border cane in proper position. I needed to
watch the front of the back, the back of the back, the border cane & the loop
cane AND keep everything tight, at the same time. On the top rail, at the
corners, my two hands were not enough, so I enlisted the help of my wife. Often
four hands work better on the border. My fingers hurt after completing this
step, which took 2 hours.
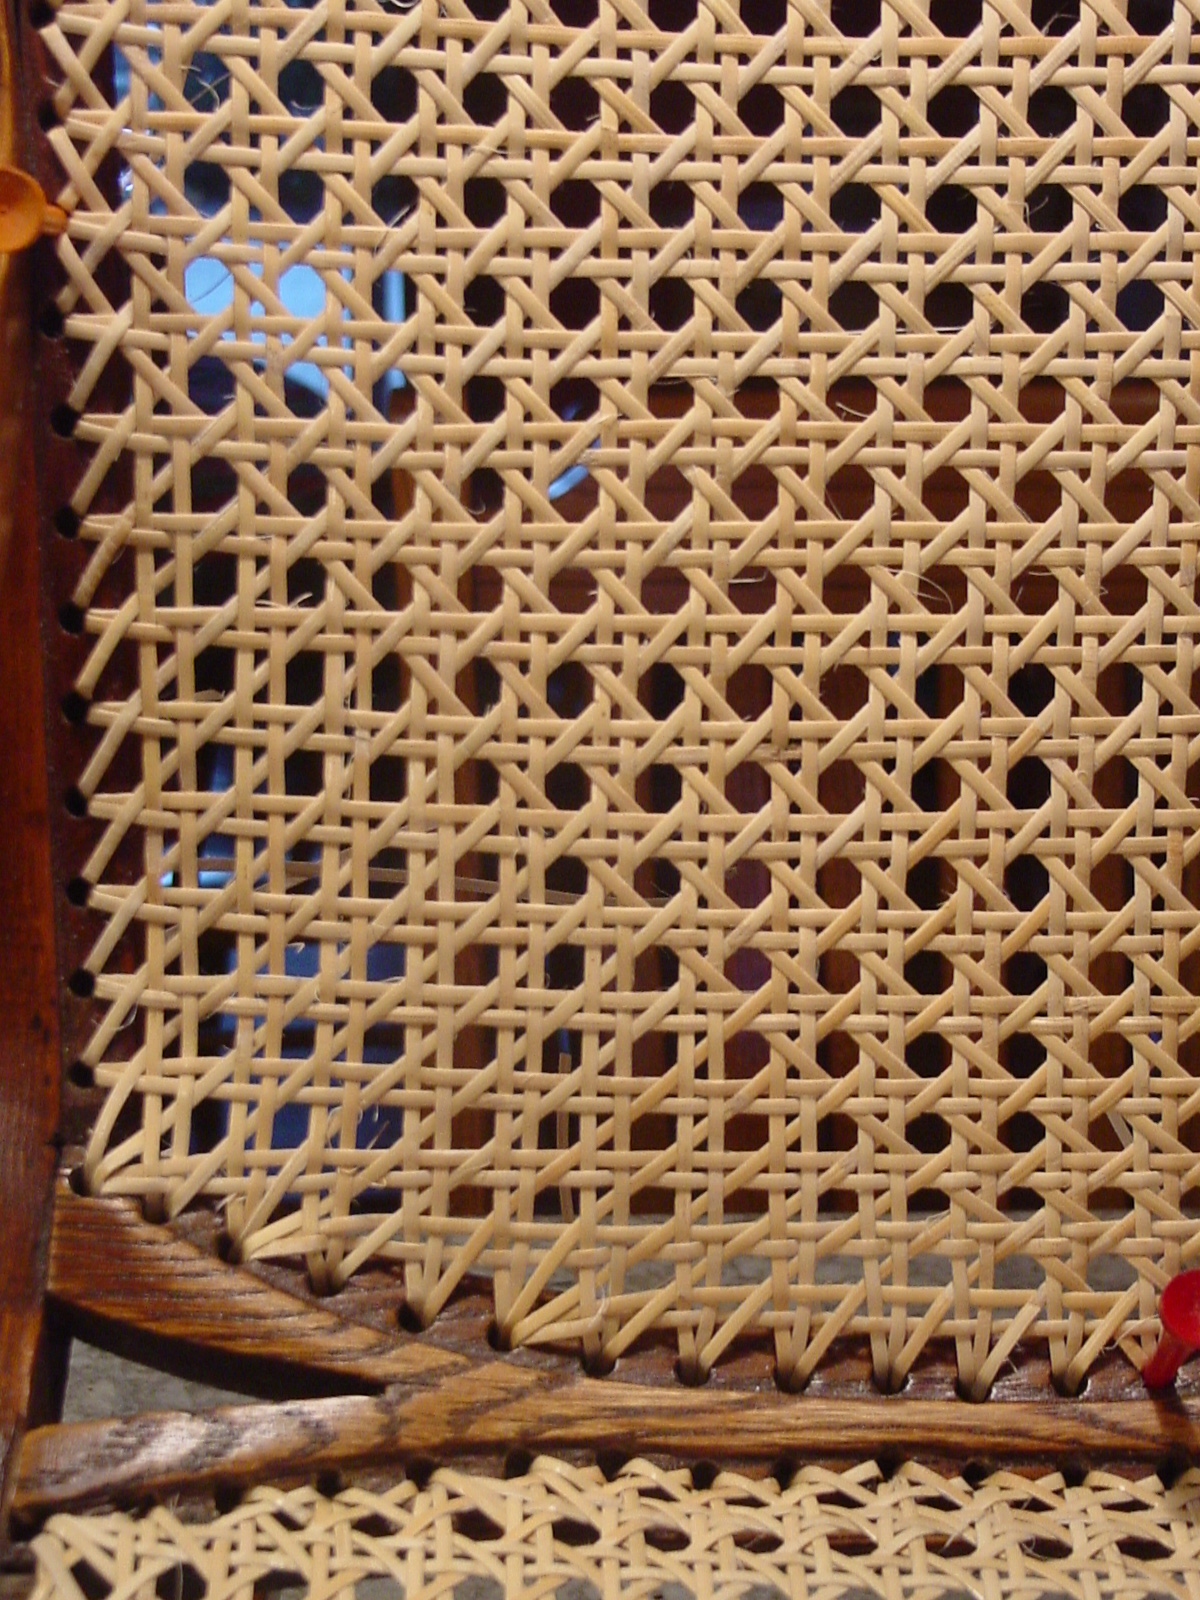
Here is a close-up of the back, with the border completed. Notice I looped
every-other hole, to allow for pegging & also tried to maintain symmetry from
side to side. The bottom rail rail was most difficult because of the large
number of cane ends.

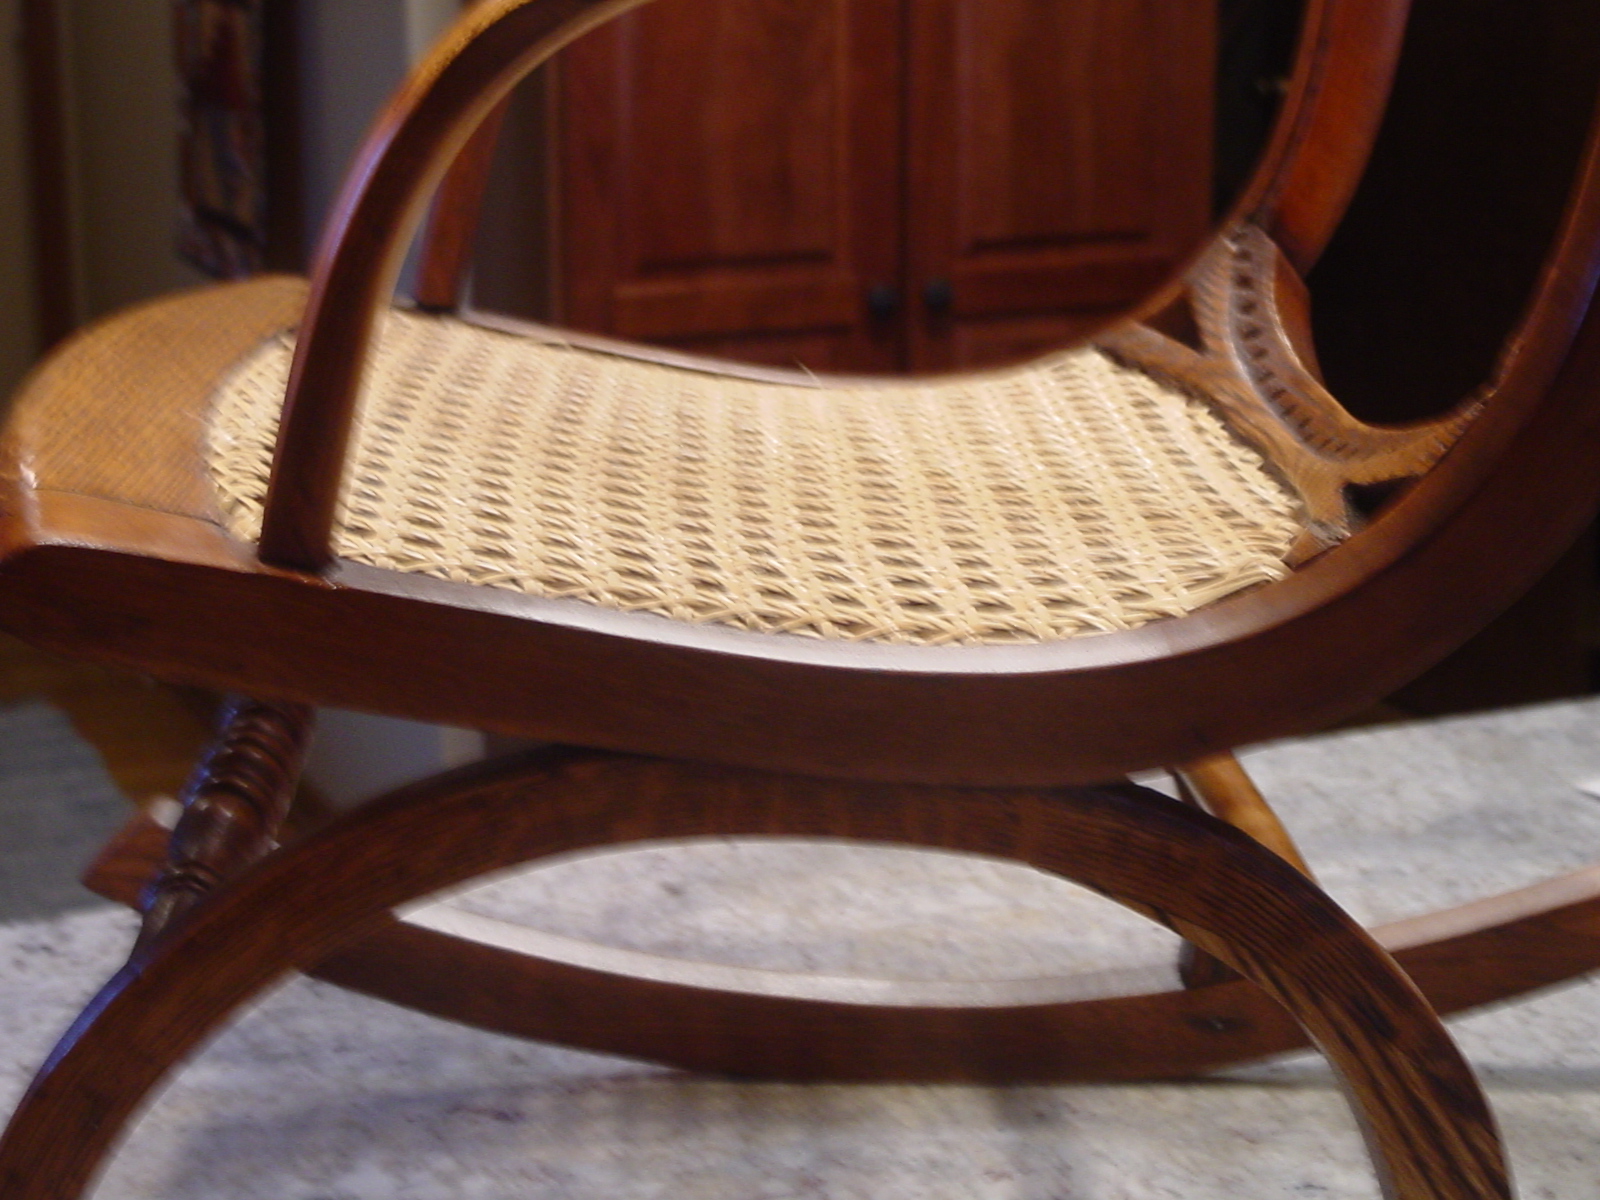
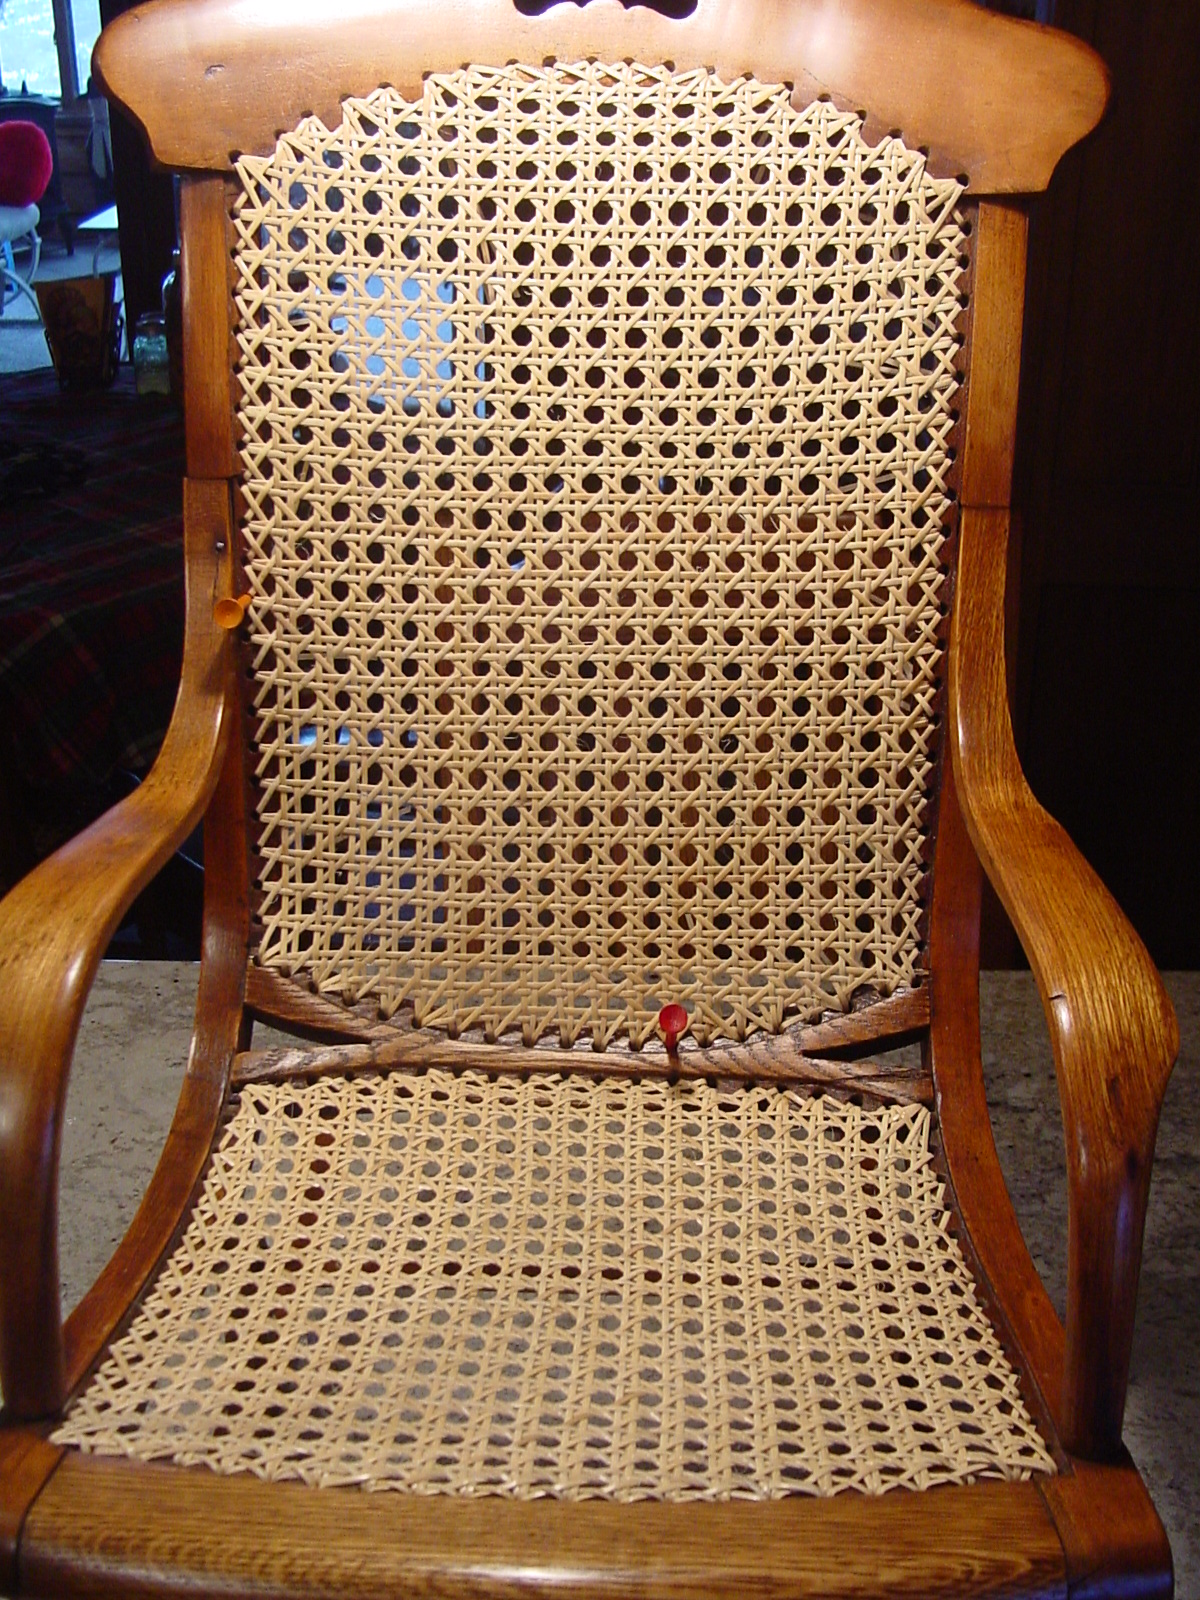
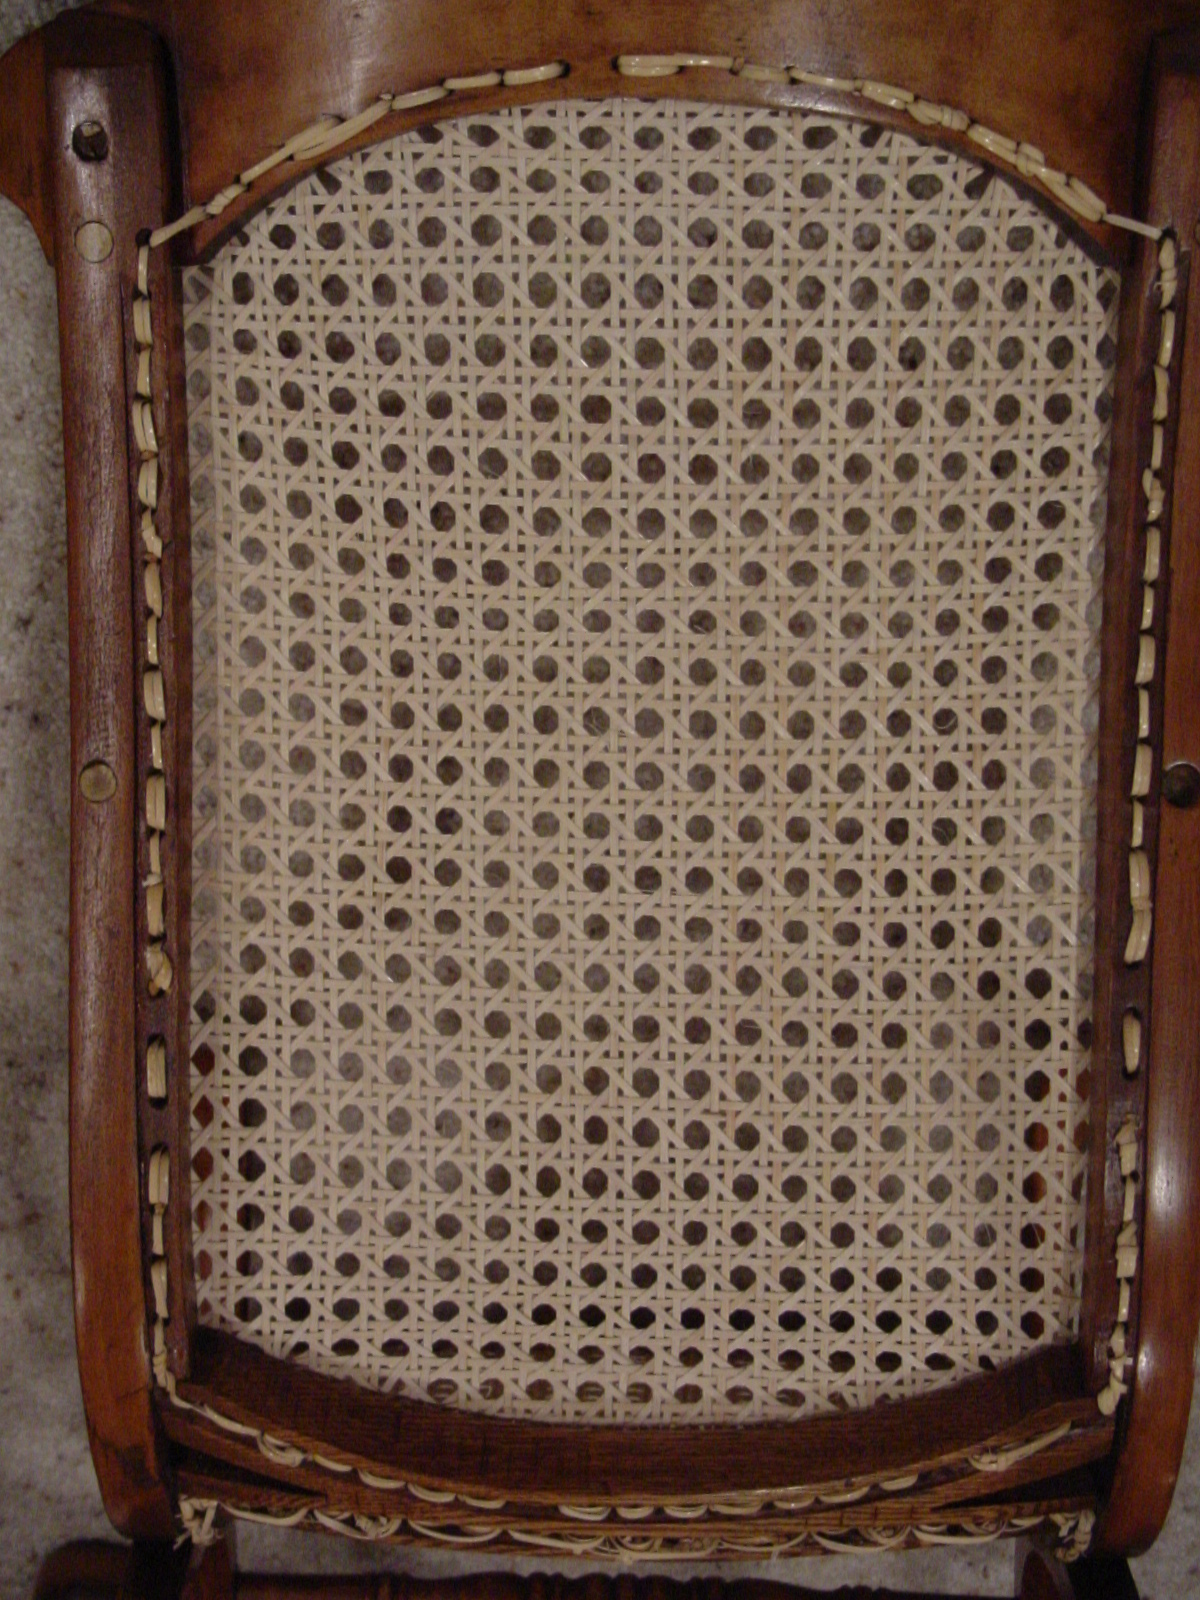
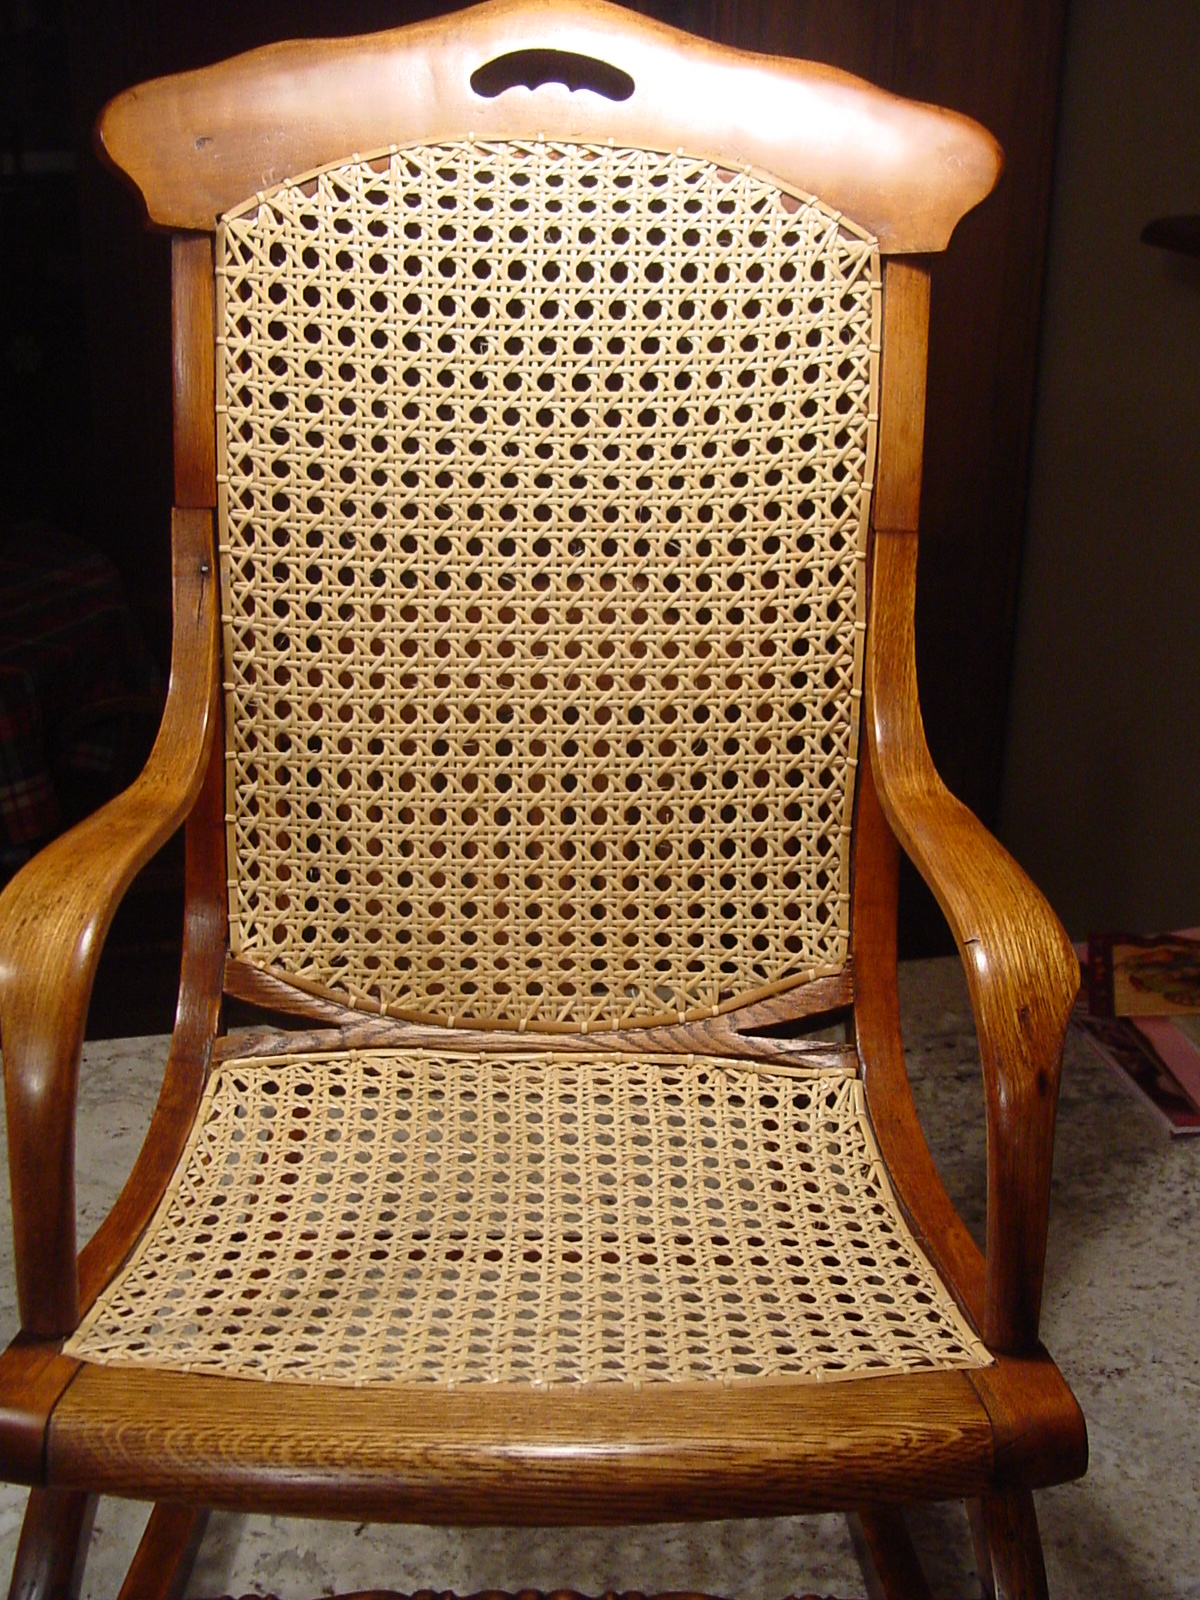
The Completed child' Doll Rocker. It looks awesome! Please go back to
the top of this web page & look to see the $35 old dirty broken rocker I started
with; & then return to here. What a transformation. The finished product made
the hard work well worth it.
New techniques that I tried on this project included: pegging the back;
weaving step 2 first to establish the curve of the seat & using the weaving tool
on a curved seat & back.
Project Completed: November 2004. Time to celebrate!