Stephanie had a lot of ribbon but not any cane around. So being creative, she tried caning with ribbon. Here are some of her pictures & success story. This is a a plain "bentwood" chair, the usual early 1900s kind with a circular seat.
11/16/02 Wayne -
I had a couple of bentwood chairs with holes for cane and a surplus of thin
polyester ribbon in several colors. So I thought ... what the heck, if it
doesn't work I can slice it out and find some real cane. I used a long needle to
pull the ribbon through the holes, and worked with a bit more tension than real
cane because the ribbon won't shrink. But it WORKED and looks very good
even without a border. I tried several kinds of braid and none of them looked
good. It's surprisingly sturdy. I wouldn't use it on dining room chairs, but for
a side chair that only gets occasional use it has worked well.
Stephanie
11/17/02 Wayne -
It was more a matter of having lots of ribbon on hand and not wanting to tackle
real cane than having innate artistic ability.
The three pictures show close-ups of the project, if you want to add them to
your "other's projects" page as a caning variation that might be of interest.
It's the standard 7-step process your web page shows, but with thin (1/8 inch)
polyester ribbon in place of the cane. You have to start with a chair that has
been repaired and refinished.
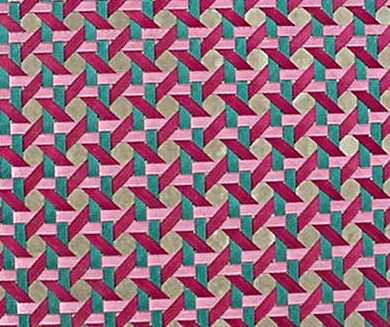
The first picture is the center of the seat with the finished pattern. Teal is
running front to back, pink is side to side, and a dark pink is the diagonal.
Color choice and the order they are used would affect the pattern. A monochrome
in tan or brown would look much like real caning. The partner of this one will
have the teal running diagonally and should look more teal than pink because the
last layer shows more surface area.
Here are differences between cane and ribbon: One advantage of the ribbon here
in Phoenix is that it doesn't have to be worked wet, so you can start and stop
any time.
Clear tape replaced the wooden pegs for holding the ends. Ends are "tied off" by
tucking them into a hole and holding them with white glue under the chair. I run
a whole reel of ribbon as a single "cane" and don't notice any fraying from the
process except at the end where the eye of the needle causes wear.
Durability, as I mentioned, has yet to be measured, but the first chair I did is
four+ years old and showing no wear in light use as a side chair. A single
strand of ribbon is pretty tough, and by the time you have the whole seat woven
it's definitely strong enough to sit on. Add some stain-proofing spray and it's
probably good for a decade or more, or until you get tired of it and change
colors.
Tension ... this will not shrink like wet cane. I guessed and laid the first strands with about 1/4 inch of give in the middle and got lucky. If the first strands are pulled too tight you will have too much trouble with the diagonals. It's tedious, but you can loosen or tighten them if you have to.
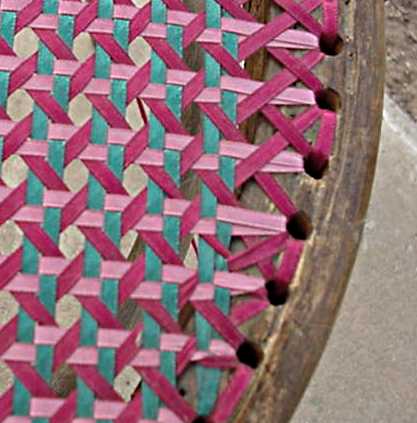
The second picture shows the holes along one edge. The softness of the ribbon is both good and bad ... it is easier to weave than cane, but as you can see, it has a tendency to wrinkle where the ribbon can't quite run straight into the hole. No one has noticed - they are all too impressed with the caning. :)
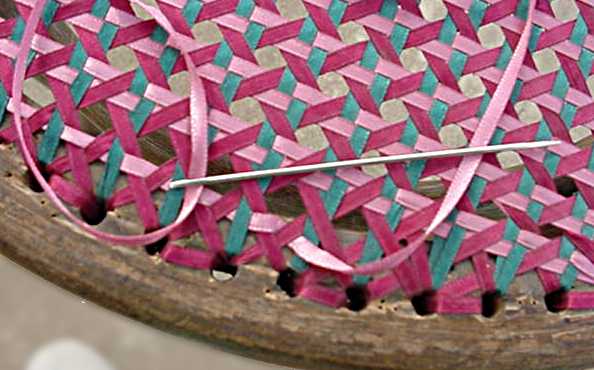
The third picture shows the weave being fixed at the front, with the large needle I use to get the ribbon through the holes. I didn't run the first two colors close enough to the edge and had to run a filler ribbon into the weave all around to make it look better. Although it would have been easier to run the strands at the start, the flexibility of the ribbon means I can run a filler - something that is impossible with cane.
Finishing the edges was a bit of a dilemma. I ended up running a basting stitch with the dark pink ribbon, in and out of the holes all around the edge. That produced the half-coverage you see here. Offsetting the stitches by one hole and running around again leaves a tidy rim of the dark pink, although with the holes showing. Seeing them doesn't bother me, and the edging is enough to disguise some of the damage along the edge. Perfectionists could try running a thin cord around the edge, and holding it with some of the ribbon, as if it were finish cane. Gluing a thin flat upholstery braid around the edge would also work.
Stephanie
Thank Stephanie for showing us a very colorful alternative & also a great
visual learning tool for caning.
Wayne.