This might also be called the 5-step caning; or at least I have had one caner email stating that she had done a 5-step caning process several years ago & now couldn't find her instructions.
Chair Caning: Diamond Pattern
This might also be called the 5-step caning; or at least I have had one caner
email stating that she had done a 5-step caning process several years ago
& now couldn't find her instructions.
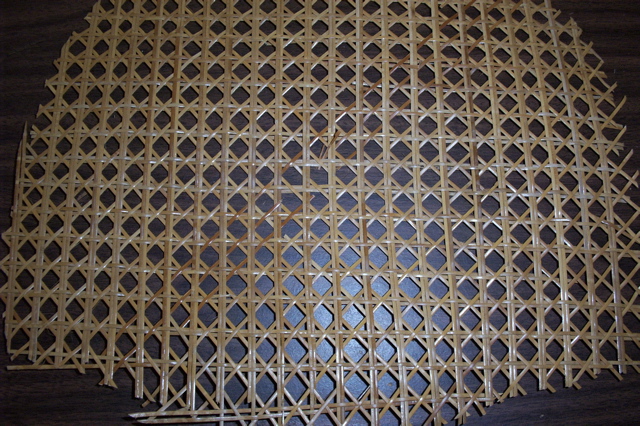
Helen found this pattern on a chair that she was going to re-cane. Some broken cane are visible, showing the need for re-caning.
Thank you, Helen for sharing this decorative, lightweight, simple, pattern
with the caning community.
---------------------------------------------------------------------------------------------------
Diamond ?? Pattern
The "Step" numbering here references back to the 7-step method.
Step 1 & 3 verticals, run together first.
Step 2 horizontal OVER, then under, every pair of steps 1 & 3 verticals.
Step 4 horizontal UNDER, then over (opposing), every pair of 1 & 3, to the south
side of Step 2.
Step 5 start in NW corner drawing under verticals and over horizontals
Step 6 start in NE corner drawing again, under verticals and over horizontals
Step 7 normal binding or pegging
Carefully looking at the pattern you can easily see there is little support at
the grid intersections--- BUT--looks attractive.
Until next interesting project -- keep in touch--Helen
-----------------------------------------------------
Created 11/2004