
Daisy & Buttons Chair Caning - The Seat
Start: Use the same sized cane throughout this pattern for both seat & back. Run the cane strands for the verticals steps 1 & 3, & the horizontals for steps 2 & 4. Take extra time now to line up the horizontal & vertical cane pairs. I then used red twist ties to locate where the Daisies will be formed.
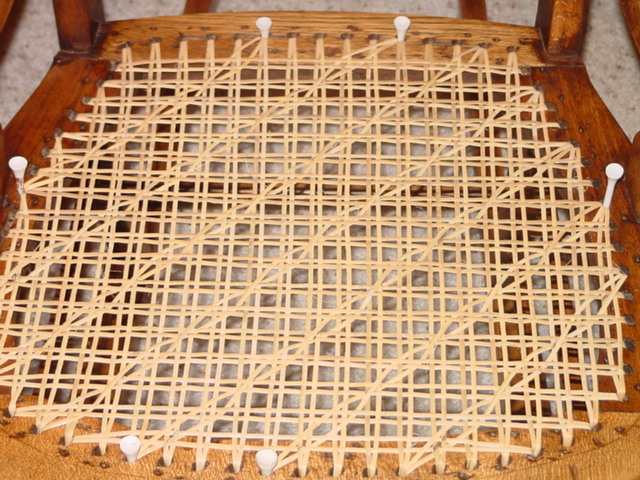
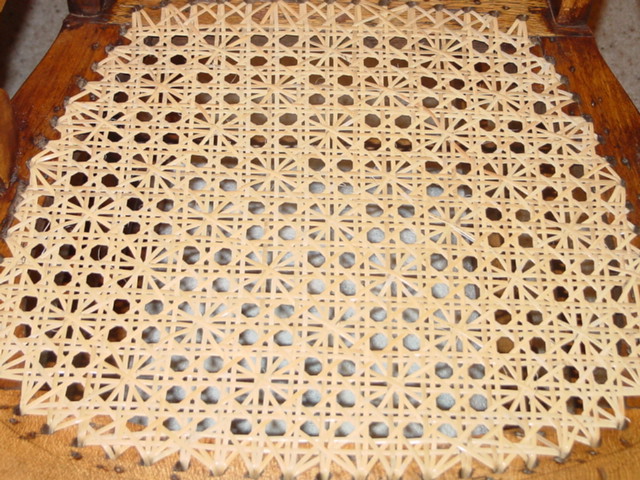
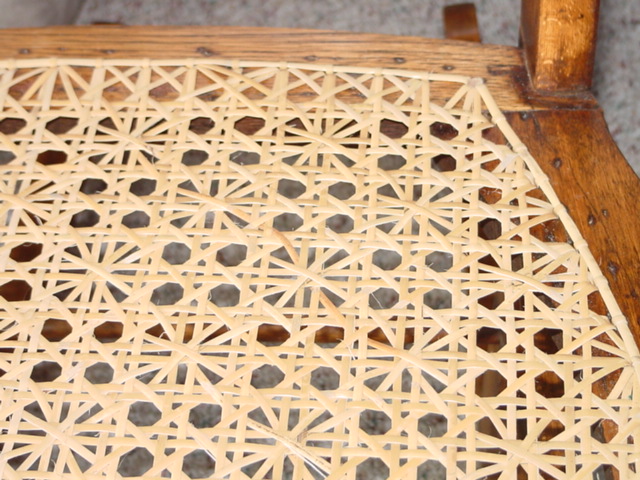
Locating the Daisies: First locate the approximate center of the seat by counting the holes on the side & front rails. Make a pencil mark & place a twist tie over this intersection. Then count up 4 intersections, make a pencil mark & place a twist tie. Repeat this along that vertical row. Then count diagonally across to the second intersection, mark & twist tie this. Then count 4 intersections & repeat the process. You chair seat should look similar to this.
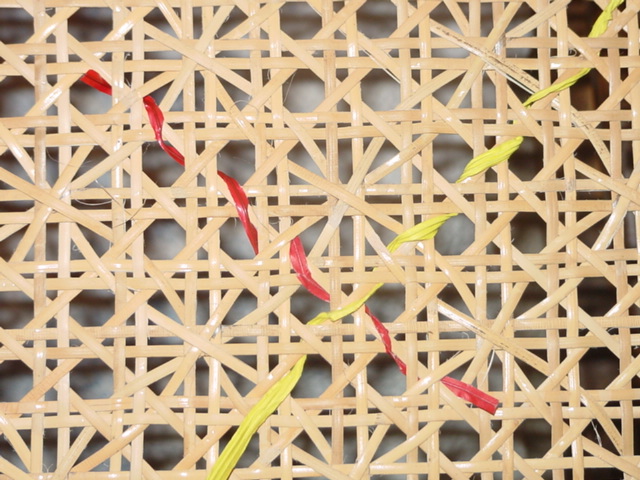
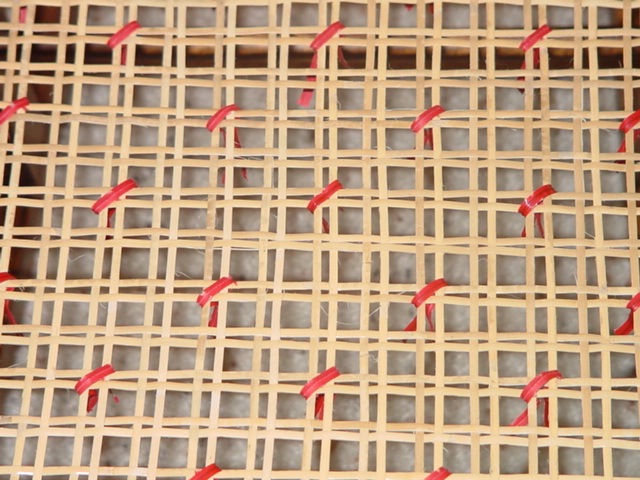 This close-up should help to visualize the daisy pattern layout. Notice how the
verticals & horizontals are neatly paired up. I marked with a pencil for a
quick reference, but found that the pencil mark did not stand out enough.
I used the red twist ties so I could more easily see the intersections. As I ran
a cane diagonally over the intersection, I removed the red twist ties & then the
pencil mark reminded me where the intersections were located. You could easily
erase the pencil marks after done, but they just kind of disappeared as I caned.
This close-up should help to visualize the daisy pattern layout. Notice how the
verticals & horizontals are neatly paired up. I marked with a pencil for a
quick reference, but found that the pencil mark did not stand out enough.
I used the red twist ties so I could more easily see the intersections. As I ran
a cane diagonally over the intersection, I removed the red twist ties & then the
pencil mark reminded me where the intersections were located. You could easily
erase the pencil marks after done, but they just kind of disappeared as I caned.
First Diagonal: This was the hardest for me. Pick a daisy marking close to the front rail & corner (I chose to start near the front left corner so that my knots would be more hidden on the side). Always run the cane OVER THE VERTICAL and UNDER THE HORIZONTAL in this step. When you get to a Daisy marker ALTERNATE going OVER ONE and then UNDER THE NEXT. So you have to keep two things in mind 1. the over/under of the verticals & horizontal runs 2. alternating over/under the daisy locations.
The alternating over/under of the daisy will give you a "squiggly" line. I found that if the cane wasn't "squiggly" I had probably missed something & had to redo. Such is the learning process :-). Skip holes on the underside to get to the next diagonal run. Be careful not to cover any holes underneath. Leave extra cane curled up for use on another run.
On the second pass of the first diagonal run, you will run OPPOSITE of the alternating daisies. So, if you went under the daisy on the first pass, go over it on this pass. Again, always run the cane OVER THE VERTICAL and UNDER THE HORIZONTAL. This run was easier for me. Just pay attention to what you are doing.
As always, weave "with YOUR eye". If it looks right to you, then it probably is right. Try to do the same weaves on opposite sides, to help with the visual balance. i.e.. if you skipped a hole on the left, then skip that hole on the right side.
Second Diagonal: Again, pick a daisy marking close to the front rail & corner This time always run the cane UNDER THE VERTICAL and OVER THE HORIZONTAL. When you get to a Daisy marker ALTERNATE going OVER ONE and then UNDER THE NEXT. This step was again the hard step for me, to keep track of everything & the pattern. Again, I found that if the cane wasn't "squiggly" I had probably missed something & had to redo.
On the second pass of the second diagonal run, you will run OPPOSITE of the alternating daisies. So, if you went under the daisy on the first pass, go over it on this pass. Again, always run the cane UNDER THE VERTICAL and OVER THE HORIZONTAL canes. Pay attention to what you are doing.
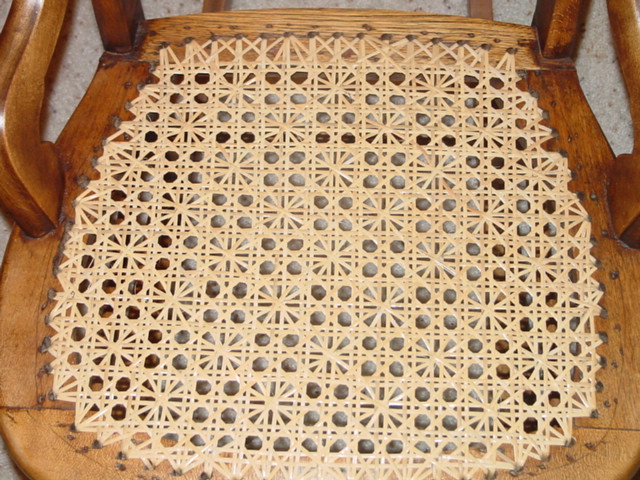
At this point you have the Daisy Pattern seat caned. You could move to the binder cane (step 7) if you like this look. I felt that the seat did not look strong enough, in my opinion. So I continued on with the "Buttons" steps.
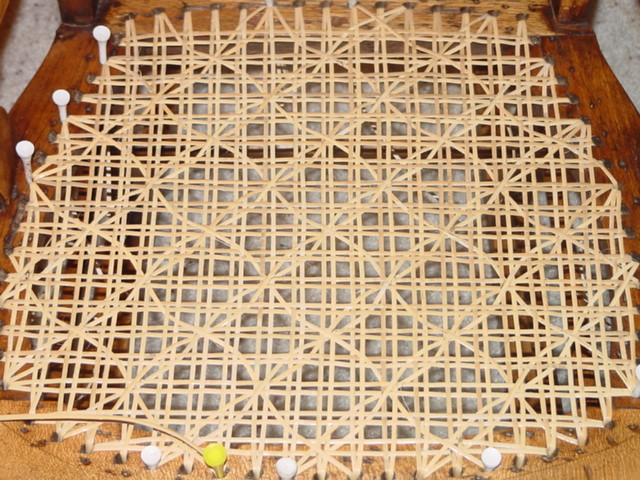
Button Diagonals. The Buttons are formed from the step 5 & 6 diagonals of the regular seven step caning method. These diagonal canes will run between the "squiggly" lines.

Step 5, Weave OVER the vertical cane & UNDER the horizontal cane. (Yellow
strand in picture)
Step 6, Weave UNDER the vertical cane & OVER the horizontal cane. (Red strand in
picture)
Perhaps the next time I would try to combine the "squiggly line" diagonal steps with the "button" diagonal steps to minimize the skipping of holes & amount of cane run under the seat.
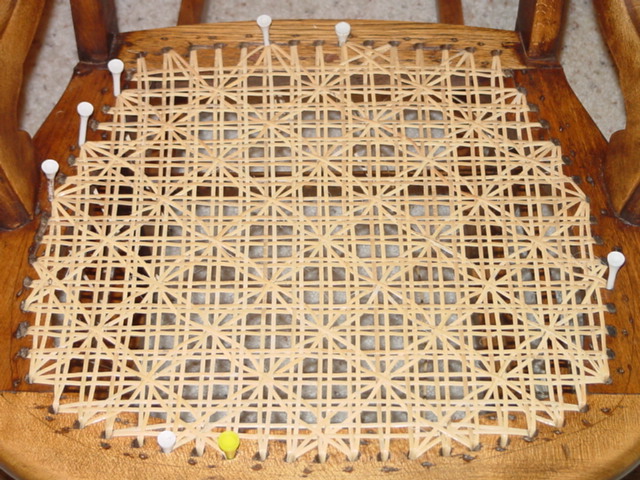
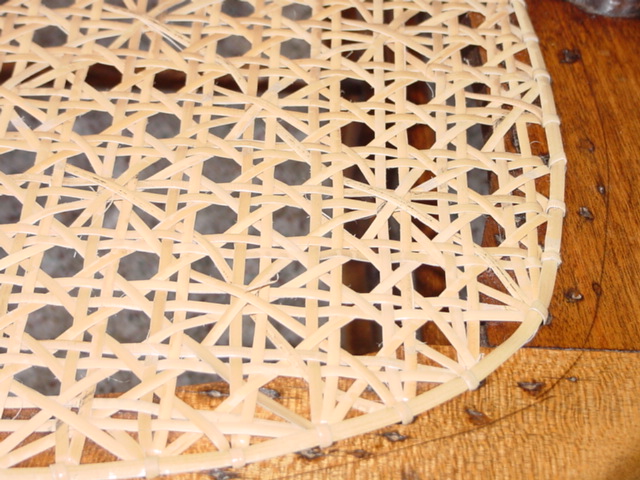
The Almost Finished Seat - Daisies & Buttons. There is actually some 3-Dimensional effect to this pattern that is pleasing to the eye.
The Binder Cane. Follow Step 7 of the regular caning for the binder.
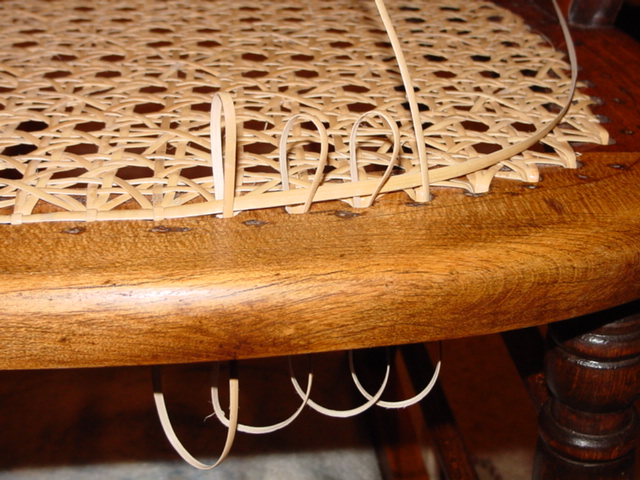
I'm adding this picture of the binding looping to help clarify the process. I really try to keep the loops under the seat very tight. This seems to require 3 hands, but my hands have somehow become used to it & different fingers on each hand have formed an agreement on working together to get the job done :-)
I usually loop about 4-8 times before tightening up. Again, be careful around the corners. Keep the binder cane laying flat & not crimped. If the corners are square & I usually peg them. On round corners, I prefer to manipulate the binder to follow the curve of the chair.
Copyright 2003, All photographs are exclusively & completely the property of Wayne Sharp. All use for profit prohibited without his permission.