Daisy & Buttons Chair Caning - The Back
Curved Back Rockers - Caning Instructions
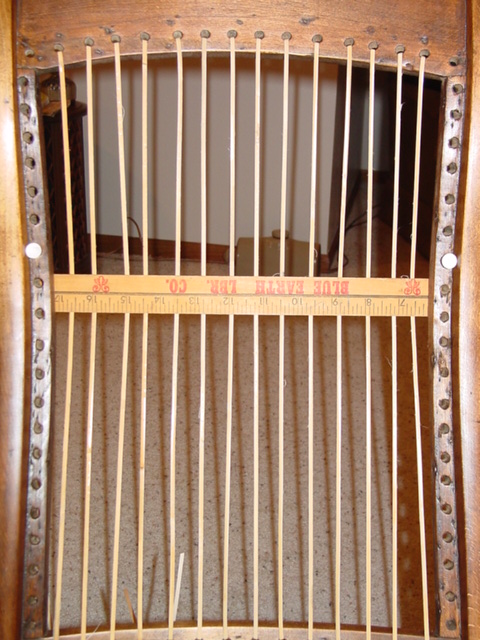
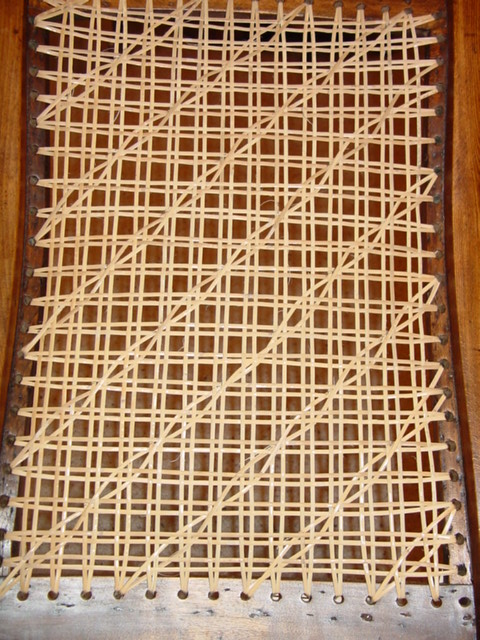
The caning of the curved back rocker begins with the first 4 steps of the regular caning process. There are some variations of technique to ensure the cane follows the natural curve of the back. Primary to all techniques is ensuring that the cane are loose enough in steps 1 & 3, the verticals.
I used a ruler (wedged behind the side rails) to make sure the cane was loose enough in step 1 vertical. This allowed enough "sag" that I could place my hand against the cane & my hand would be slightly behind the back of the side rails.
Another technique is to weave the step 2 horizontal in the middle of the back, as the first step. Then run step 1 vertical BEHIND the step 2 horizontal cane. This, again, helps to ensure the verticals are loose enough.
Locating the Daisy's: First locate the approximate center of the back by counting the holes on the side & front rails. Make a pencil mark & place a twist tie over this intersection. Then count up 4 intersections, make a pencil mark & place a twist tie. Repeat this along that vertical row. Then count diagonally across to the second intersection, mark & twist tie this. Then count 4 intersections & repeat the process. On this rocker back, the intersections were not symmetrical from side to side, so finish up locating intersections "with your eye". If it looks good to you, then it is probably right.
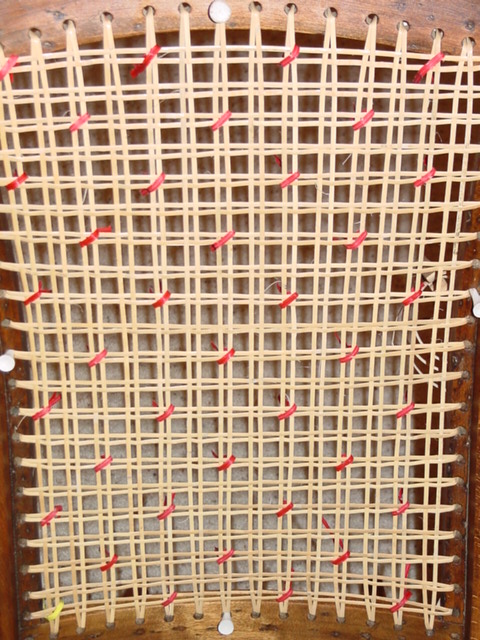
First Diagonal: This was the hardest for me. Pick a daisy marking close to the bottom rail & corner (I chose to start near the bottom left corner so that my knots would be more hidden on the back side). Always run the cane OVER THE VERTICAL and UNDER THE HORIZONTAL in this step. When you get to a Daisy marker ALTERNATE going OVER ONE and then UNDER THE NEXT. So you have to keep two things in mind 1. the over/under of the verticals & horizontal runs 2. alternating over/under the daisy locations.
The alternating over/under of the daisy will give you a "squiggly" line. Skip holes on the underside to get to the next diagonal run. Be careful not to cover any holes underneath on the rails. Leave extra cane curled up for use on another run.
On the second pass of the first diagonal run, you will run OPPOSITE of the alternating daisy's. So, if you went under the daisy on the first pass, go over it on this pass. Again, always run the cane OVER THE VERTICAL and UNDER THE HORIZONTAL. This run was easier for me. Just pay attention to what you are doing. (I was watching football during this step & made a mistake, which I later discovered & corrected).
As always, weave "with YOUR eye". If it looks right to you, then it probably is right. Try to do the same weaves on opposite sides, to help with the visual balance. i.e.. if you skipped a hole on the left, then skip that hole on the right side.
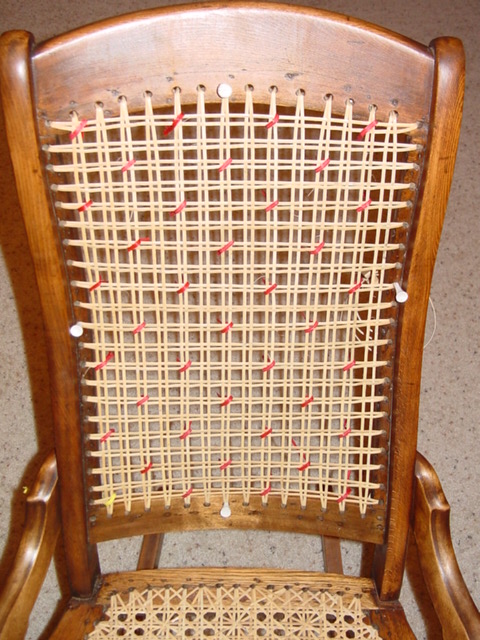
Second Diagonal: Again, pick a daisy marking close to the bottom rail & corner This time always run the cane UNDER THE VERTICAL and OVER THE HORIZONTAL. When you get to a Daisy marker ALTERNATE going OVER ONE and then UNDER THE NEXT. This step was again the hard step for me, to keep track of everything & the pattern. Again, I found that if the cane wasn't "squiggly" I had probably missed something & had to redo.
On the second pass of the second diagonal run, you will run OPPOSITE of the alternating daisy's. So, if you went under the daisy on the first pass, go over it on this pass. Again, always run the cane UNDER THE VERTICAL and OVER THE HORIZONTAL canes. Pay attention to what you are doing.
At this point you have the Daisy Pattern caned. You could move to the binder cane (step 7) if you like this look. I wanted to match the rocker back with the seat. So I continued on with the "Buttons" steps.
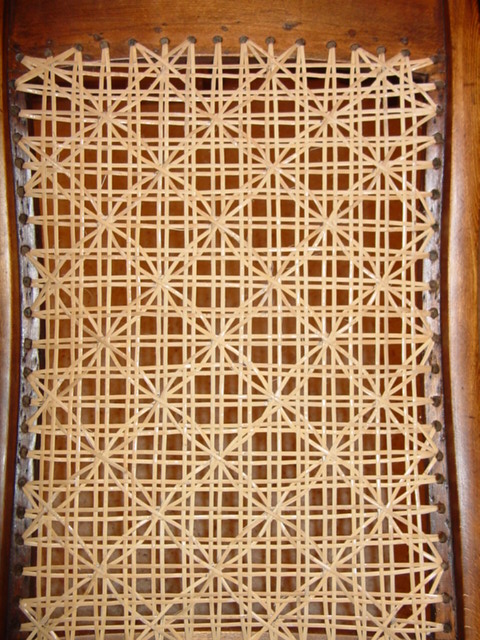
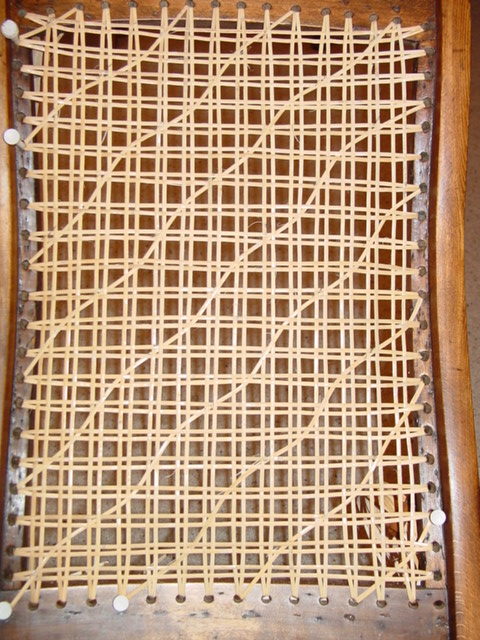
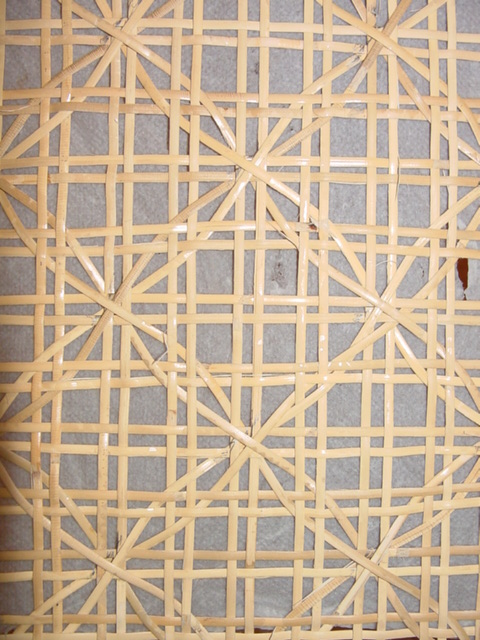
Button Diagonals. The Buttons are formed from the step 5 & 6 diagonals of the regular seven step caning method. These diagonal canes will run between the "squiggly" lines.
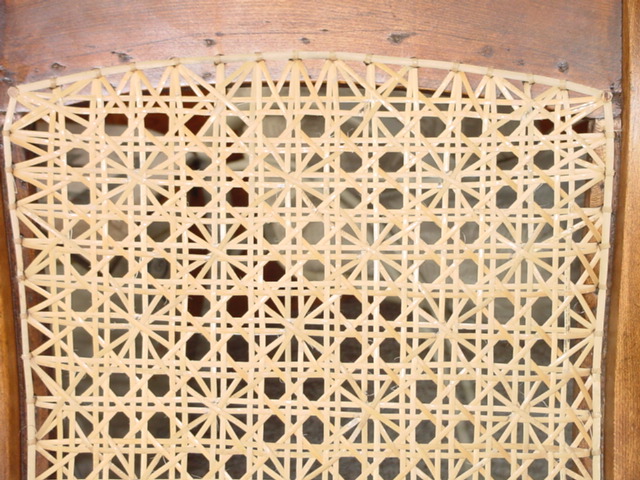
The Almost Finished Curved Back - Daisy & Buttons. Just need step 7 Binder to be added. There is actually some 3-Dimensional effect to this pattern that is pleasing to the eye.

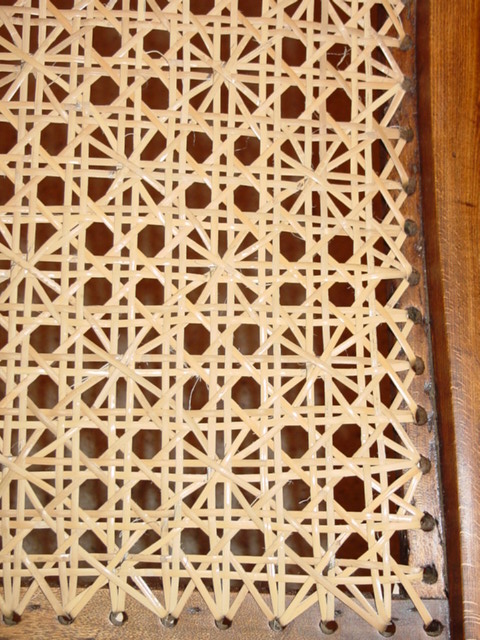
On these square corners I chose to peg. Again, be sure to keep the loops as tight as possible, while not crimping the binder. This helps to keep the back of the rocker as neat as possible. Knots will still be visible on the back, just be observent of the back's appearance as you cane. If you don't like the way something on the back is looking, redo/adjust it.
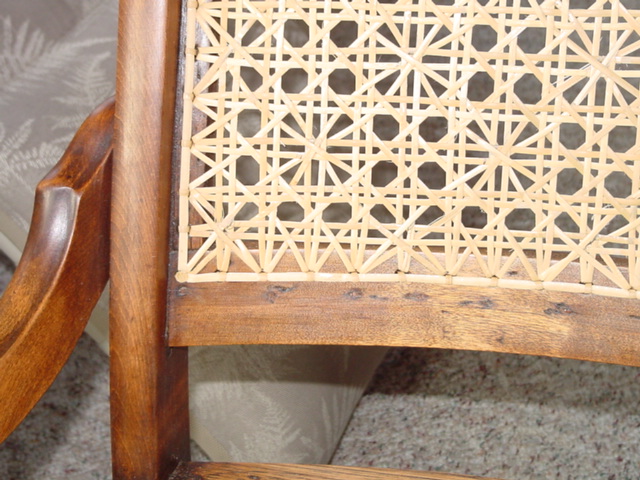
I also chose to peg the top corners because they are mostly square.
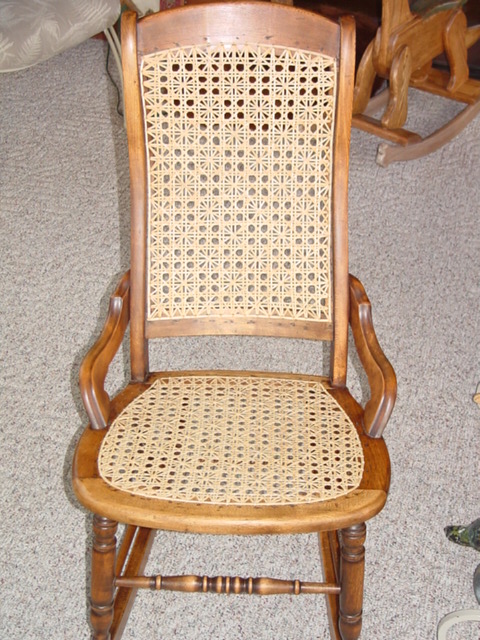
The completed curved back rocker, with Daisy & Buttons pattern. Yea!
Copyright 2003, All photographs are exclusively & completely the property of Wayne Sharp. All use for profit prohibited without his permission.