Chair Caning Step 4. Second Side to Side.
Weaving begins here. Start in the upper right hole that the step 2 cane started at. Weave OVER the step 3 vertical cane and UNDER the step 1 cane. The cane should be run below the step 2 horizontal cane.
There are several techniques to aid this weaving process. Over time you will find a technique that you prefer. Things to consider: a). techniques that speed up the process. b) techniques that do less damage to the cane. c). techniques that are easiest for you to do. d). how tight a hole you are weaving into.
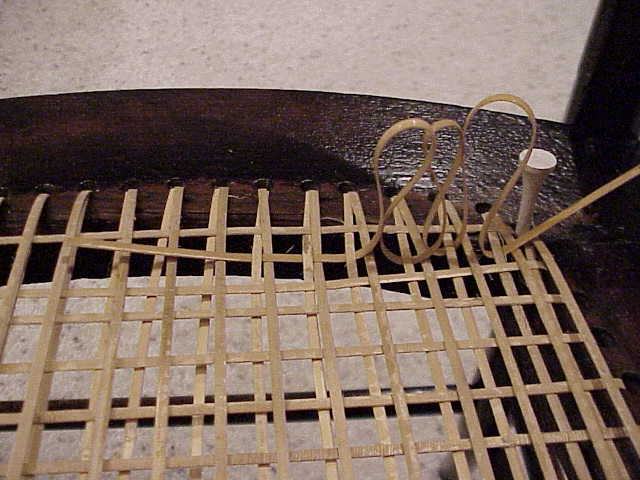
In the above photo, the cane was looped through 4 vertical sets before it is pulled completely through. Weave with one hand above and one hand below the seat. Keep the cane from twisting & kinking. Pull the cane horizontally, so as to avoid breaking the cane. Don't pull up to crack the cane. The technique is easiest when the cane is loose. A variation of this would be to pull as much of the cane through each vertical set right away, leaving just a small loop. This feels like sewing. After 4-6 loops are formed, then pull the loops through from the back of the cane to the front of the cane.
Another technique would be to thread the cane without looping. This works well when the cane is very loose & the weaving cane is sturdy (or fresh, in that it is just starting to be used).
Probably the slowest technique is to do 1 vertical set at a time. However, as a beginner or when the cane is very tight or when in a corner/very difficult hole, weaving 1 vertical set at a time works best. This also avoids damaging the cane.
Keep the 1st horizontal canes in order. Occasionally take 2 golf tees to straighten out the cane, to make it easier to weave.
When finished with this step, go back over the whole seat with 2 golf tees straightening out all the cane sets. Arrange the cane visually parallel, by pulling the cane pairs together.
Return to Chair Caning Instructions page. Go to Chair Caning Step 5.